Navigate to the desks section:
Click on "Desks" in the menu to access the desk booking options.
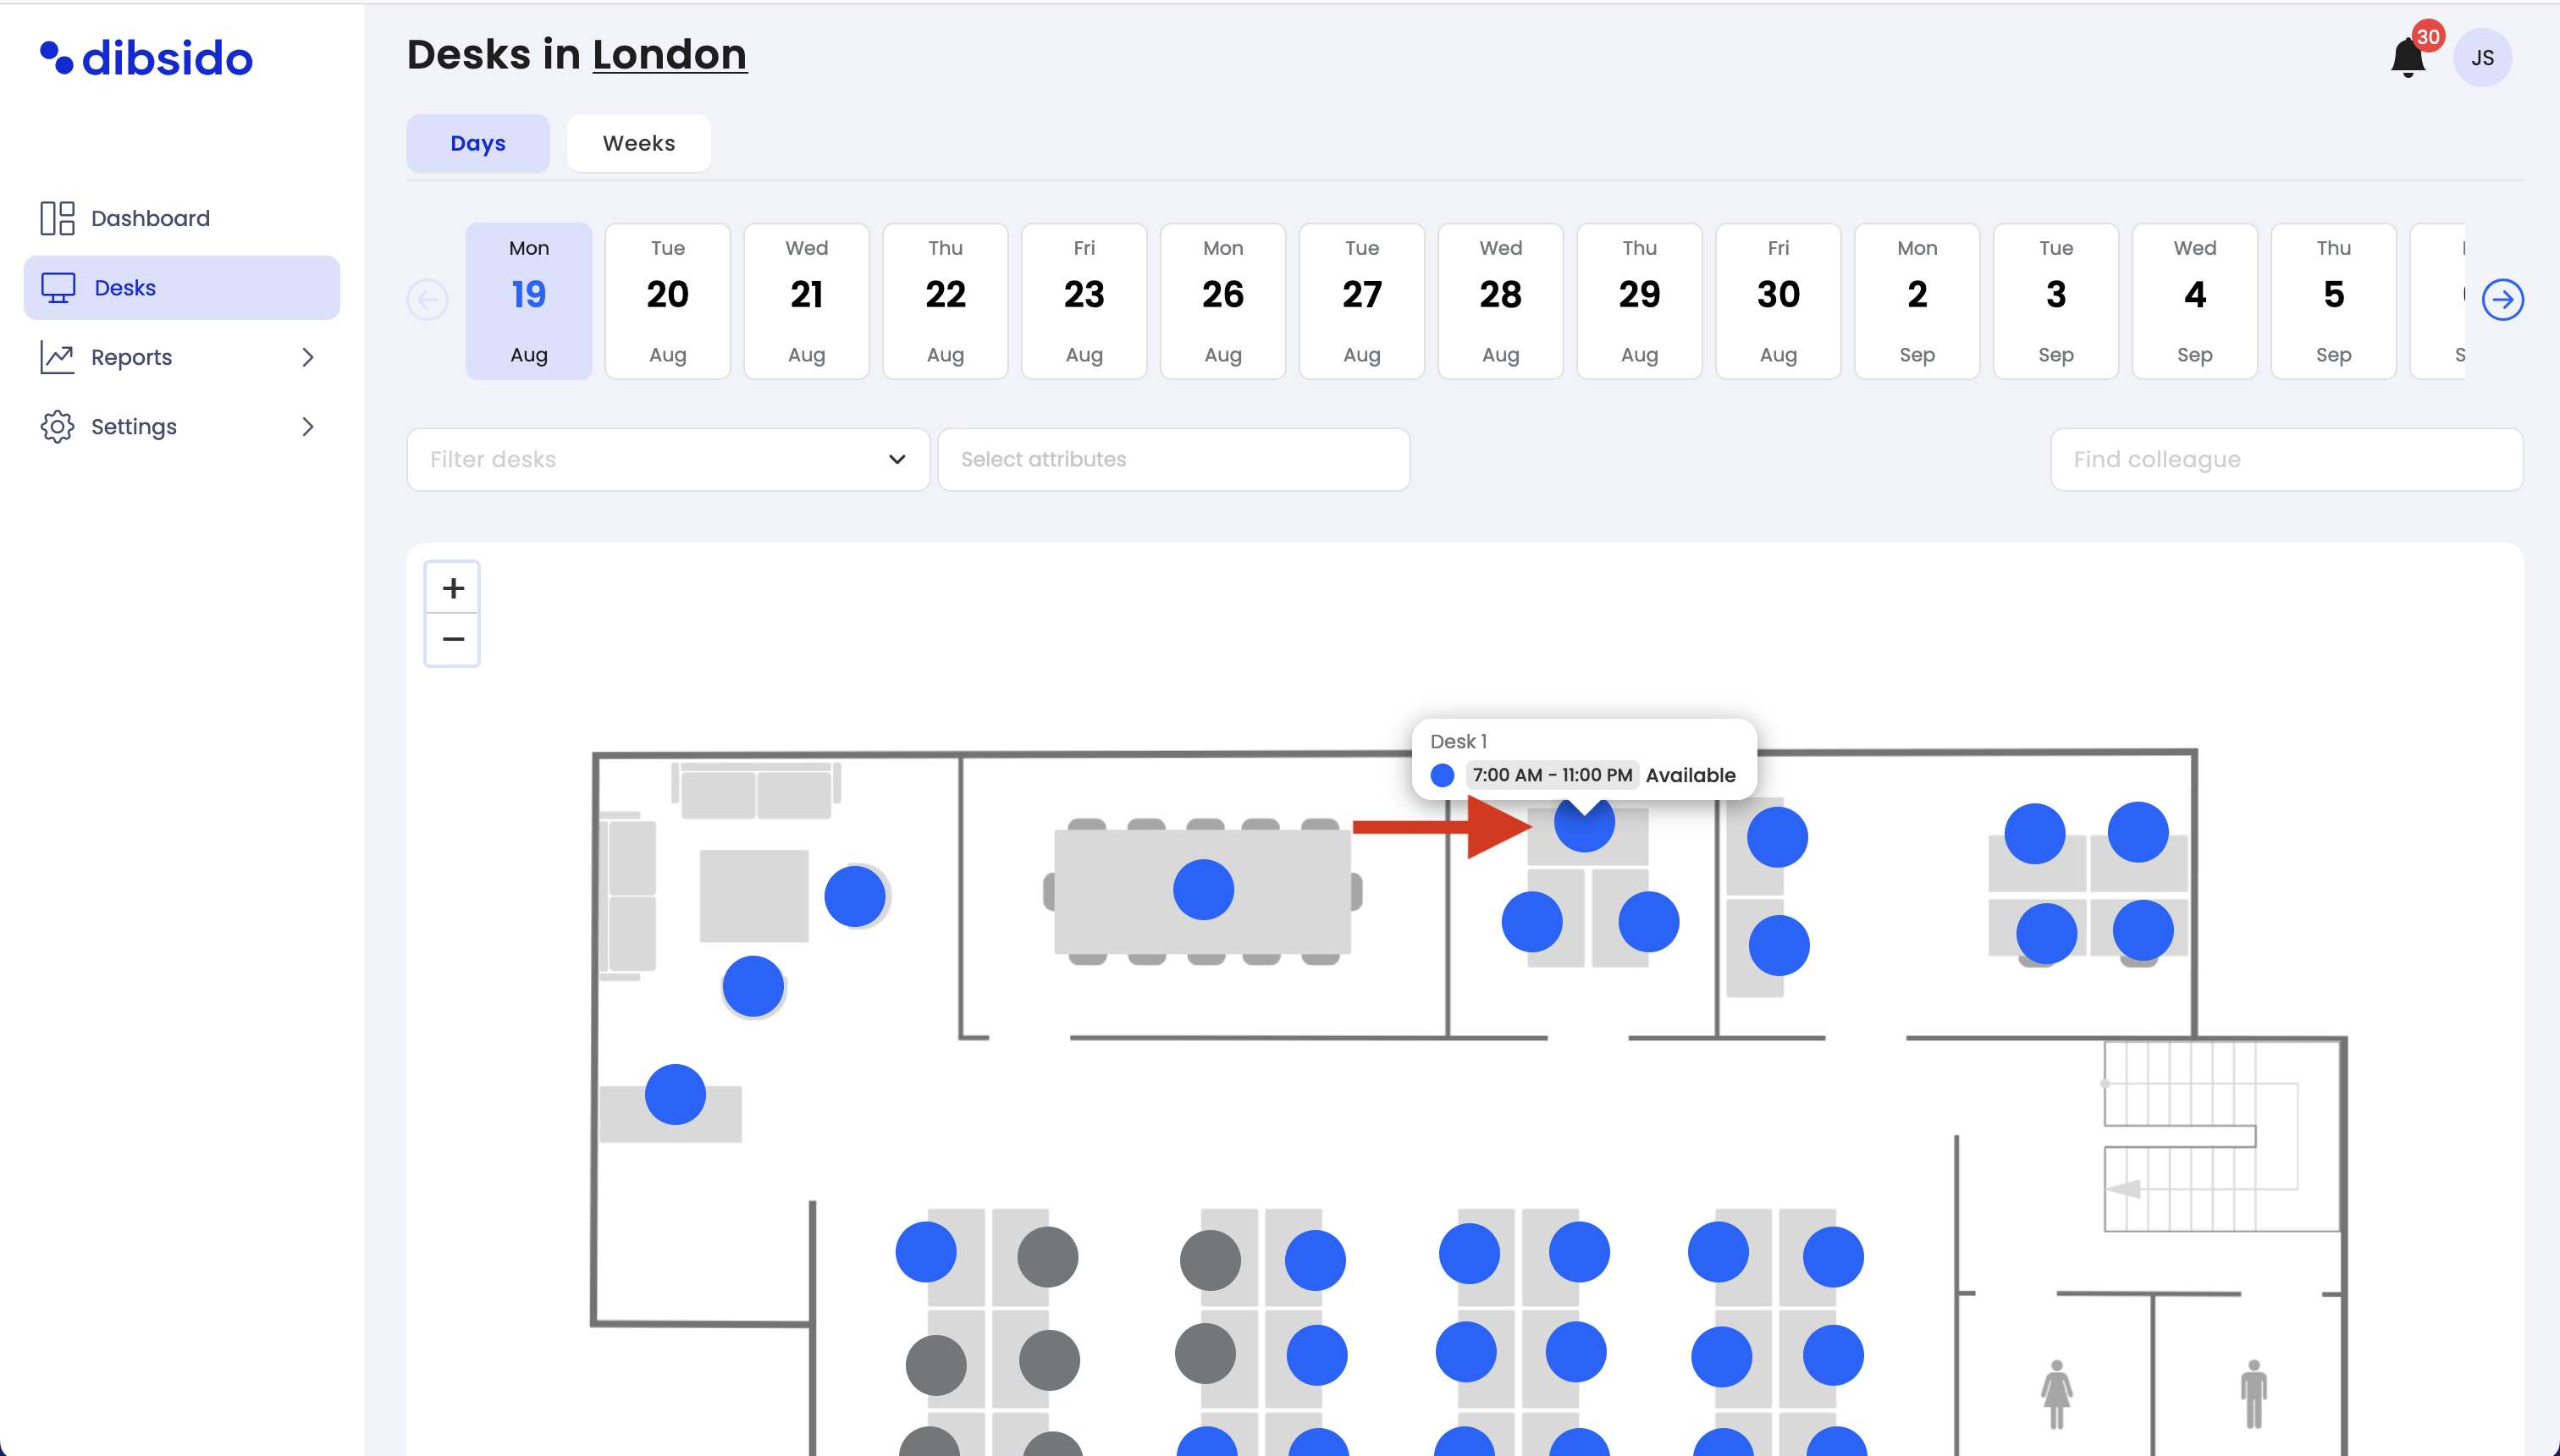
Choose a desk on the interactive map:
If your company has an interactive map, you’ll see a visual layout of the office with markers representing desks.
Understanding the markers:
Blue: Available desk.
Dark Grey: Occupied desk.
Grey: You do not have permission to book this desk.
Half Blue/Grey: The desk already has some reservations.
Green: You have a reservation at this desk.
Select a desk:
Click on the desk marker of your choice. A sidebar will open on the right side of the screen.
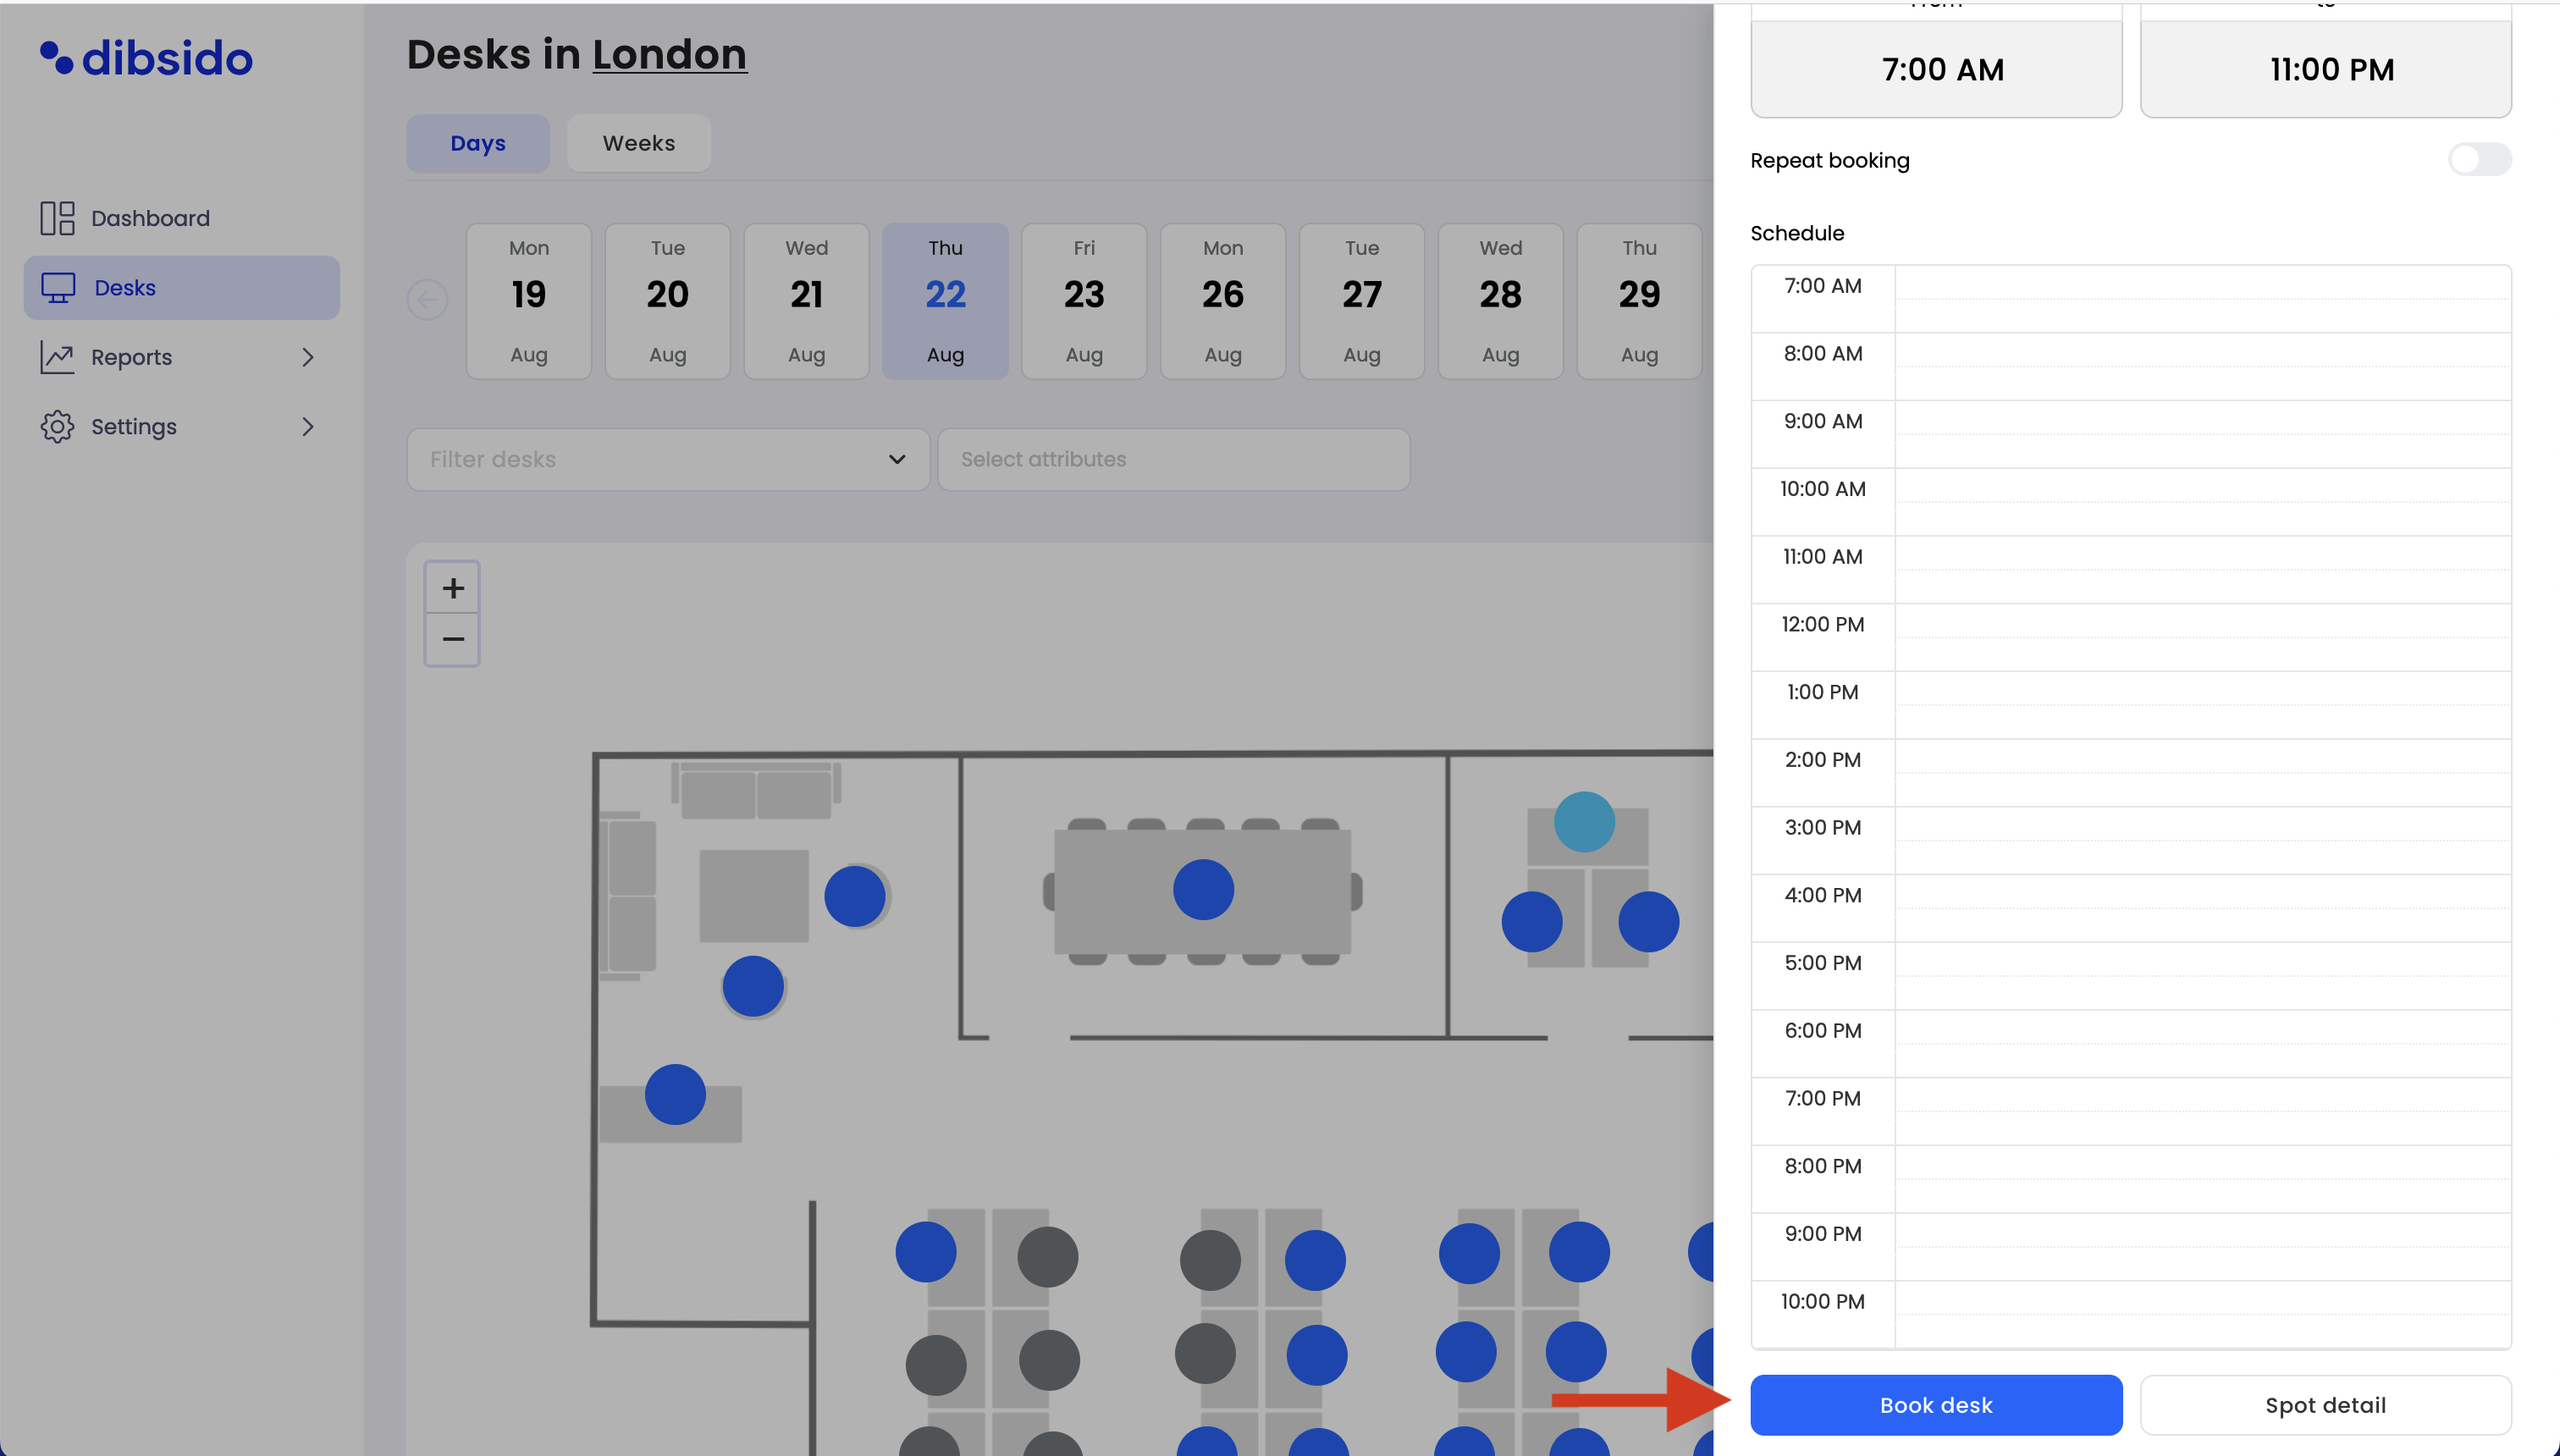
Customize your booking (If applicable):
In the sidebar, you may have the option to customize the duration of your booking, depending on your company’s settings.
Book the desk:
Click on the "Book Desk" button to confirm your reservation. That’s it—your desk is booked!
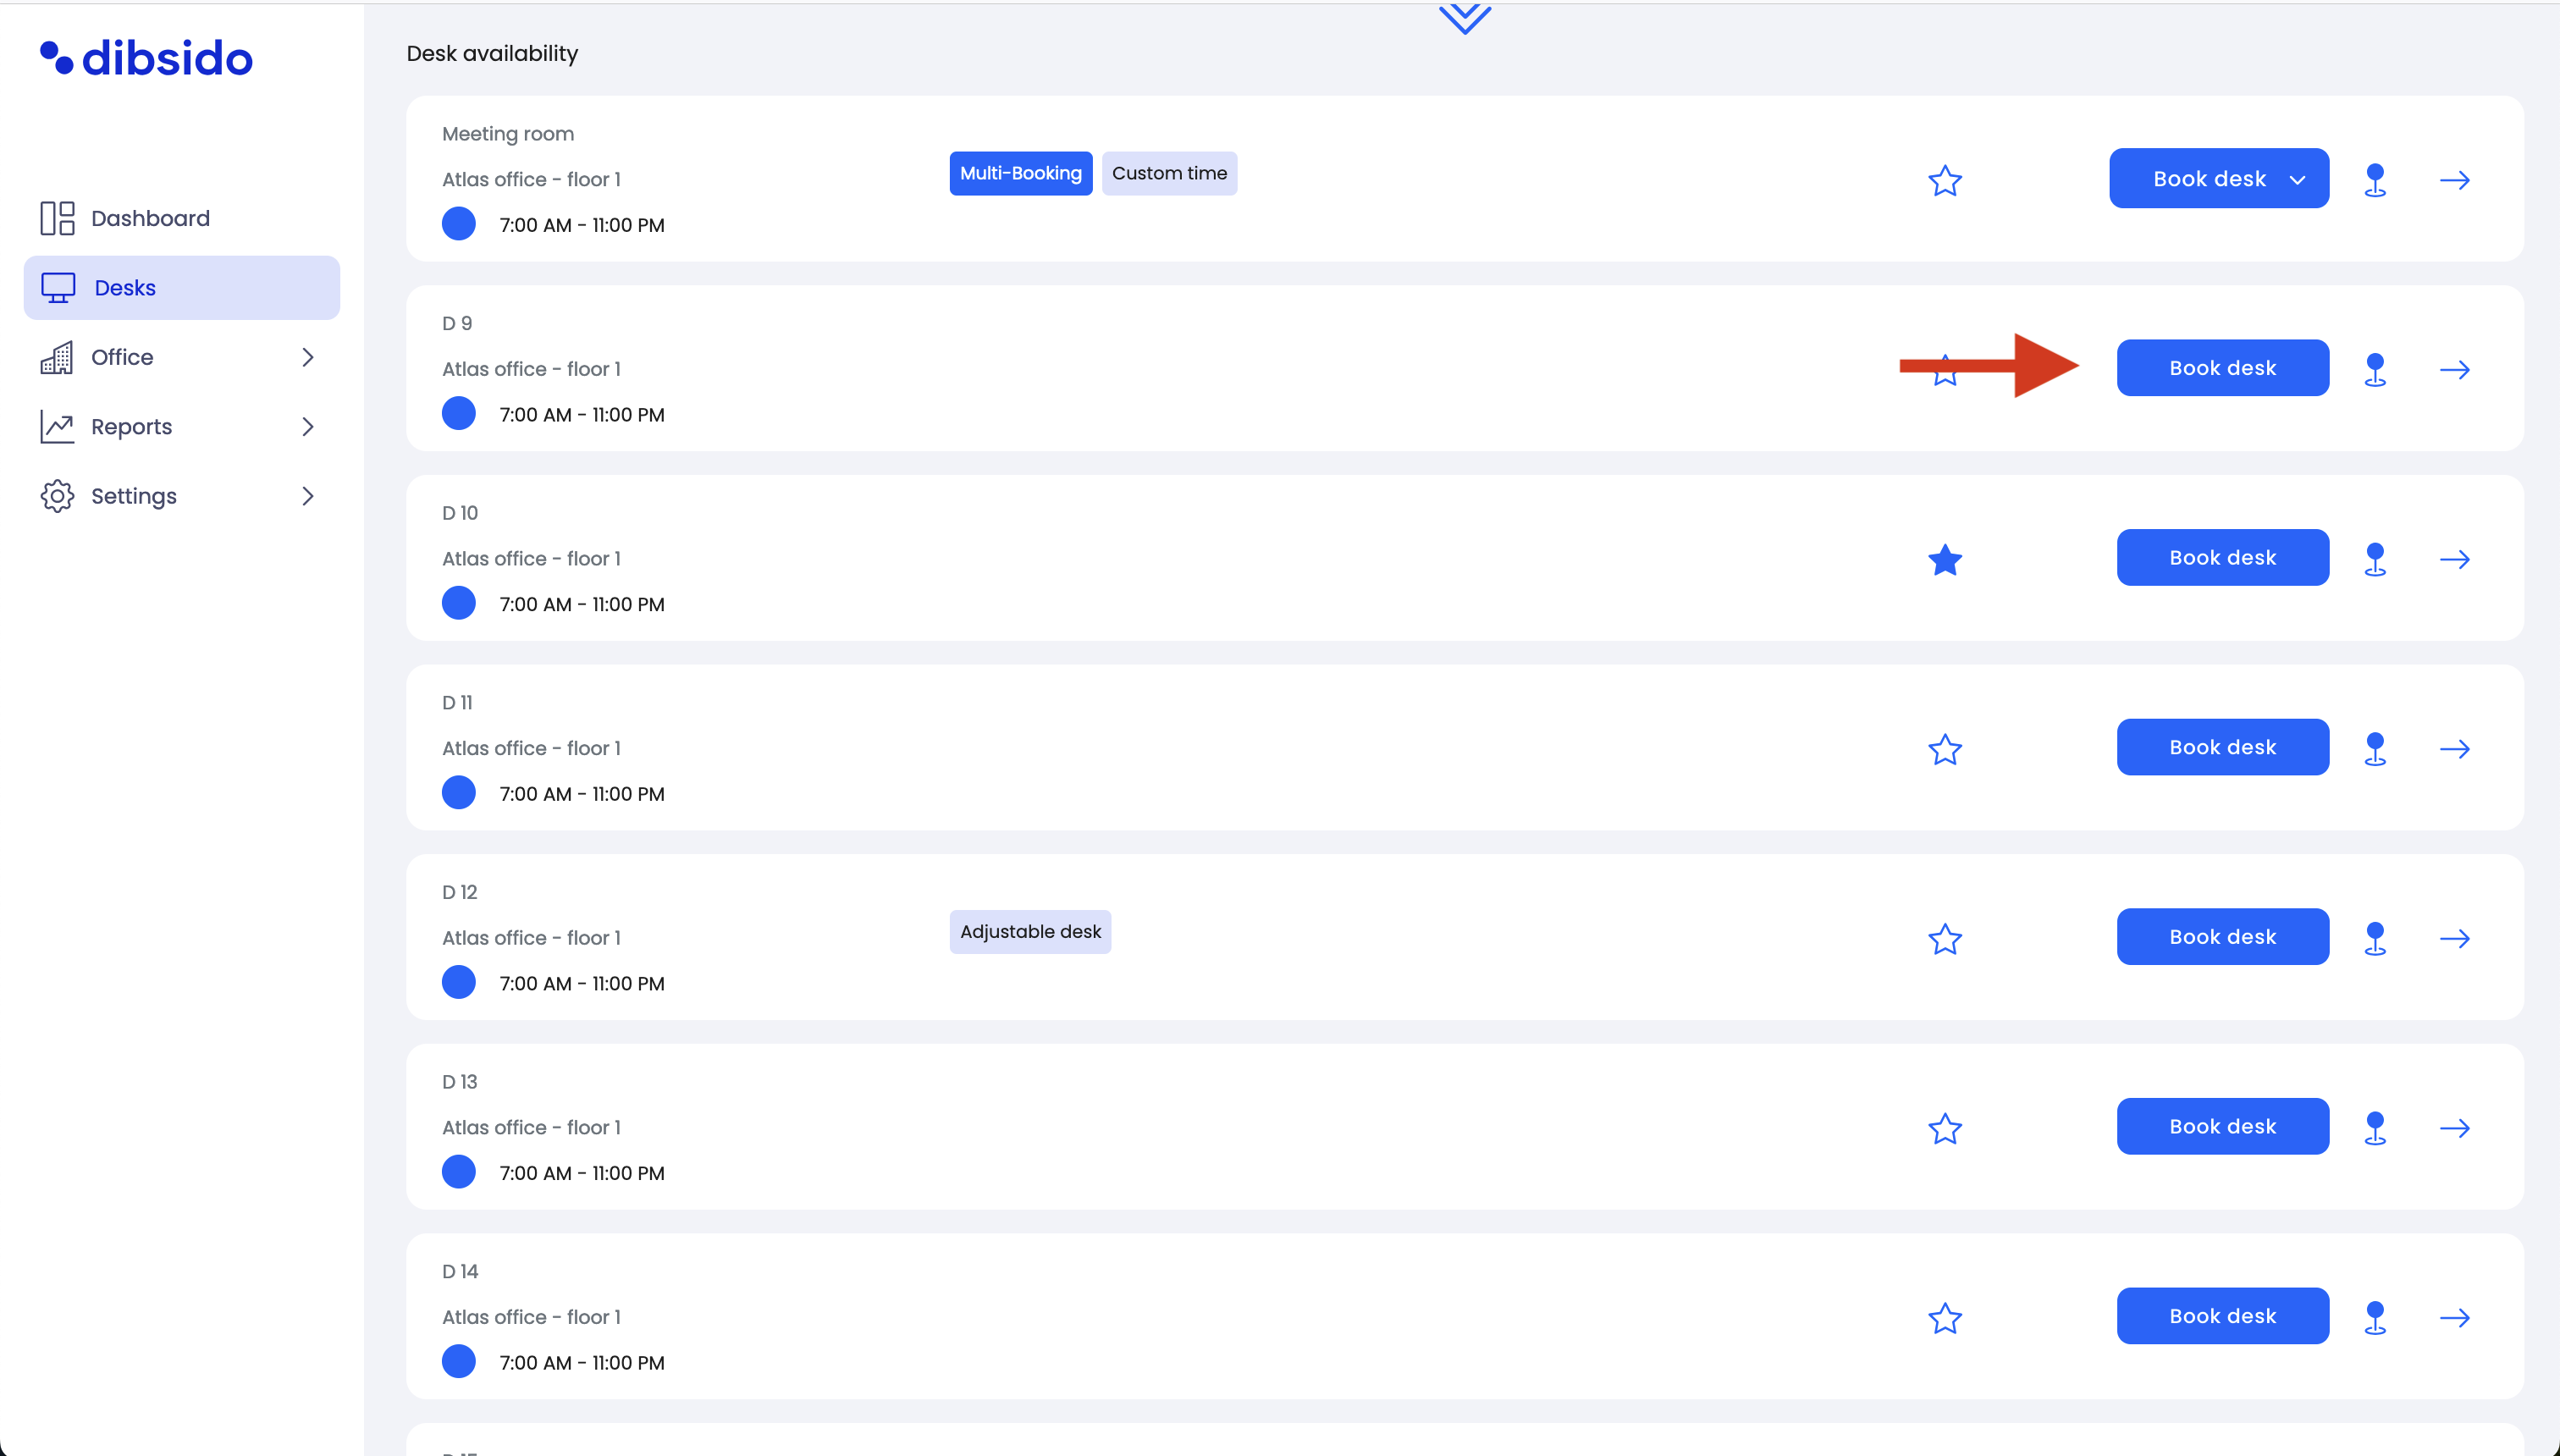
Booking without an interactive map:
If your company does not use an interactive map, go to the "Desks" section.
Select the desk you want to book from the list.
Click on the "Book Desk" button to complete your reservation.
By following these steps, you can easily book a desk in Dibsido, ensuring you have a designated workspace when you need it.
