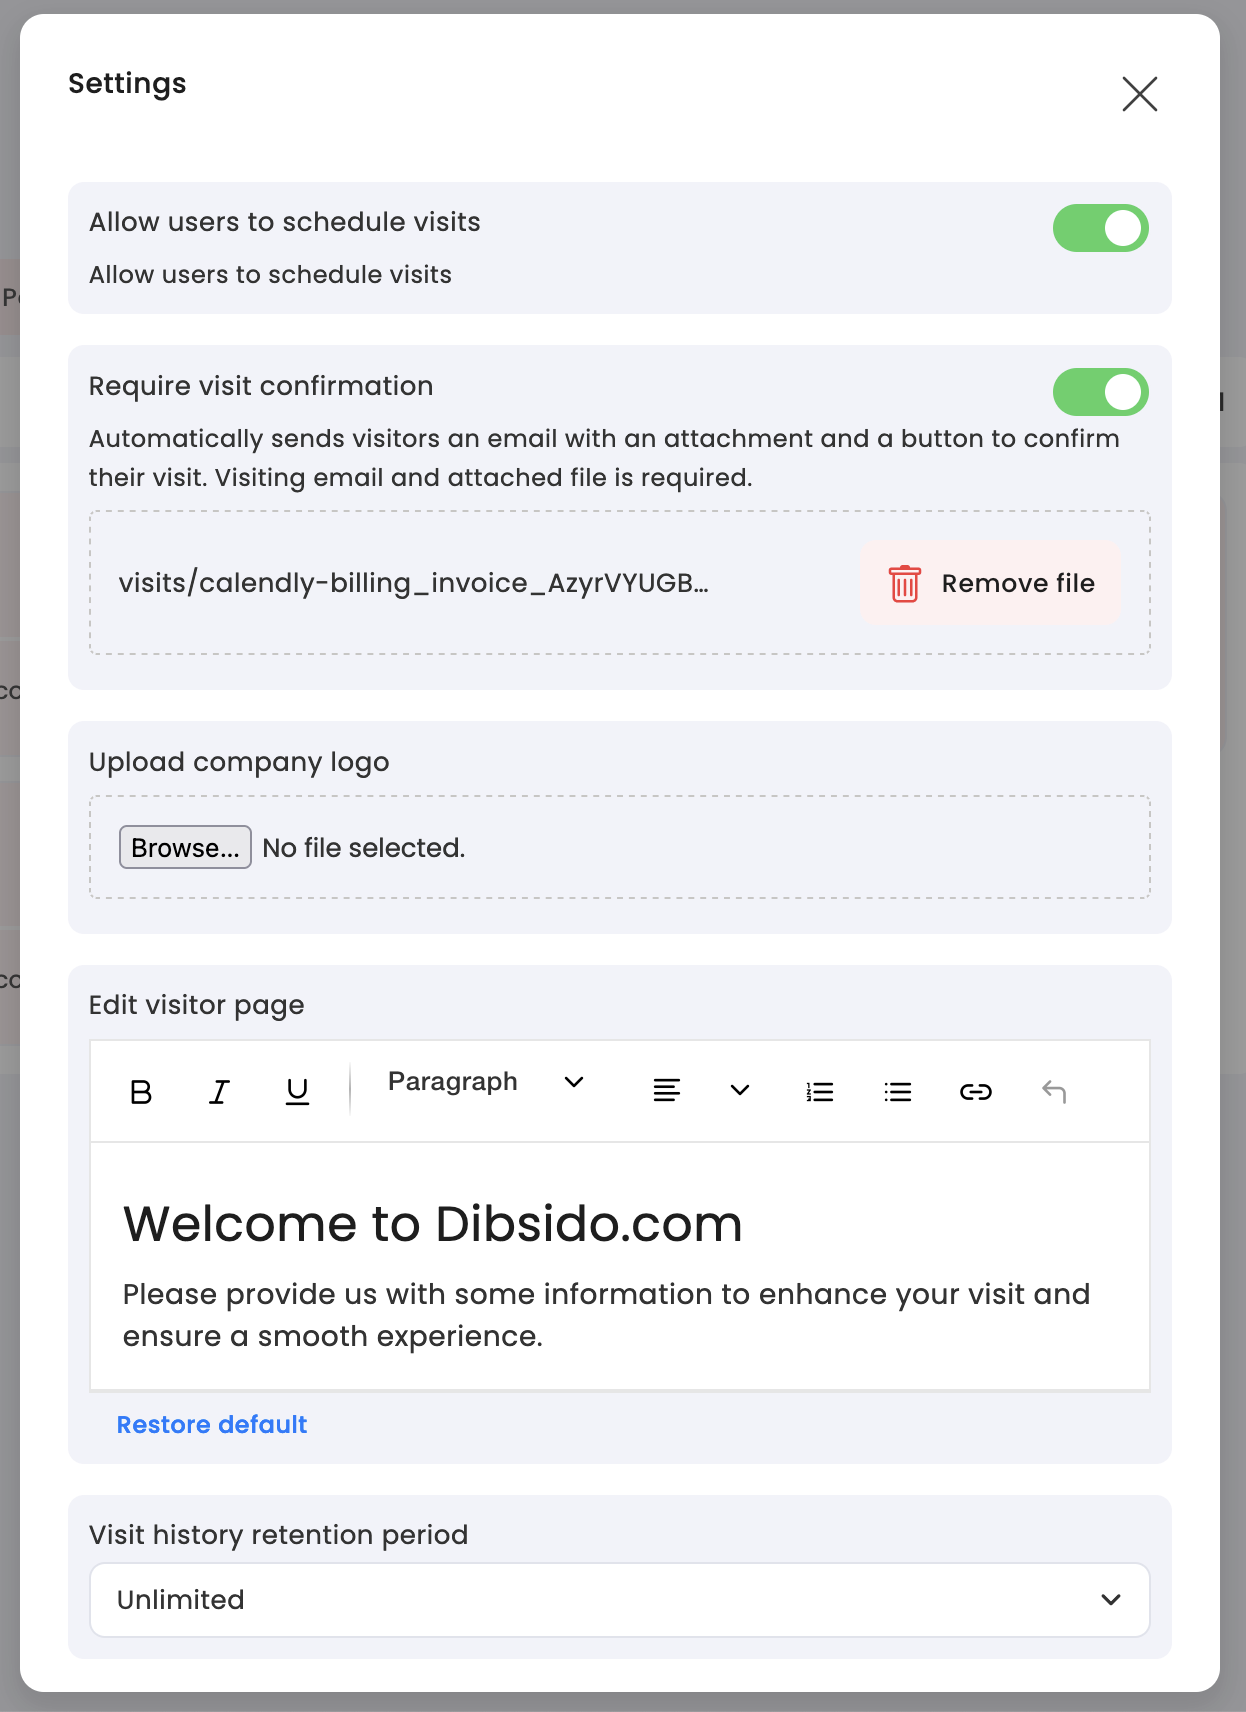
Navigate to visits settings:
Go to the Office section in the Dibsido menu.
Select Visits from the dropdown.
Enable the feature:
In the Visits section, click on the three dots icon located in the top right corner of the screen.
This will display a popup with additional settings.
Toggle on the Require visit confirmation option and upload any necessary documentation, such as an NDA or company policy.

Once the required visit confirmation feature is activated, the following process is triggered:
Email sent to visitor:
When a visitor is scheduled, the app automatically sends an email to the visitor's email address. This email includes the document you attached in the settings.
Visitor confirms the visit:
The email contains a button that the visitor must click to confirm their visit and acknowledge the attached document.
Once the visitor clicks the button, the visit is confirmed in the system, ensuring that they have agreed to the necessary terms before arriving.
Customizable documentation: You can customize the attachment in the email to suit your company's needs, such as adding an NDA, safety instructions, or any other relevant document.
Activation: The feature can be activated or deactivated at any time in the visits module settings.
By utilizing the required visit confirmation feature, you ensure that all visitors are aware of and agree to your company’s policies or any other important information before they enter your premises. This adds an extra layer of security and professionalism to your visitor management process.