Access the Packages Module:
Navigate to the Office menu on the left sidebar and select Packages.
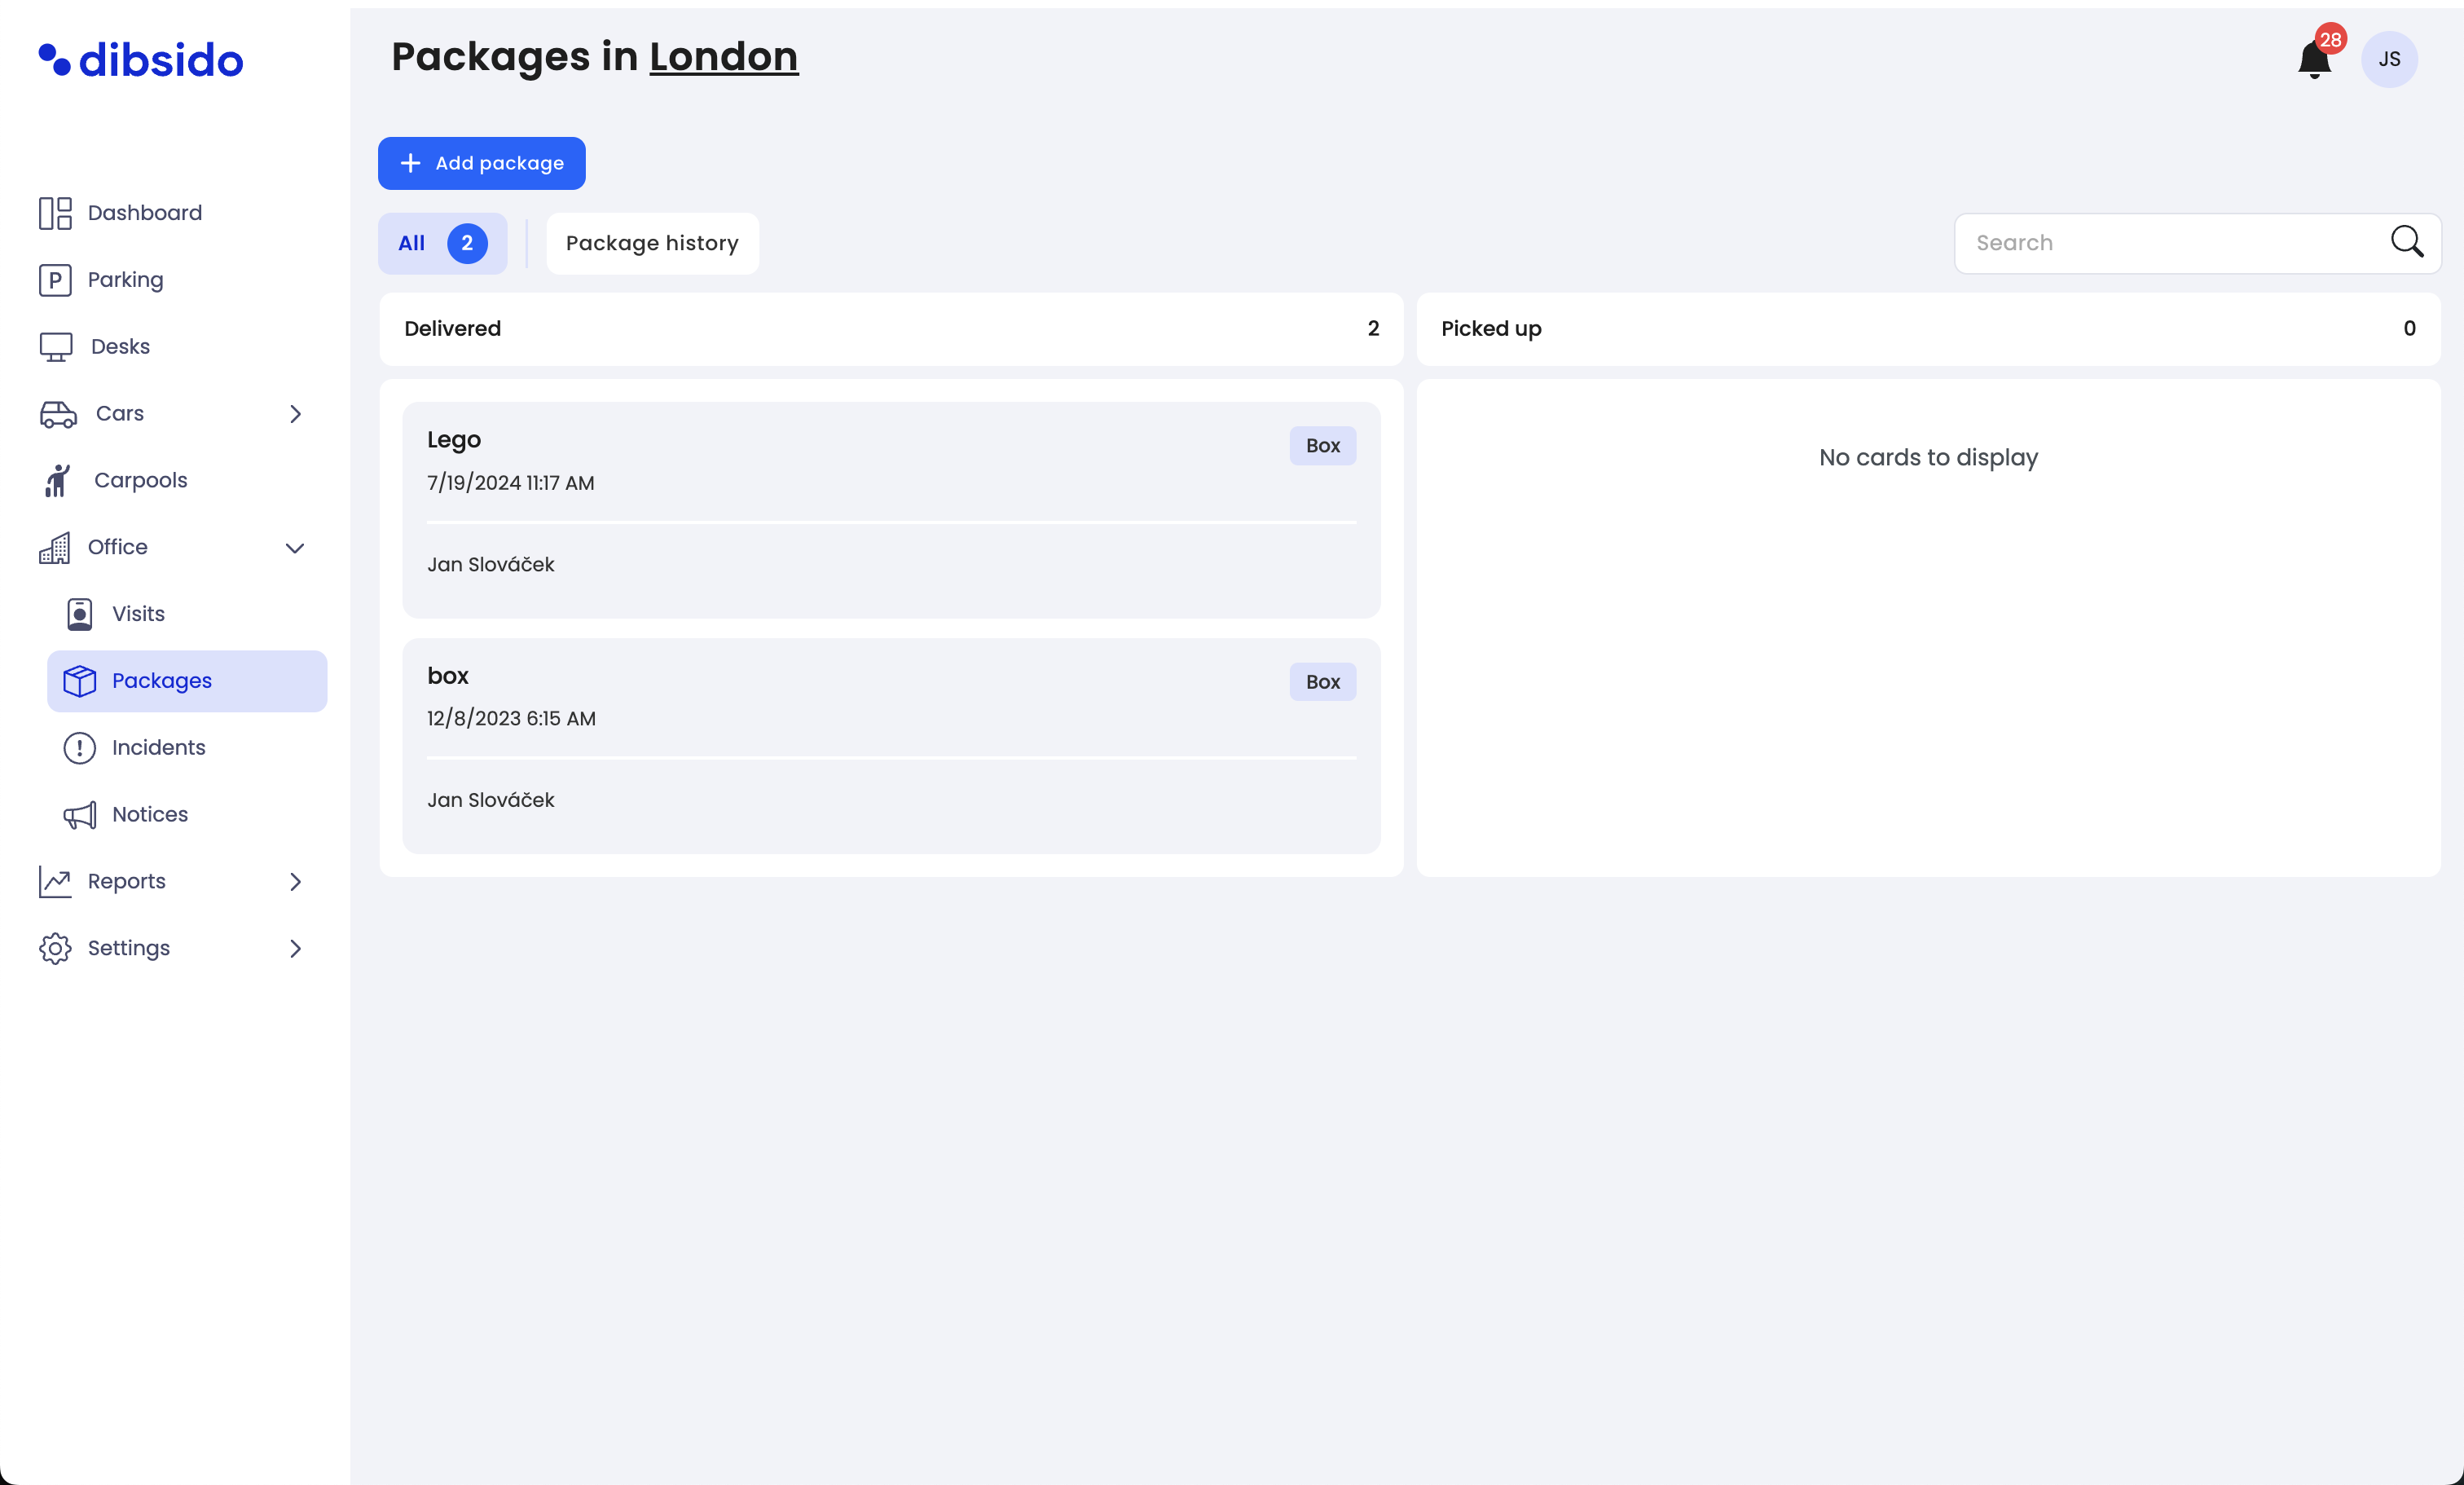
Add a New Package:
Click on the Add Package button located at the top of the screen.
A popup window will appear where you can enter the package details.
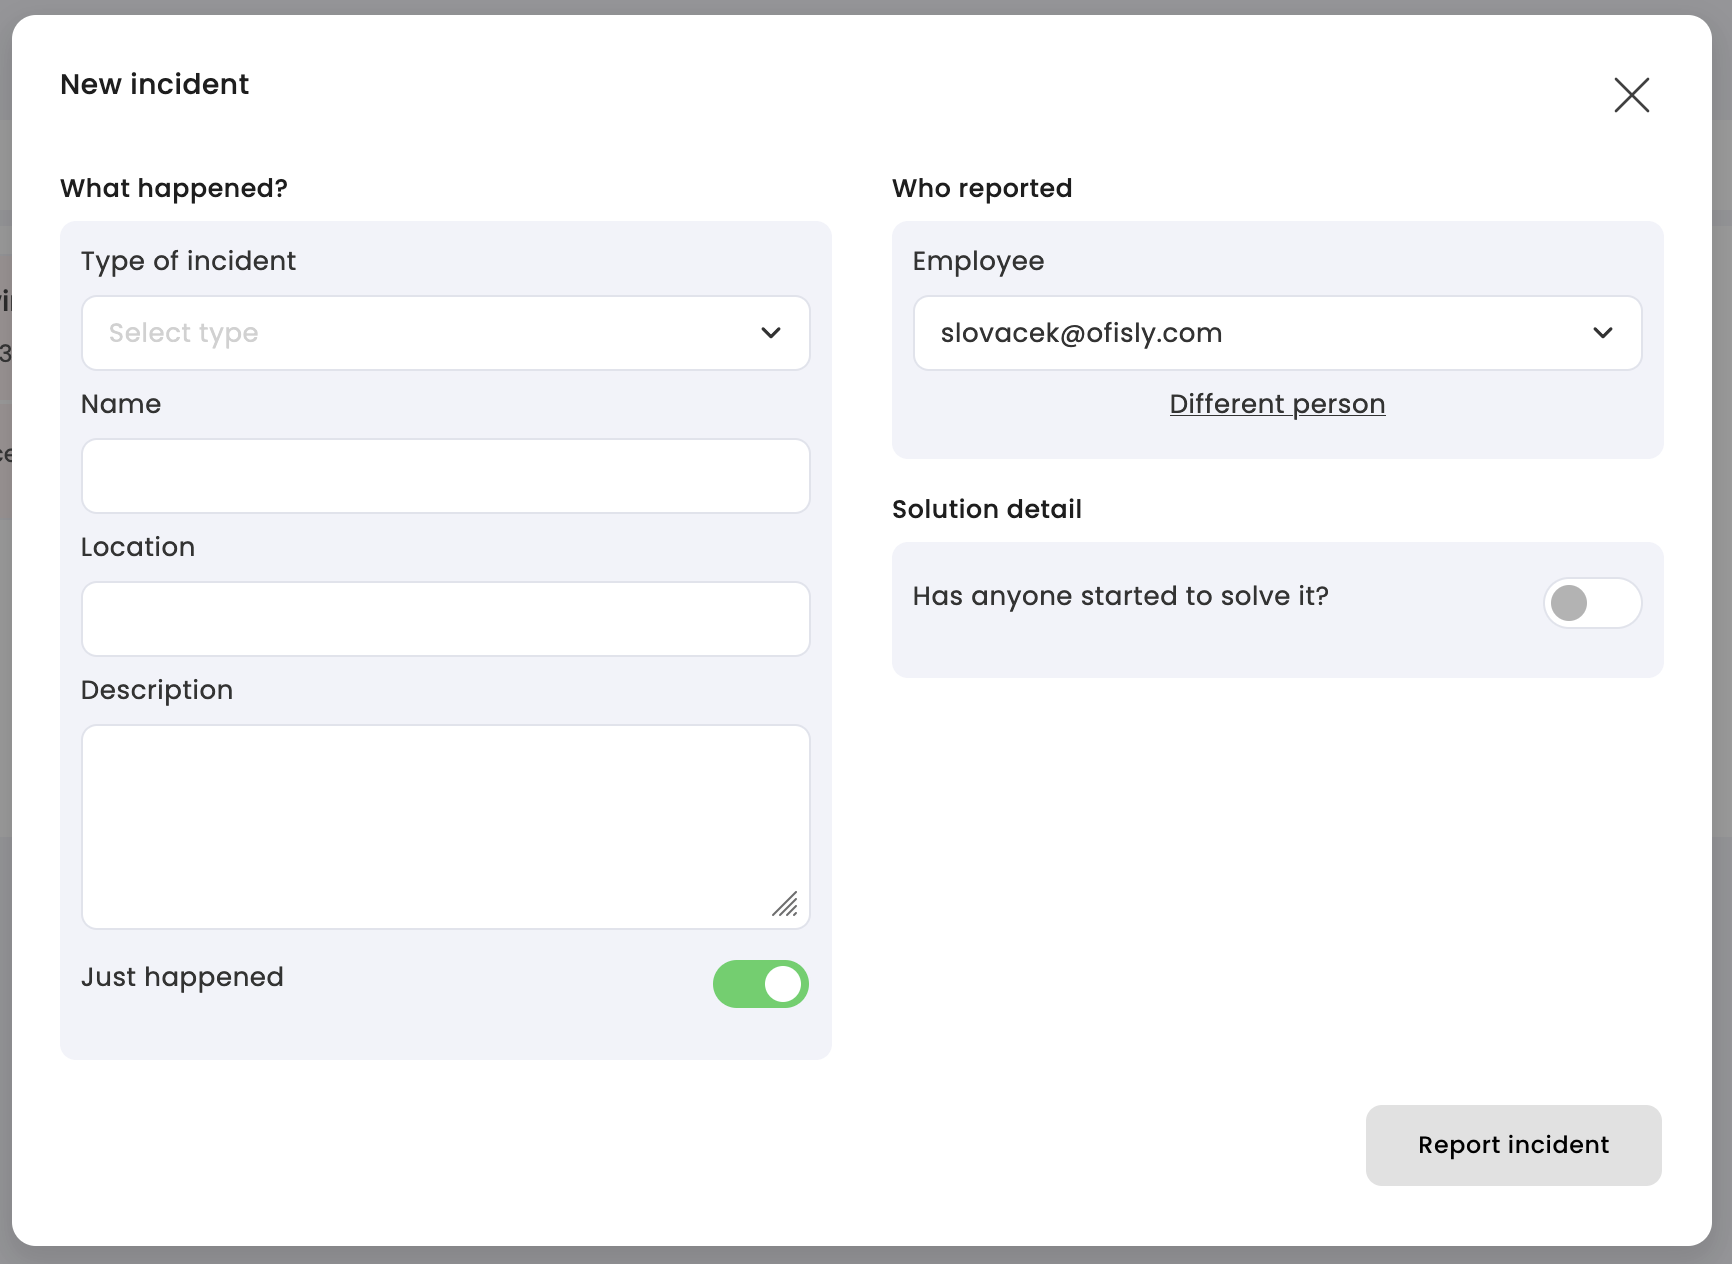
Fill in Package Information:
Package Type: Select the type of package from the dropdown menu.
Name: Enter a name or description for the package.
Recipient: Select the employee who should receive the package. If the recipient is someone else, you can click on Someone else and fill in the necessary details.
Description: Add any additional notes or details about the package, such as where it is stored or any special instructions.
Pickup Notification: Ensure the Send Notification toggle is turned on to notify the employee via Slack or email that their package has arrived.
Save the Package:
Once all details are filled in, click on Add Package to save the package to the system. The package will appear in the Delivered column, and a notification will be sent to the designated employee.
