Pre-registered users are accounts created in Dibsido that do not receive an email invitation right away. This allows administrators to set up the entire platform, including groups, desk and parking allocations, booking rules, and permissions, before employees are invited to log in.
We recommend using this approach when onboarding a new company or adding a large number of users at once.
When you add users as pre-registered, their accounts are created in Dibsido but they are not notified. The employees will not receive any email and will not have access to the platform until you decide to send the invitations. In the meantime, you can fully configure their workspace.
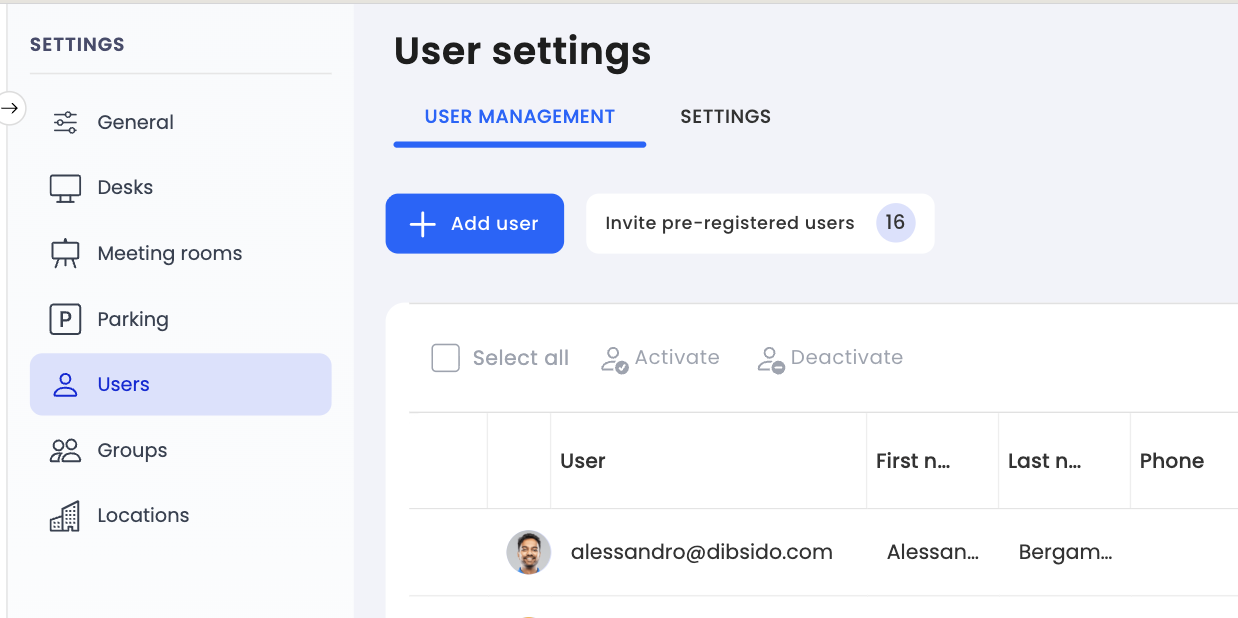
Go to Users: Navigate to the "Users" section in the settings menu.
Add user: Click the "Add User" button.
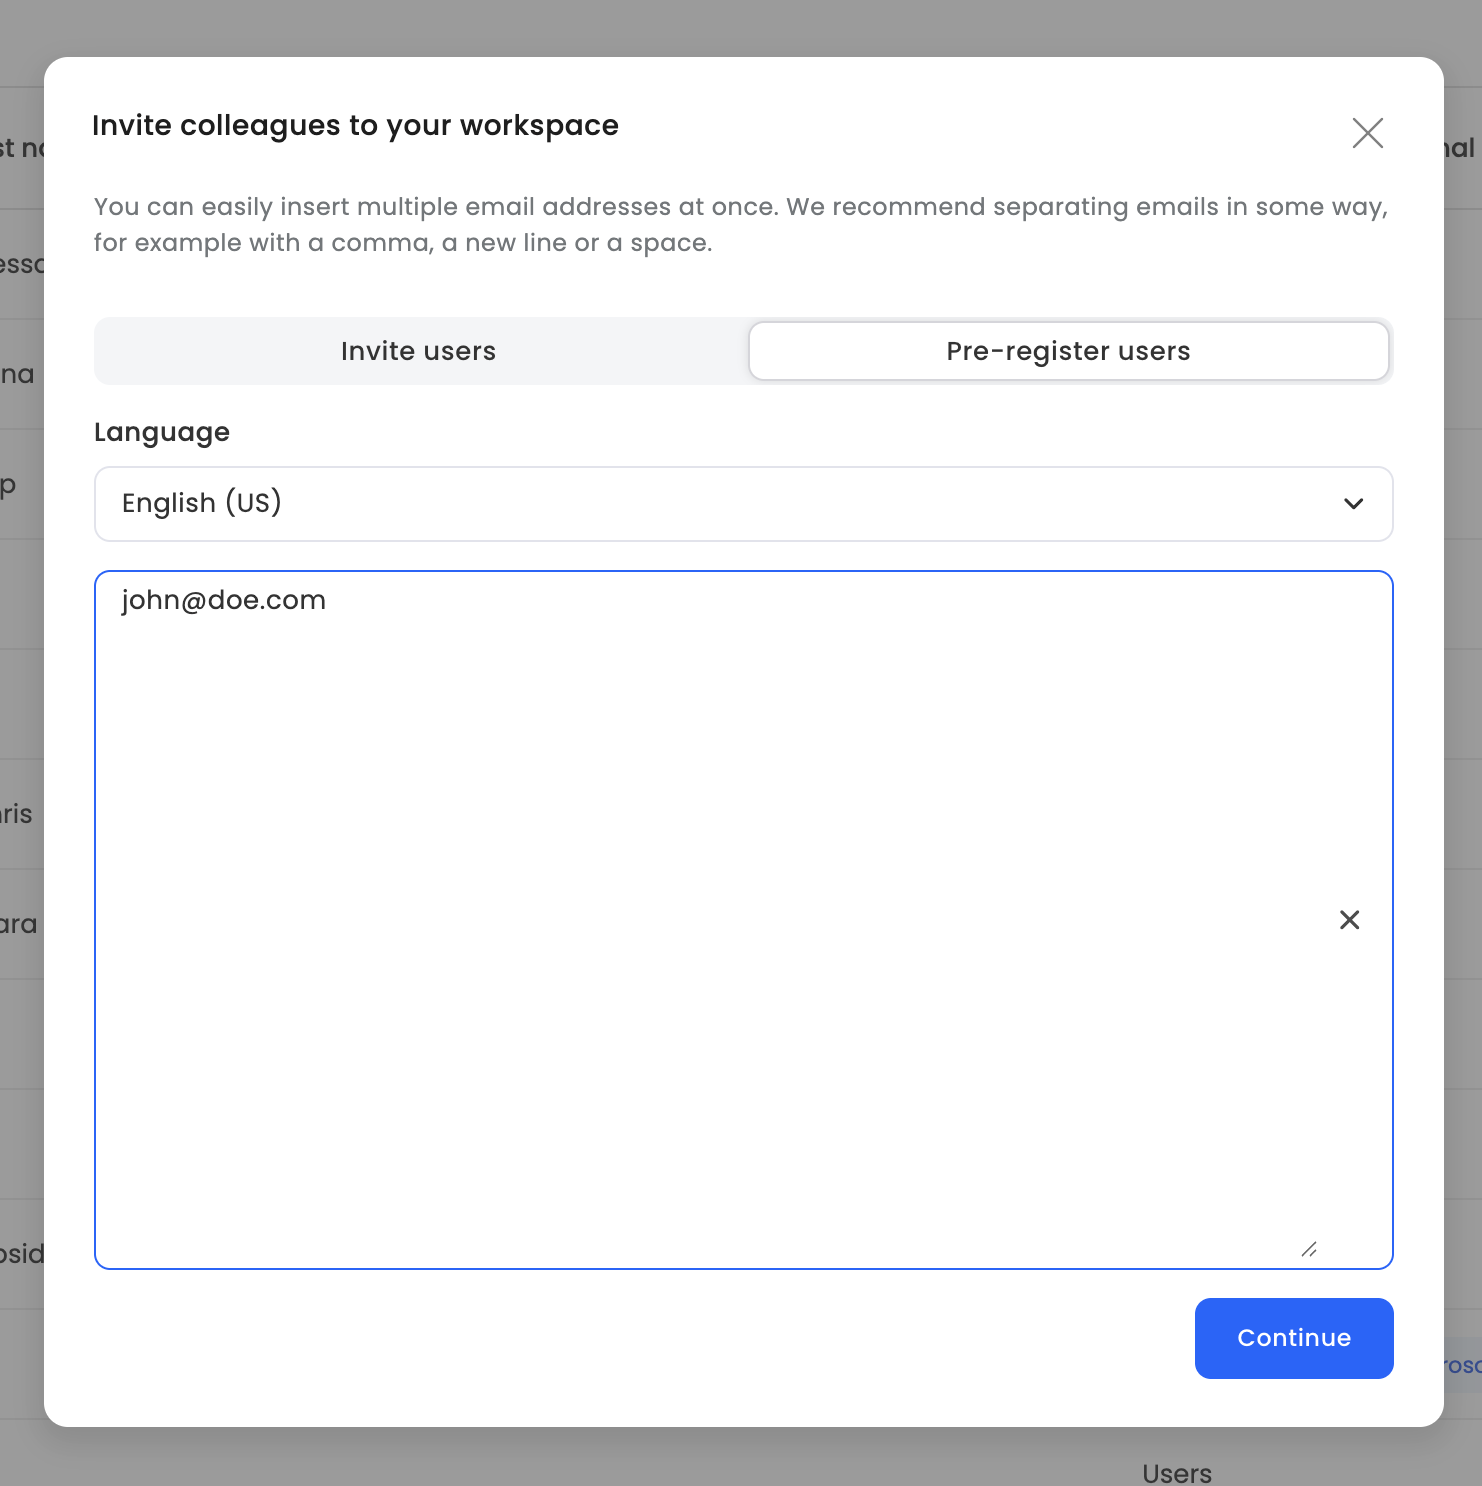
Select Pre-registered Users: In the invitation dialog. This will create the accounts without sending any notifications.
Enter email addresses: Enter the email addresses of the colleagues you want to add.
Set roles: Assign roles to the new users as needed.
Confirm: Complete the process. The users are now created in the system.
With pre-registered users in place, you can now set up everything before employees gain access:
Assign desks or parking spots to individual employees in advance.
Create groups and organize users by department or team.
Configure booking rules and permissions so that everything is ready from day one.
This ensures a seamless experience when employees first log in.
Once you have finished setting up the platform, you can send the email invitations to all pre-registered users:
Go to Users: Navigate to the "Users" section.
Click on Invite Pre-registered users.
Pre-registered users let you build out the entire Dibsido setup, including groups, allocations, and booking rules, before anyone receives an invitation. Once everything is ready, send the invitations and your team will find a fully prepared workspace waiting for them. Add pre-registered users by toggling off the email invitation option in the Add User dialog.
