The check-in feature for meeting rooms is an optional setting that requires employees to confirm their reservation around the time it starts. If a reservation is not confirmed within the configured time window, it can be automatically cancelled, freeing up the room for others.
Check-in ensures that booked meeting rooms are actually being used. Without confirmation, a reservation can be automatically cancelled based on your settings. This helps keep real-time room availability accurate and prevents rooms from being blocked by meetings that never happen.
Navigate to settings: Go to the settings menu in Dibsido.
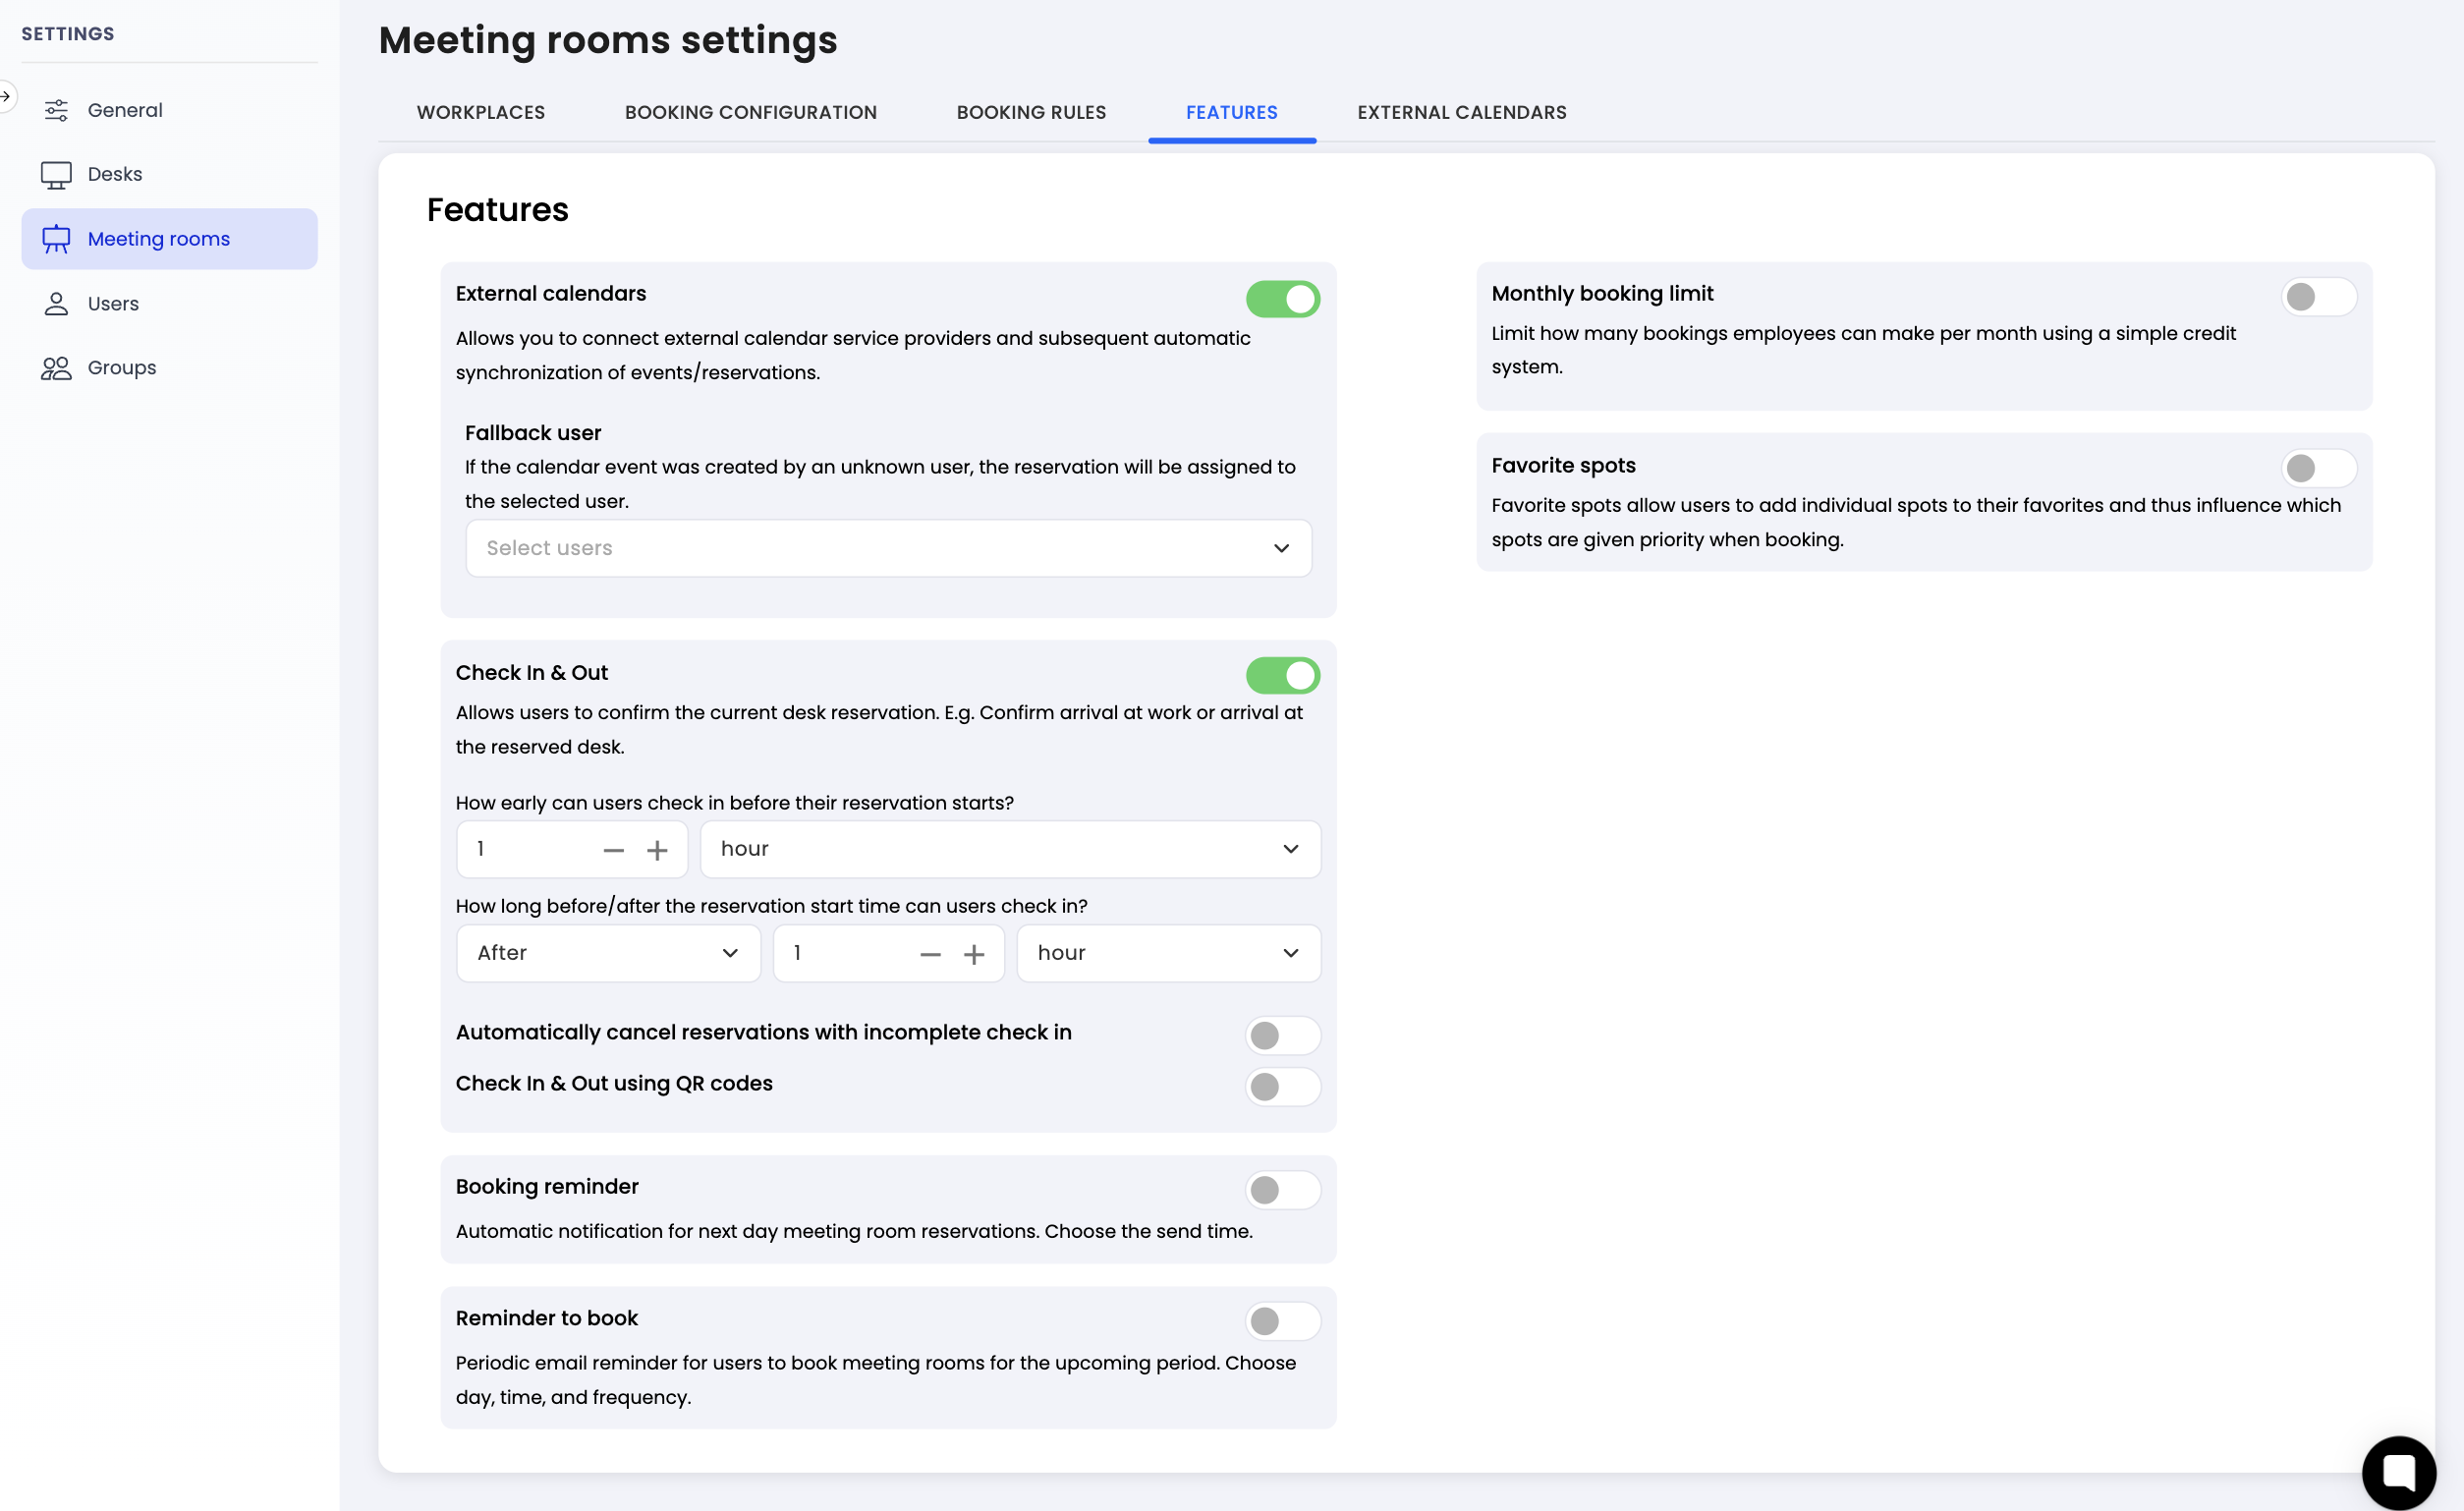
Select Meeting Rooms settings: Under settings, choose the "Meeting Rooms" option.
Go to Features tab: Within the room settings, click on the "Features" tab.
Enable Check In & Out: Find the "Check In & Out" option and toggle it on.
Set check-in window before reservation start: Define how early before the reservation start time employees can begin checking in. For example, setting this to 1 hour means an employee with a 9:00 AM booking can check in from 8:00 AM.
Set check-in window after reservation start: Define how long after the reservation start time employees can still check in. For example, setting this to 1 hour means the employee can still confirm their 9:00 AM booking until 10:00 AM. This is flexible and can be adjusted to match your company's policy.
Enable automatic cancellation (optional): Toggle on "Automatically cancel reservations with incomplete check in" if you want unconfirmed reservations to be cancelled automatically once the check-in window closes. If this option is disabled, unconfirmed reservations will remain active but will be marked as not checked in.
Save changes: Click "Save" to apply the settings.
There are two ways employees can check in to their meeting room reservation:
1. In-app check-in
By default, employees can confirm their reservation directly in the Dibsido app by clicking the check-in button when the check-in window is open. This is the simplest method and requires no additional setup.
2. QR code check-in
For organizations that want to ensure employees are physically present at the meeting room, you can enable QR code check-in. Once this option is activated:
QR codes are generated for each meeting room and can be downloaded from Dibsido.
Check-in can only be done by scanning the QR code at the room using a phone.
The in-app check-in button is disabled, making QR code scanning the only way to confirm a reservation.
Print and place the downloaded QR codes at each meeting room so employees can easily scan them upon arrival.
The check-in feature helps ensure that meeting rooms are used by the people who booked them. Configure the check-in time window before and after the reservation start to match your company's needs. Enable automatic cancellation to free up rooms that are not confirmed in time. Use in-app check-in for a simple setup, or enable QR codes for physical presence confirmation. Set it up in the Meeting Rooms settings under the Features tab.
