The first time you log in to Dibsido, you can quickly set up your initial parking zone during the trial onboarding process. This is a fast and efficient way to get started.
Fast setup: Input the name of the parking zone and the number of parking spots you need.
Ready to use: This quick setup allows you to begin managing parking reservations immediately, helping you to familiarize yourself with the platform right away.
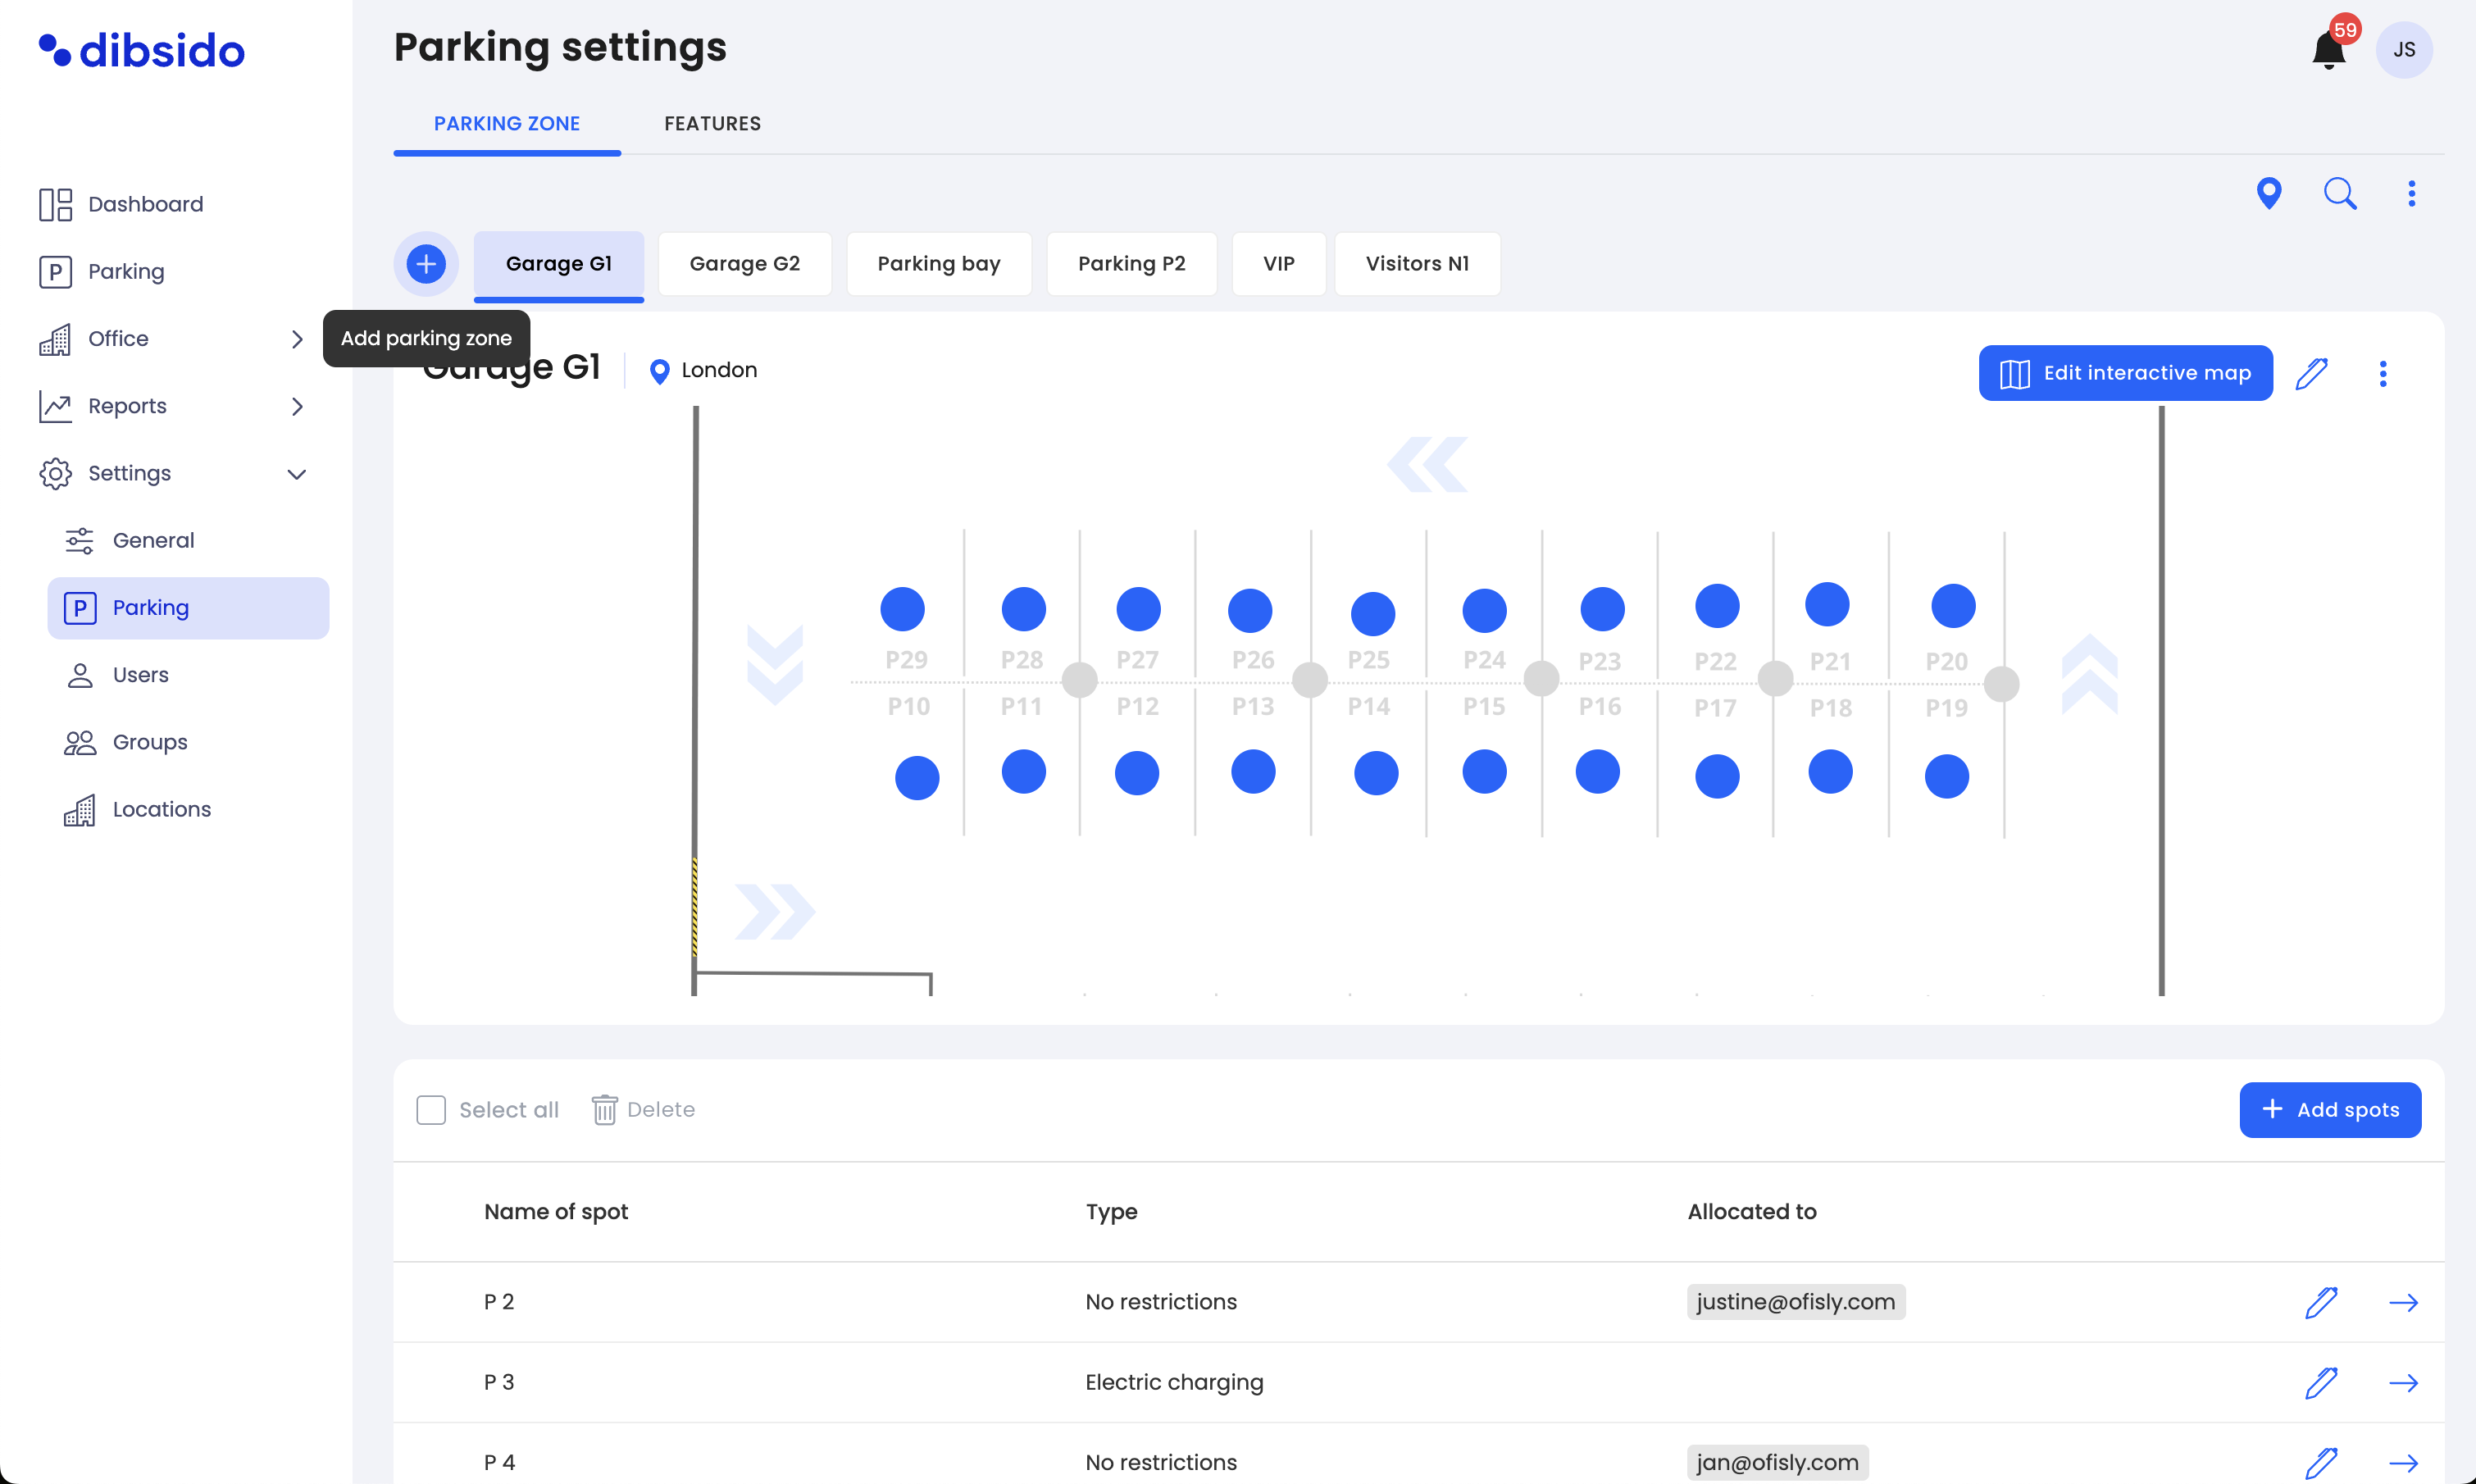
For a more detailed setup or to add additional parking zones later, you can use the settings menu.
Navigate to settings: Go to the settings menu within the Dibsido app.
Add parking zone: Click the "Add parking zone" button, represented by the (+) icon.
Input details: Enter the name of the parking zone and the number of parking spots you want to create.
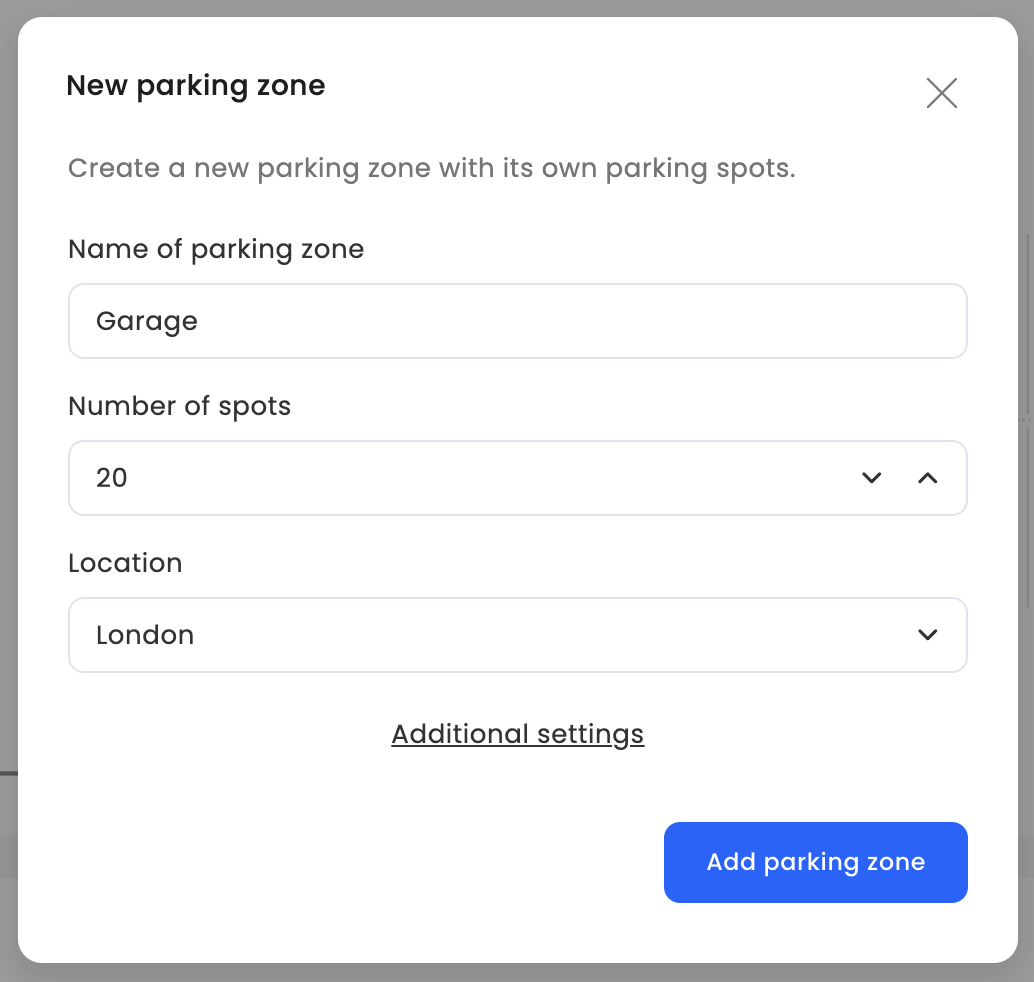
Additional settings: In this section, you can also:
Change spot names: Customize the names of the parking spots (e.g., Spot 1, Spot 2, etc.).
Starting number: Specify the starting number for spot labels.
Select type: Choose type of parking spot.
Using these methods, you can easily set up and manage your parking zones, ensuring an organized and efficient parking experience for all users.
