Navigate to groups:
Go to the "Settings" menu within the Dibsido app.
Select the "Groups" option.
Add a new group:
Click on the "Add Group" button to start creating a new group.

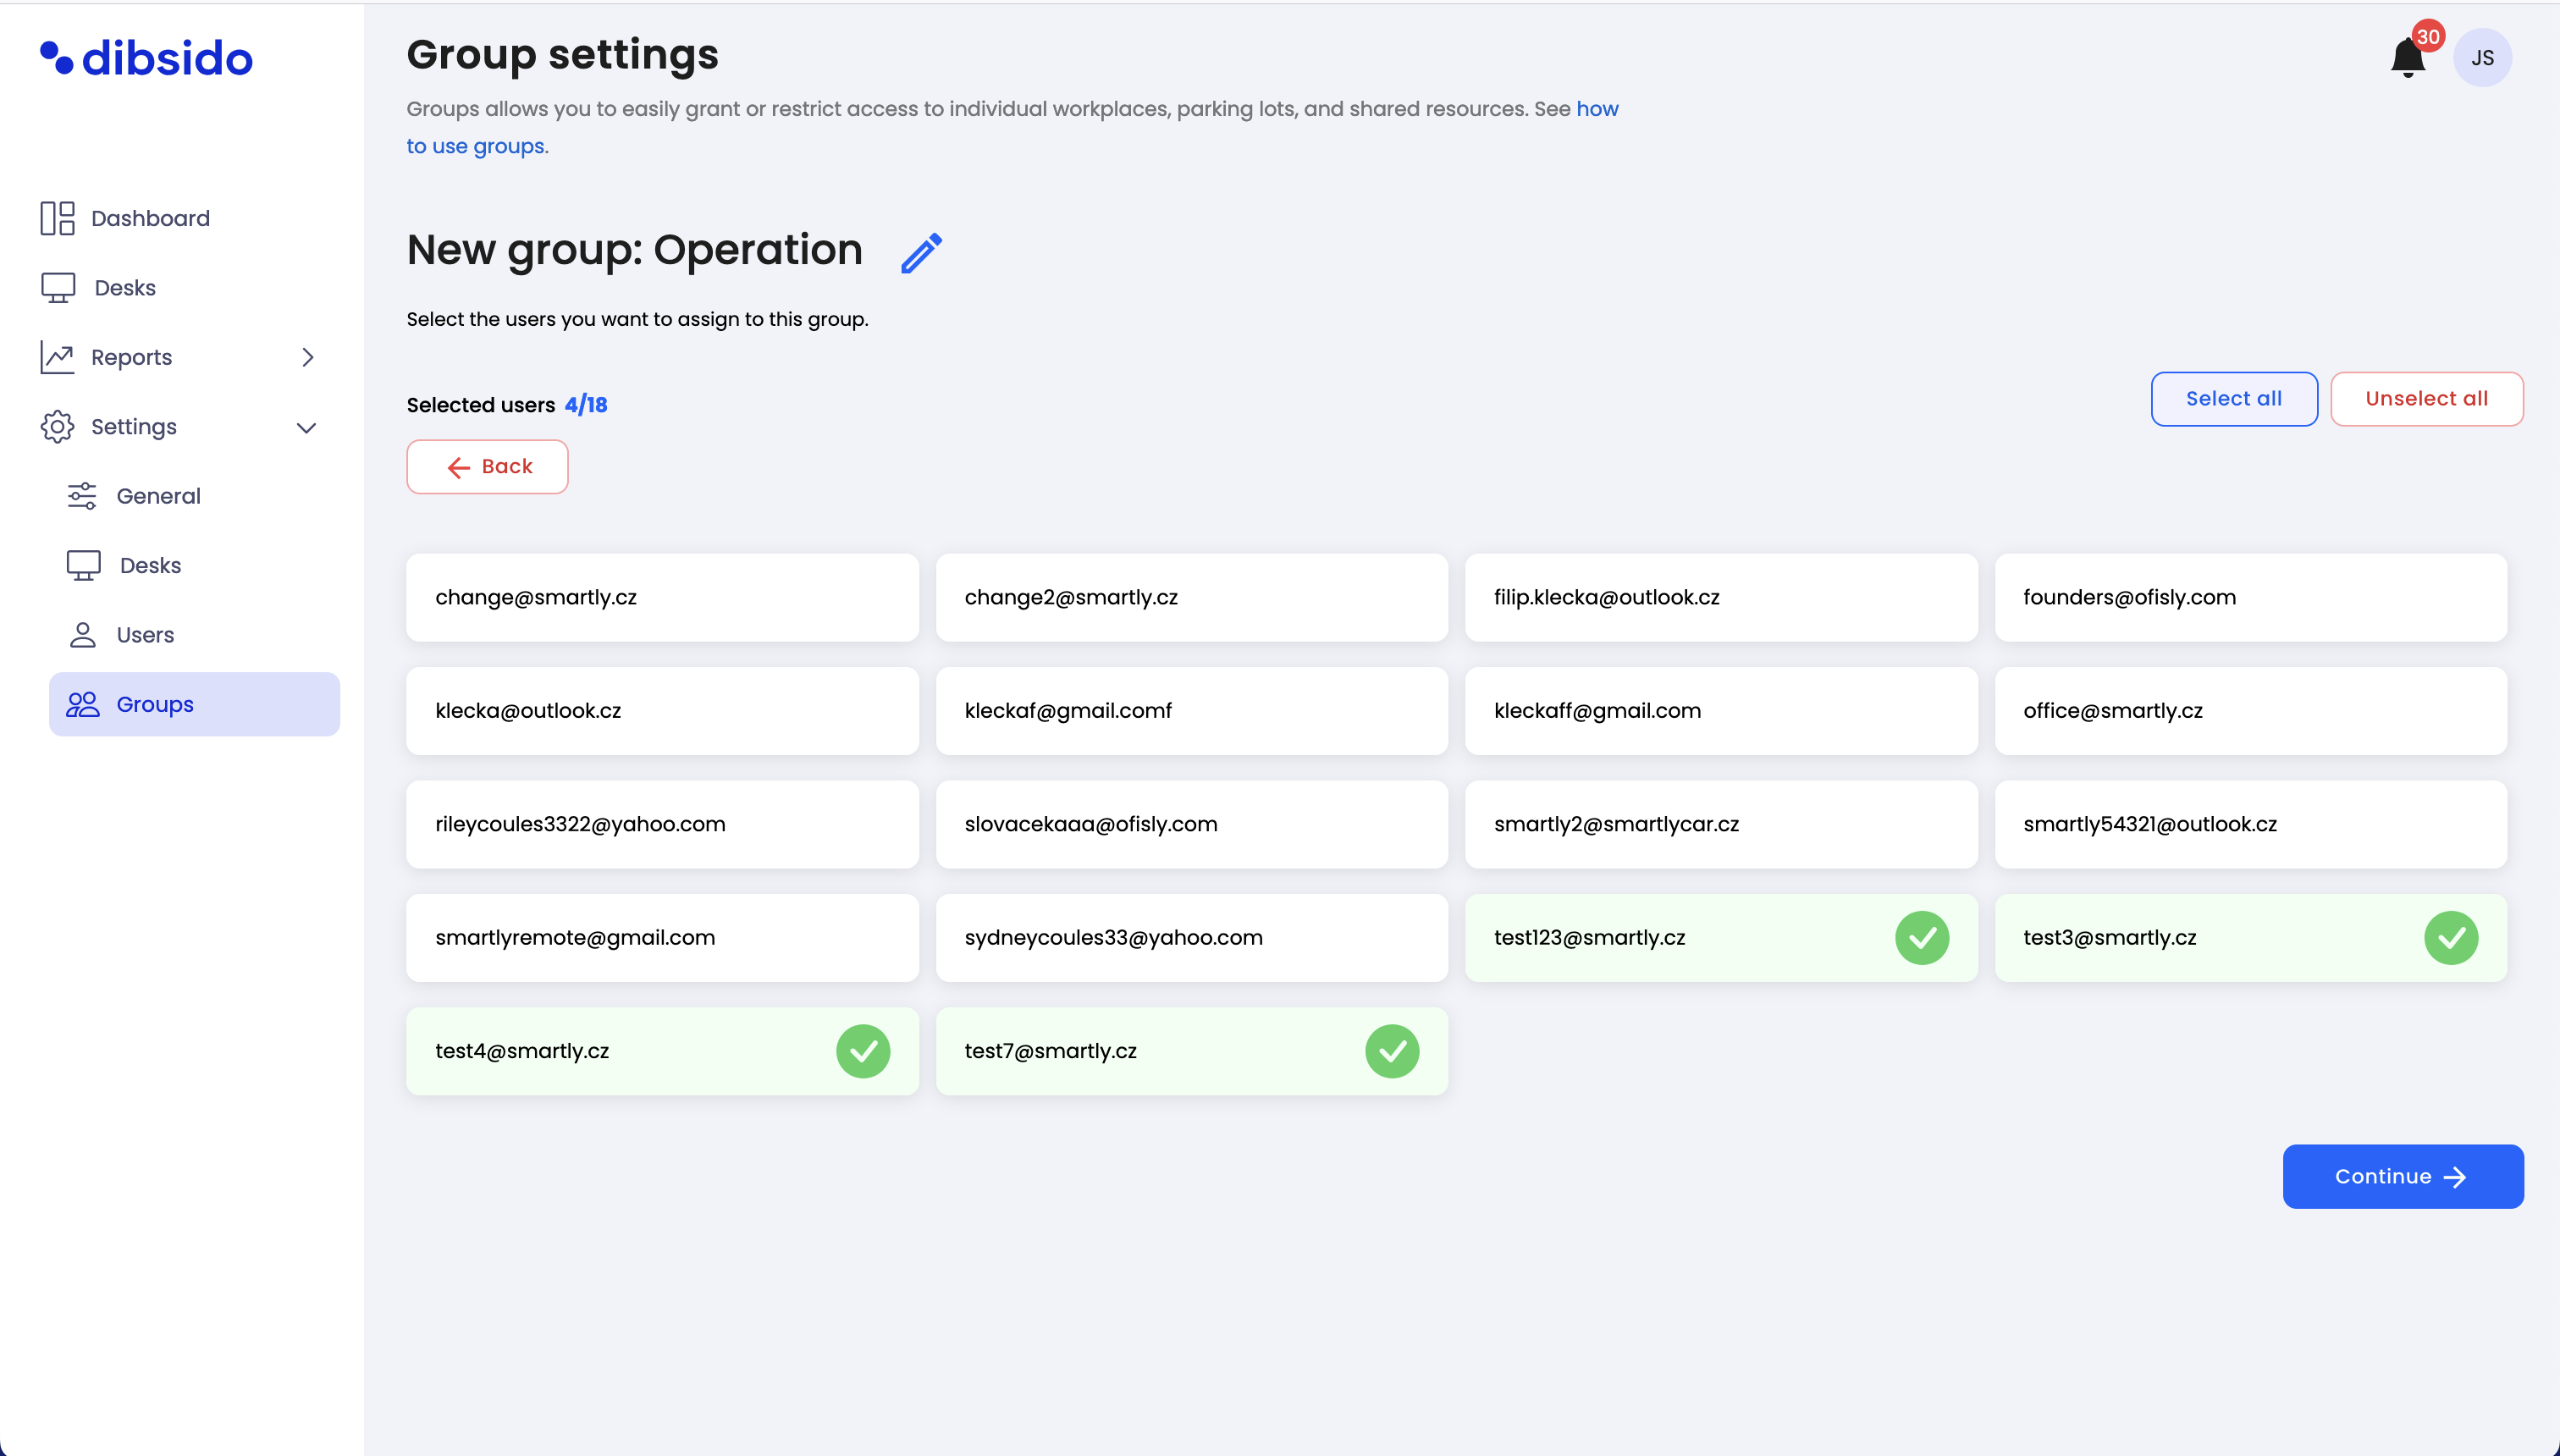
Select users:
Choose the users who will be part of this group. Remember that a user can only belong to one group at a time, so select carefully.
Select resources (if applicable):
If your company uses cars, parking, or workplace booking features, you can also select the relevant resources for this group:
Select cars: If car management is enabled, choose which cars this group can access.
Select parking zones: If parking management is enabled, assign parking zones to the group.
Select workplaces: If desk booking is enabled, allocate workplaces to the group.

Overview and additional settings:
Review the group setup in the overview. Here, you can also access additional settings and handle any reservation conflicts that may arise (e.g., if a user in the group has a conflicting reservation or assigned seat).
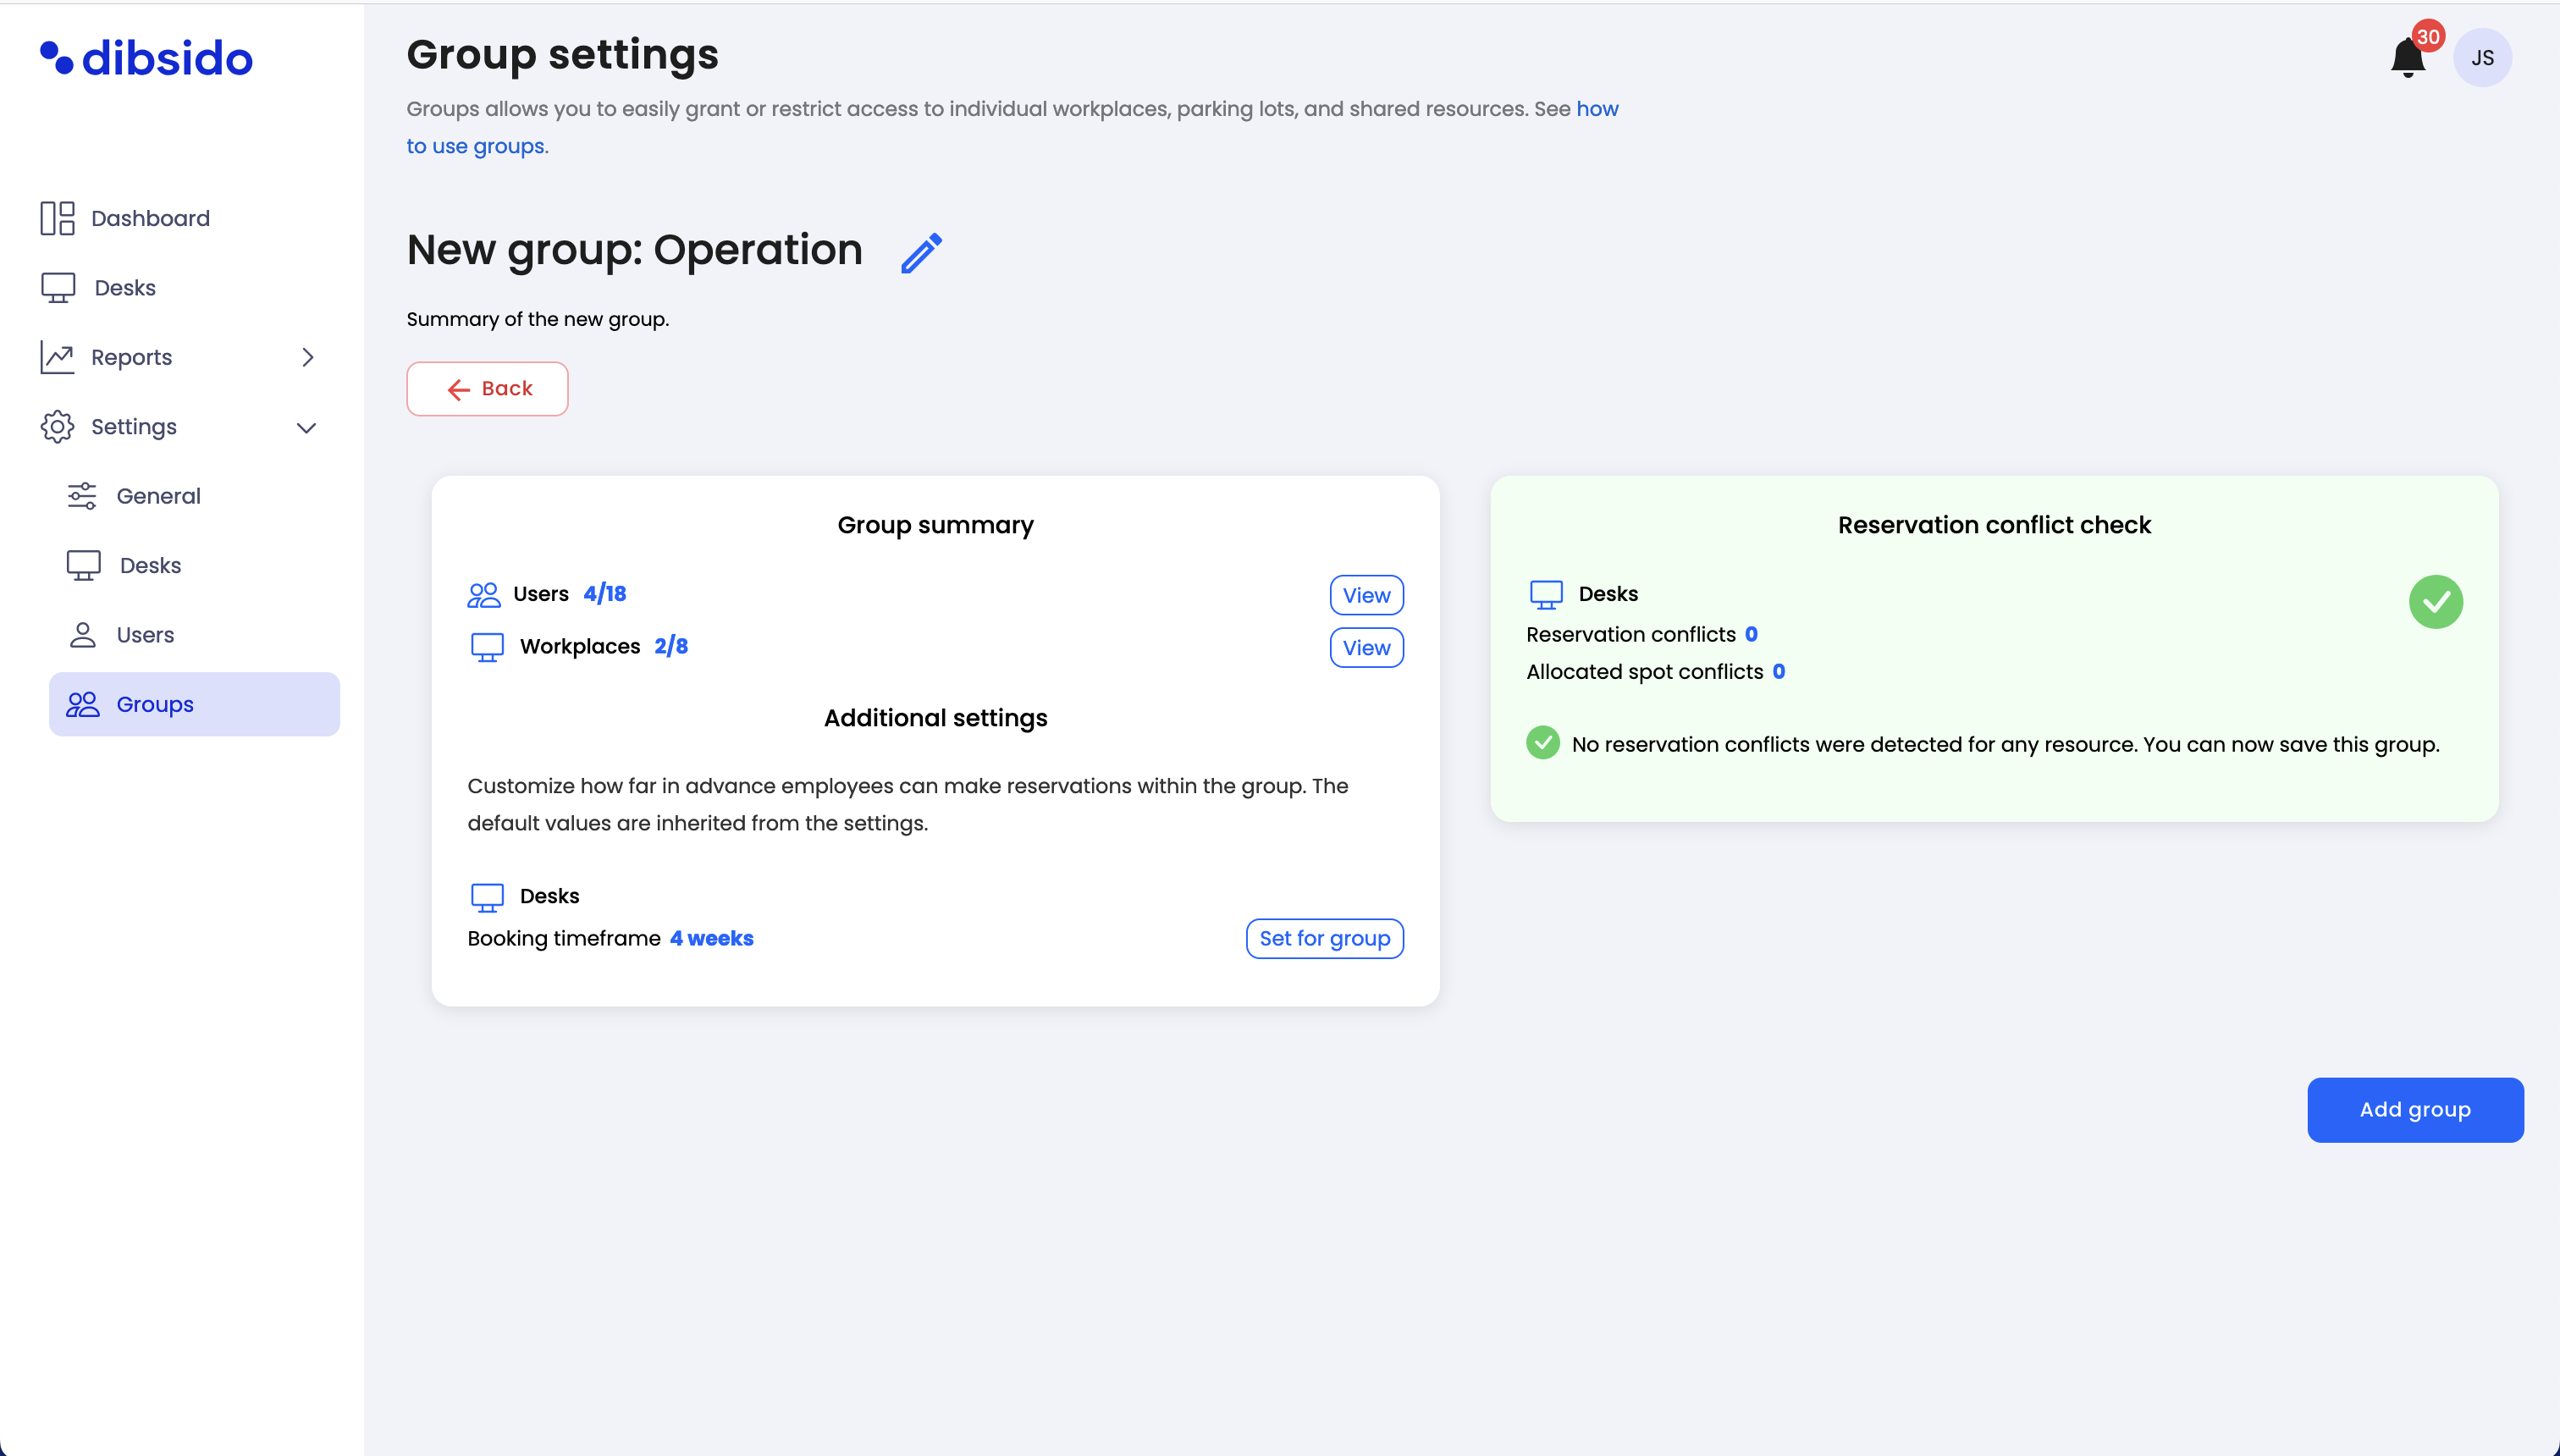
Address reservation conflicts:
If there are any reservation conflicts, you’ll need to resolve them by either deleting the conflicting reservations or removing the affected users from the group.
Save the group:
Once everything is set up and conflicts are resolved, save the group to finalize the creation process.

