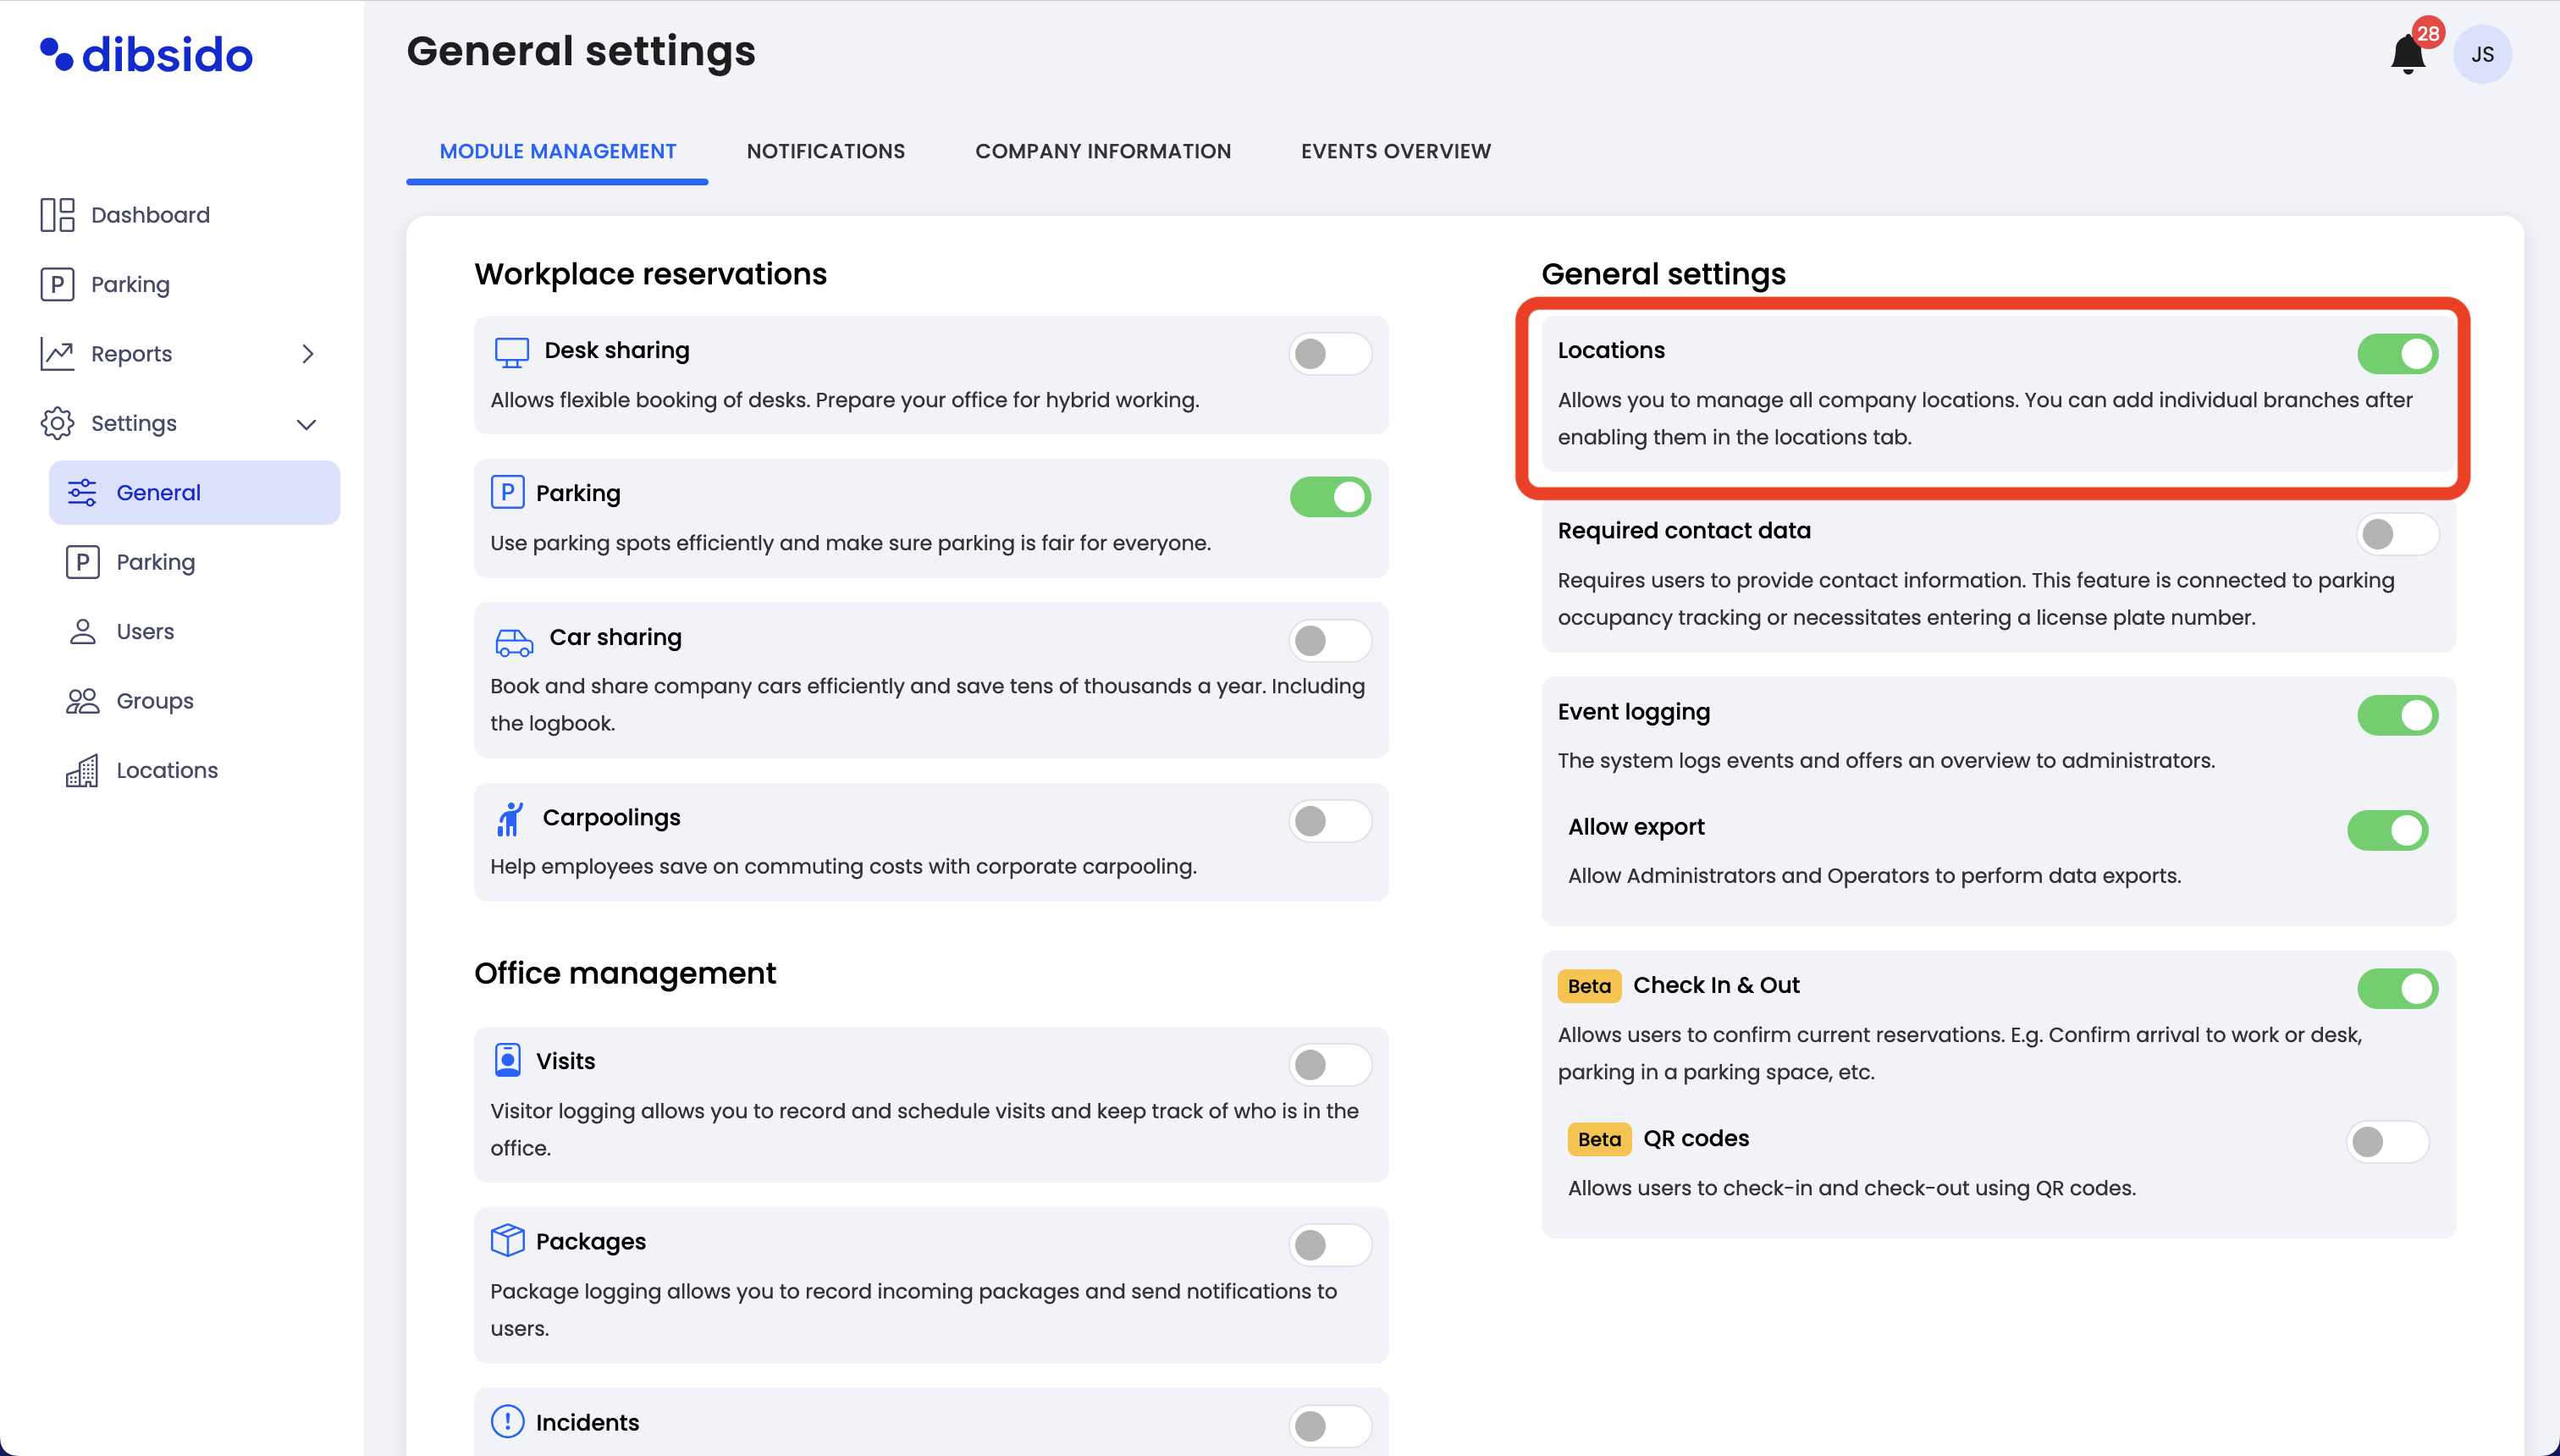
Activate Locations:
First, you need to enable the Locations feature in Dibsido. Go to the "Settings" menu and select "General." Turn on the Locations feature to make it available for use.
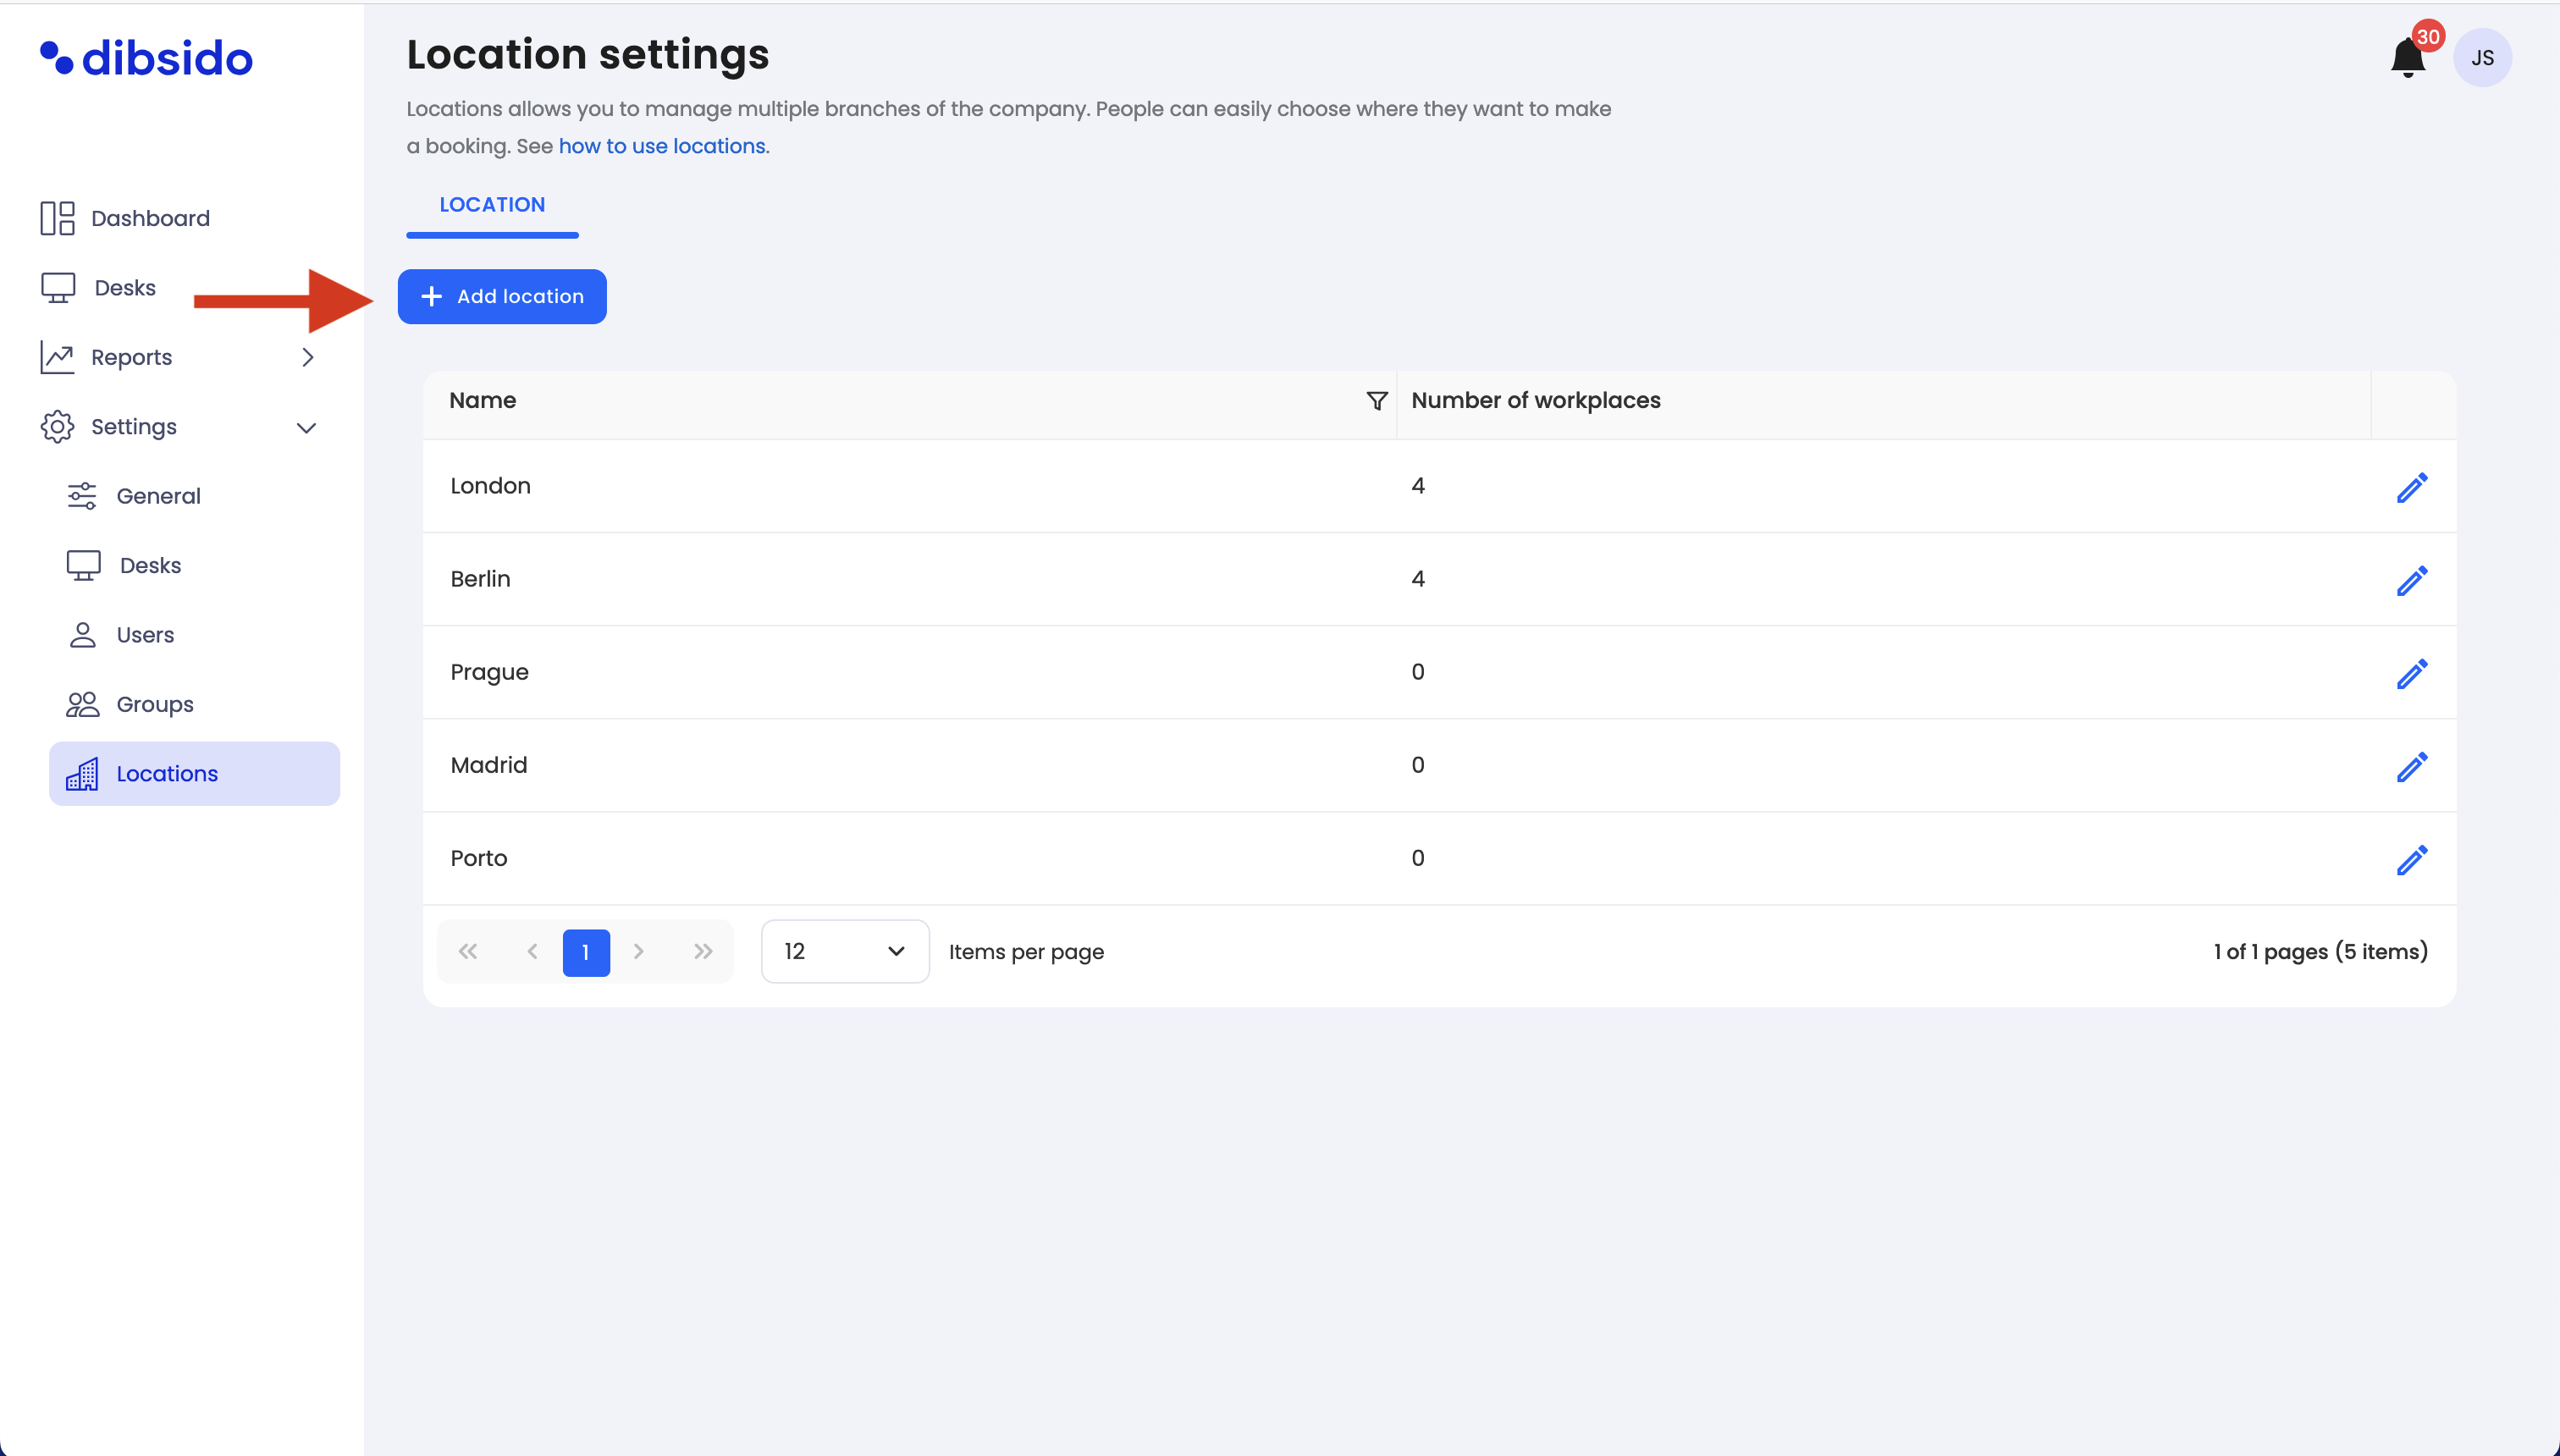
Navigate to Locations:
After activating the feature, go to the "Settings" menu and select "Locations."
Add a new Location:
Click on the "Add Location" button to create a new Location.
Name the Location:
Enter the name of the new Location. This could be the name of the branch, city, or specific office where the resources are located.
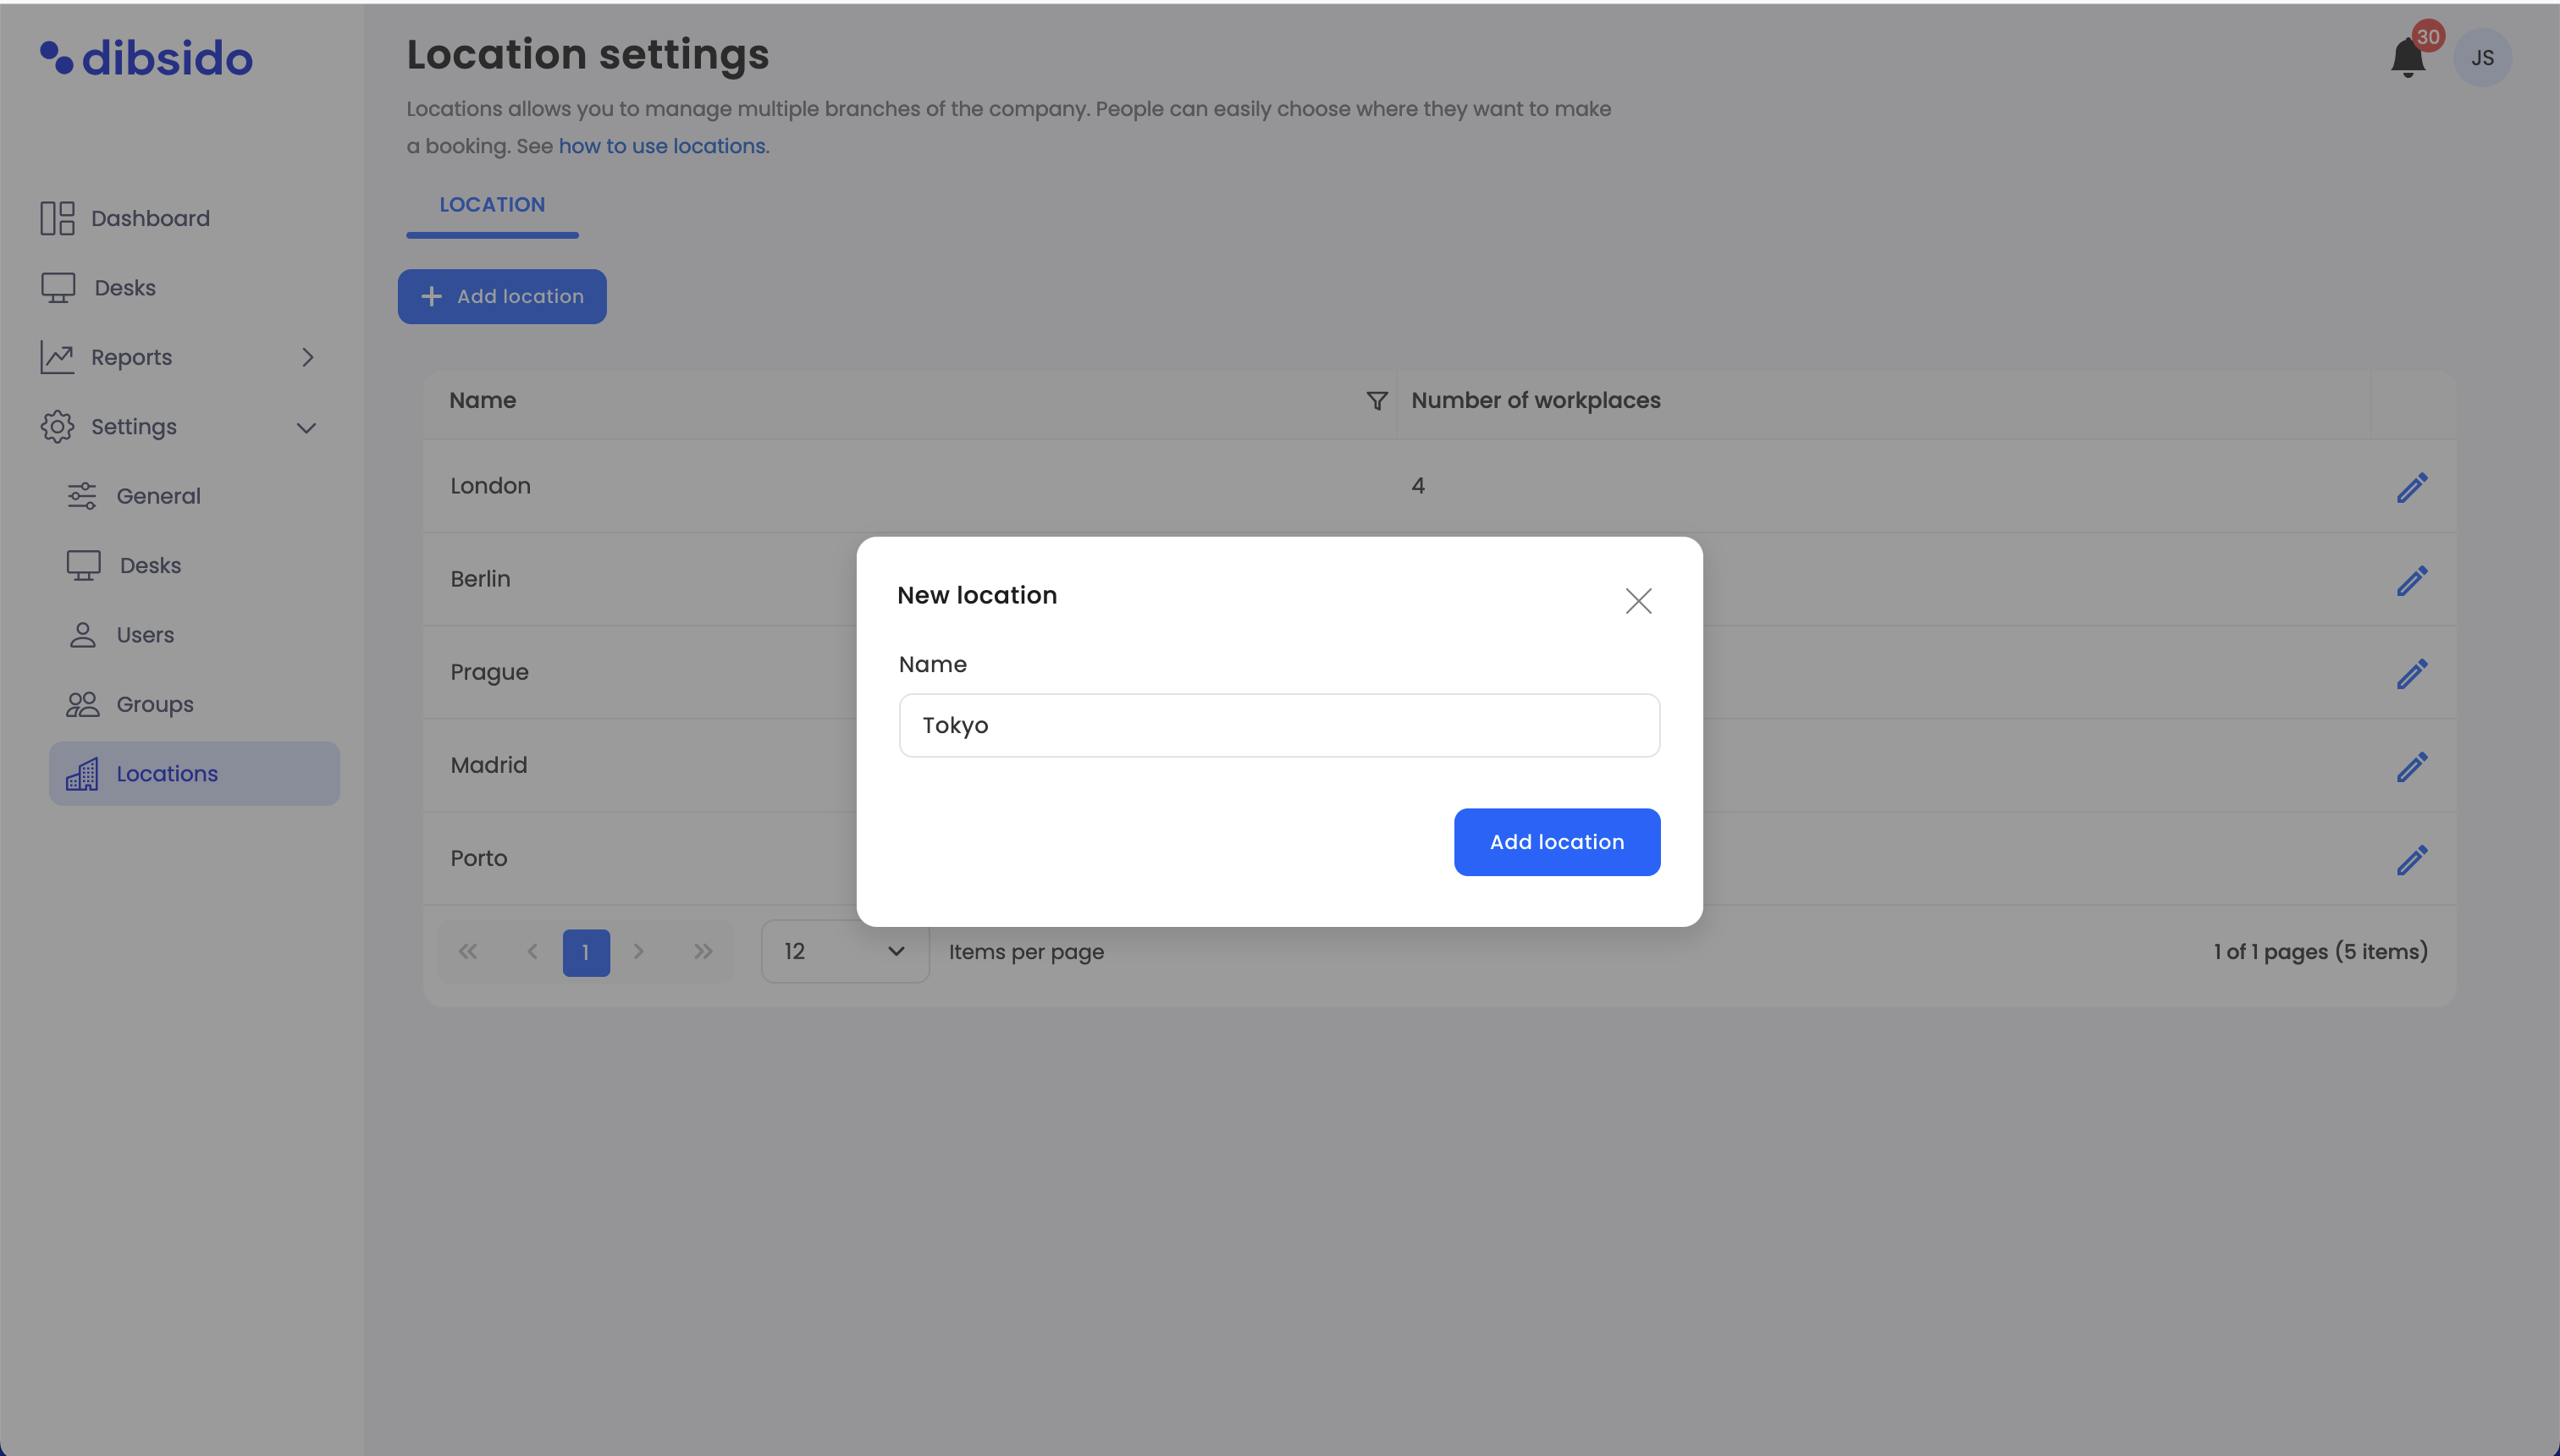
Save the Location:
Once everything is set up, save the Location to finalize its creation.
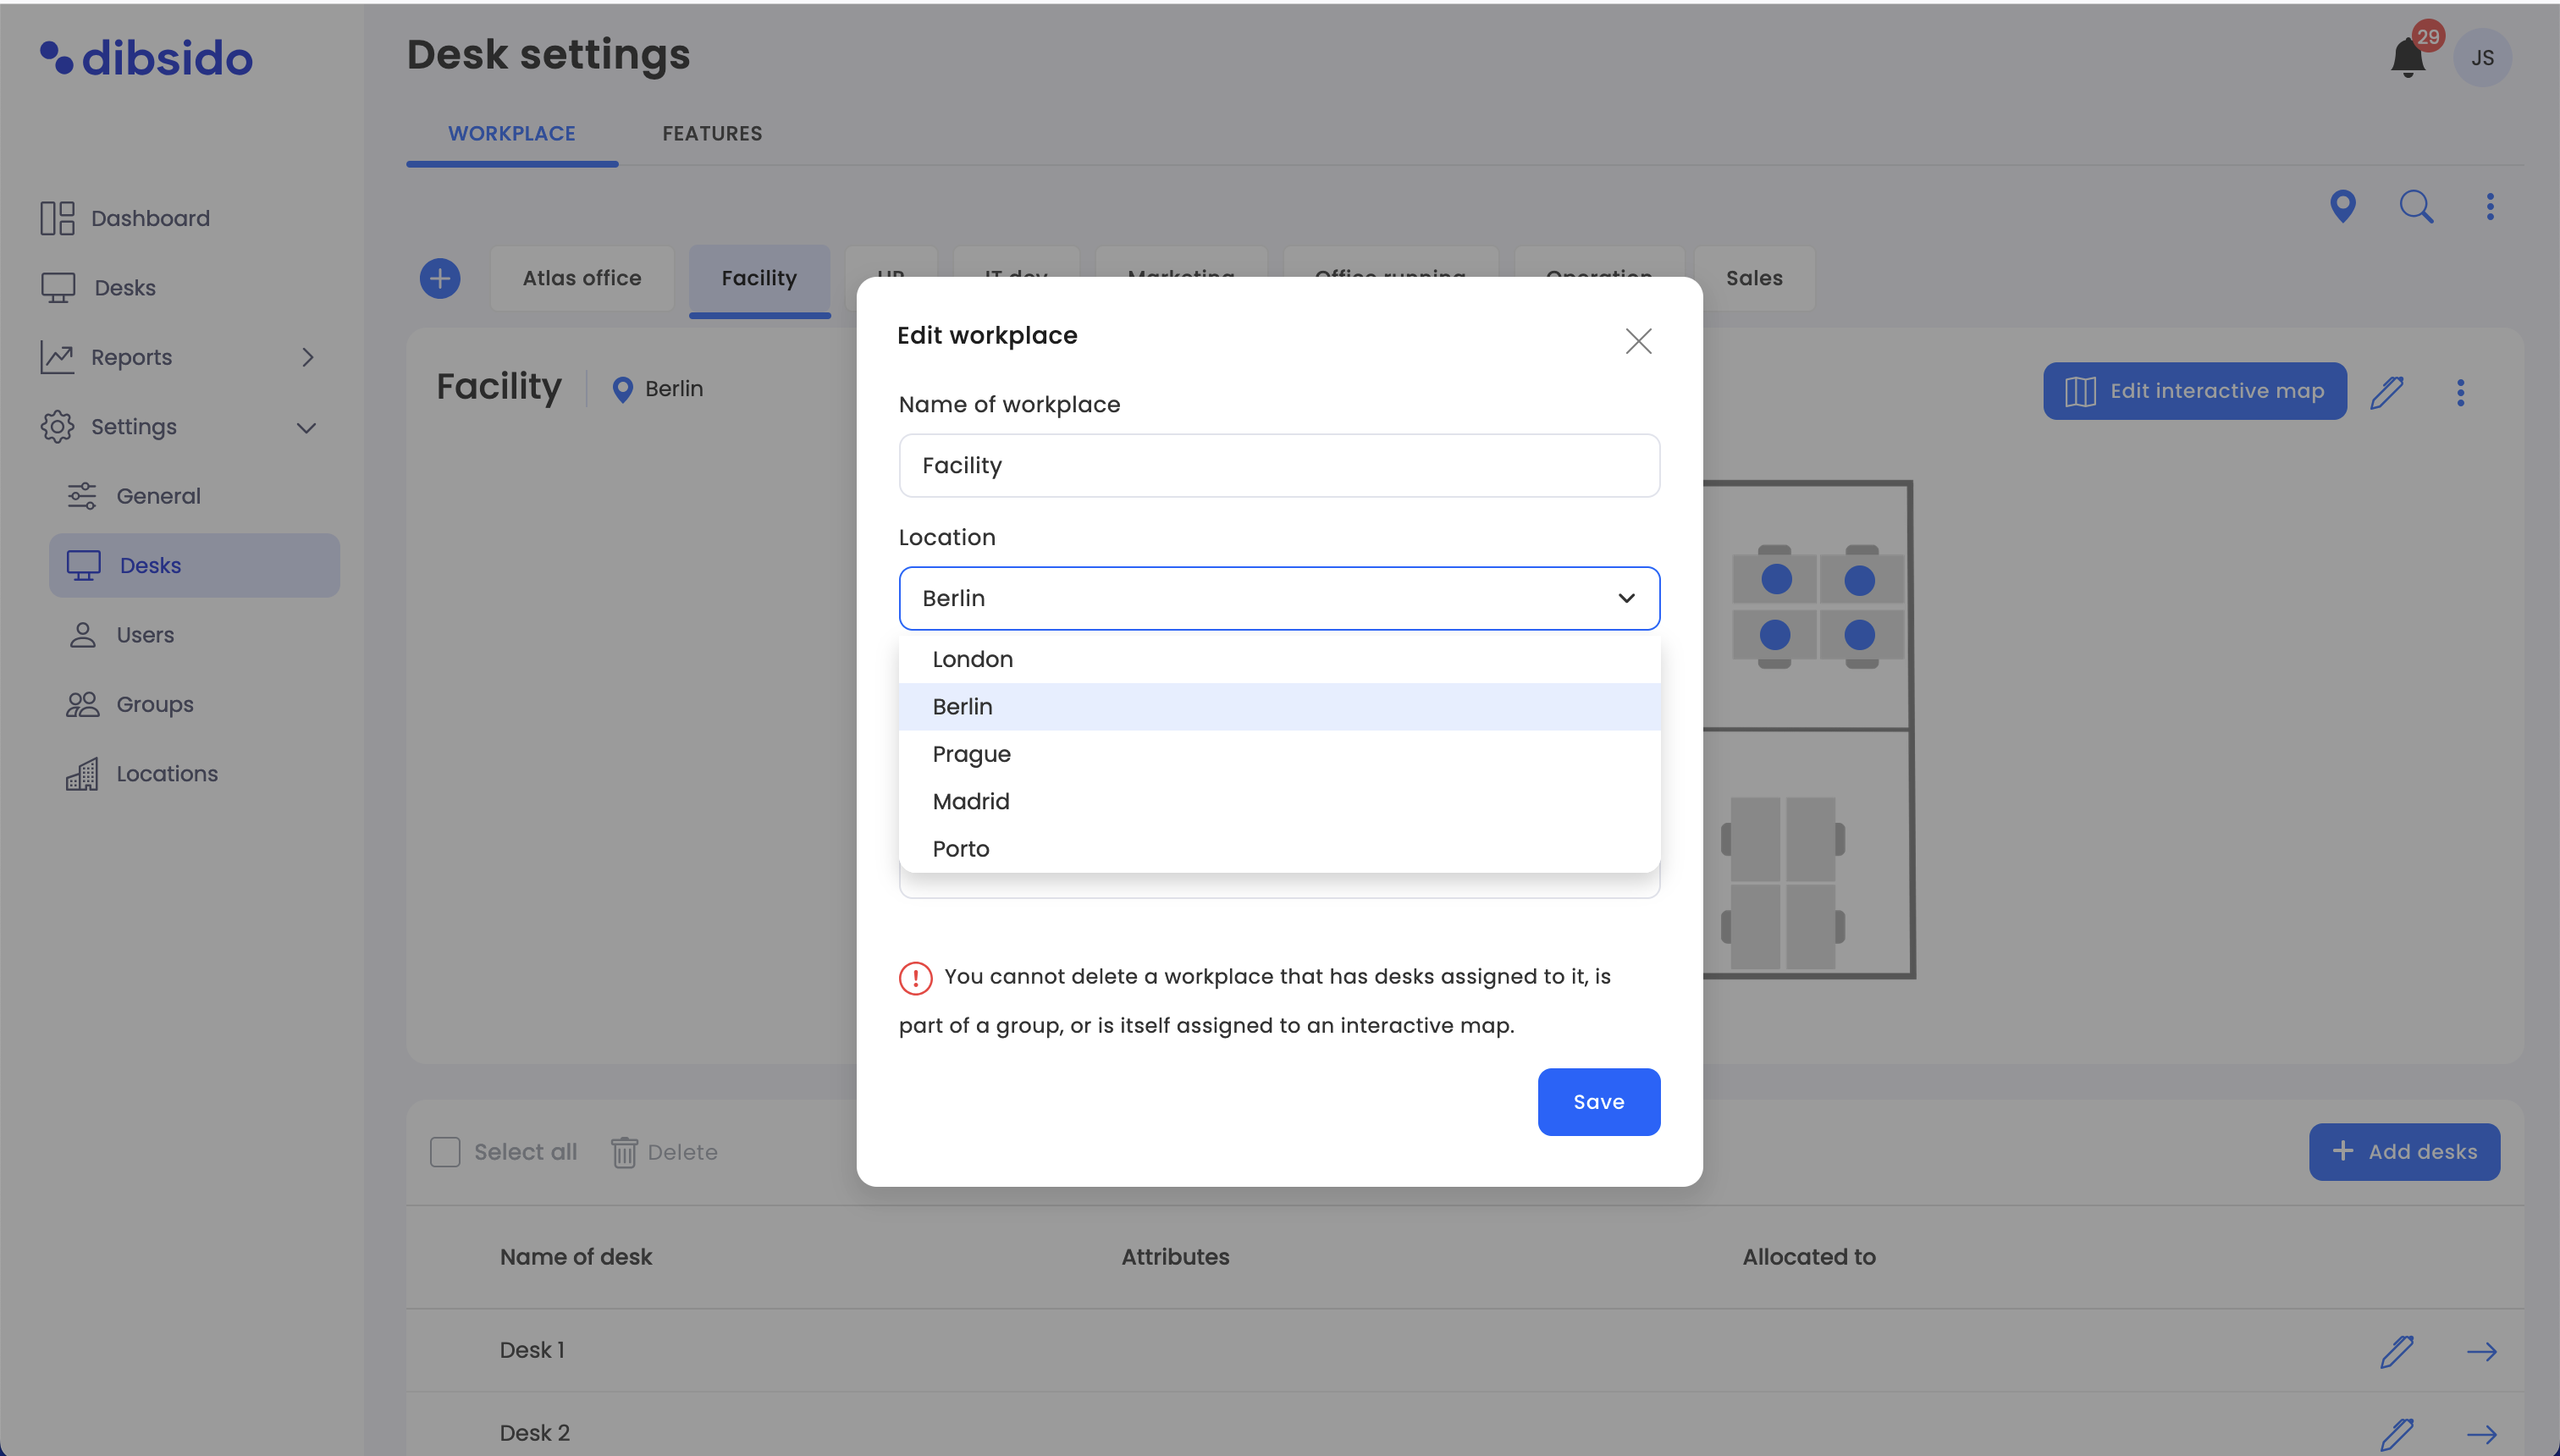
Assign workplaces and parking zones:
It is crucial to assign the new Location to existing workplaces and parking zones:
Assign workplaces: Go to "Settings" > "Desks," click on the edit button (pen icon) next to the workplace, select the appropriate Location, and save.
Assign parking zones: Go to "Settings" > "Parking," click on the edit button (pen icon) next to the parking zone, select the appropriate Location, and save.


