How to upload floorplan images to Dibsido
Choose parking zone: Select the parking zone you want to create an interactive map for.
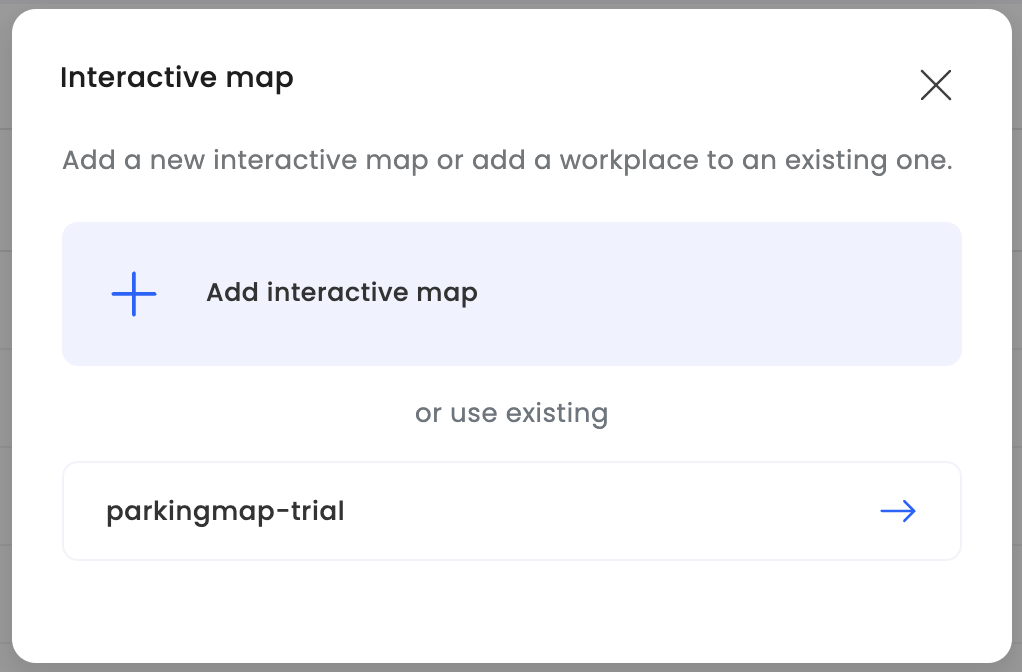
Create an interactive map: Click the "Create Interactive Map" button.
Choose an option: Select either "Add Interactive Map" or "Add Parking Zone to Existing One."
Upload image: If creating a new interactive map, upload any image (jpg, pdf, png) with a maximum size of 6MB by clicking the "Upload Image" button in the top right corner.
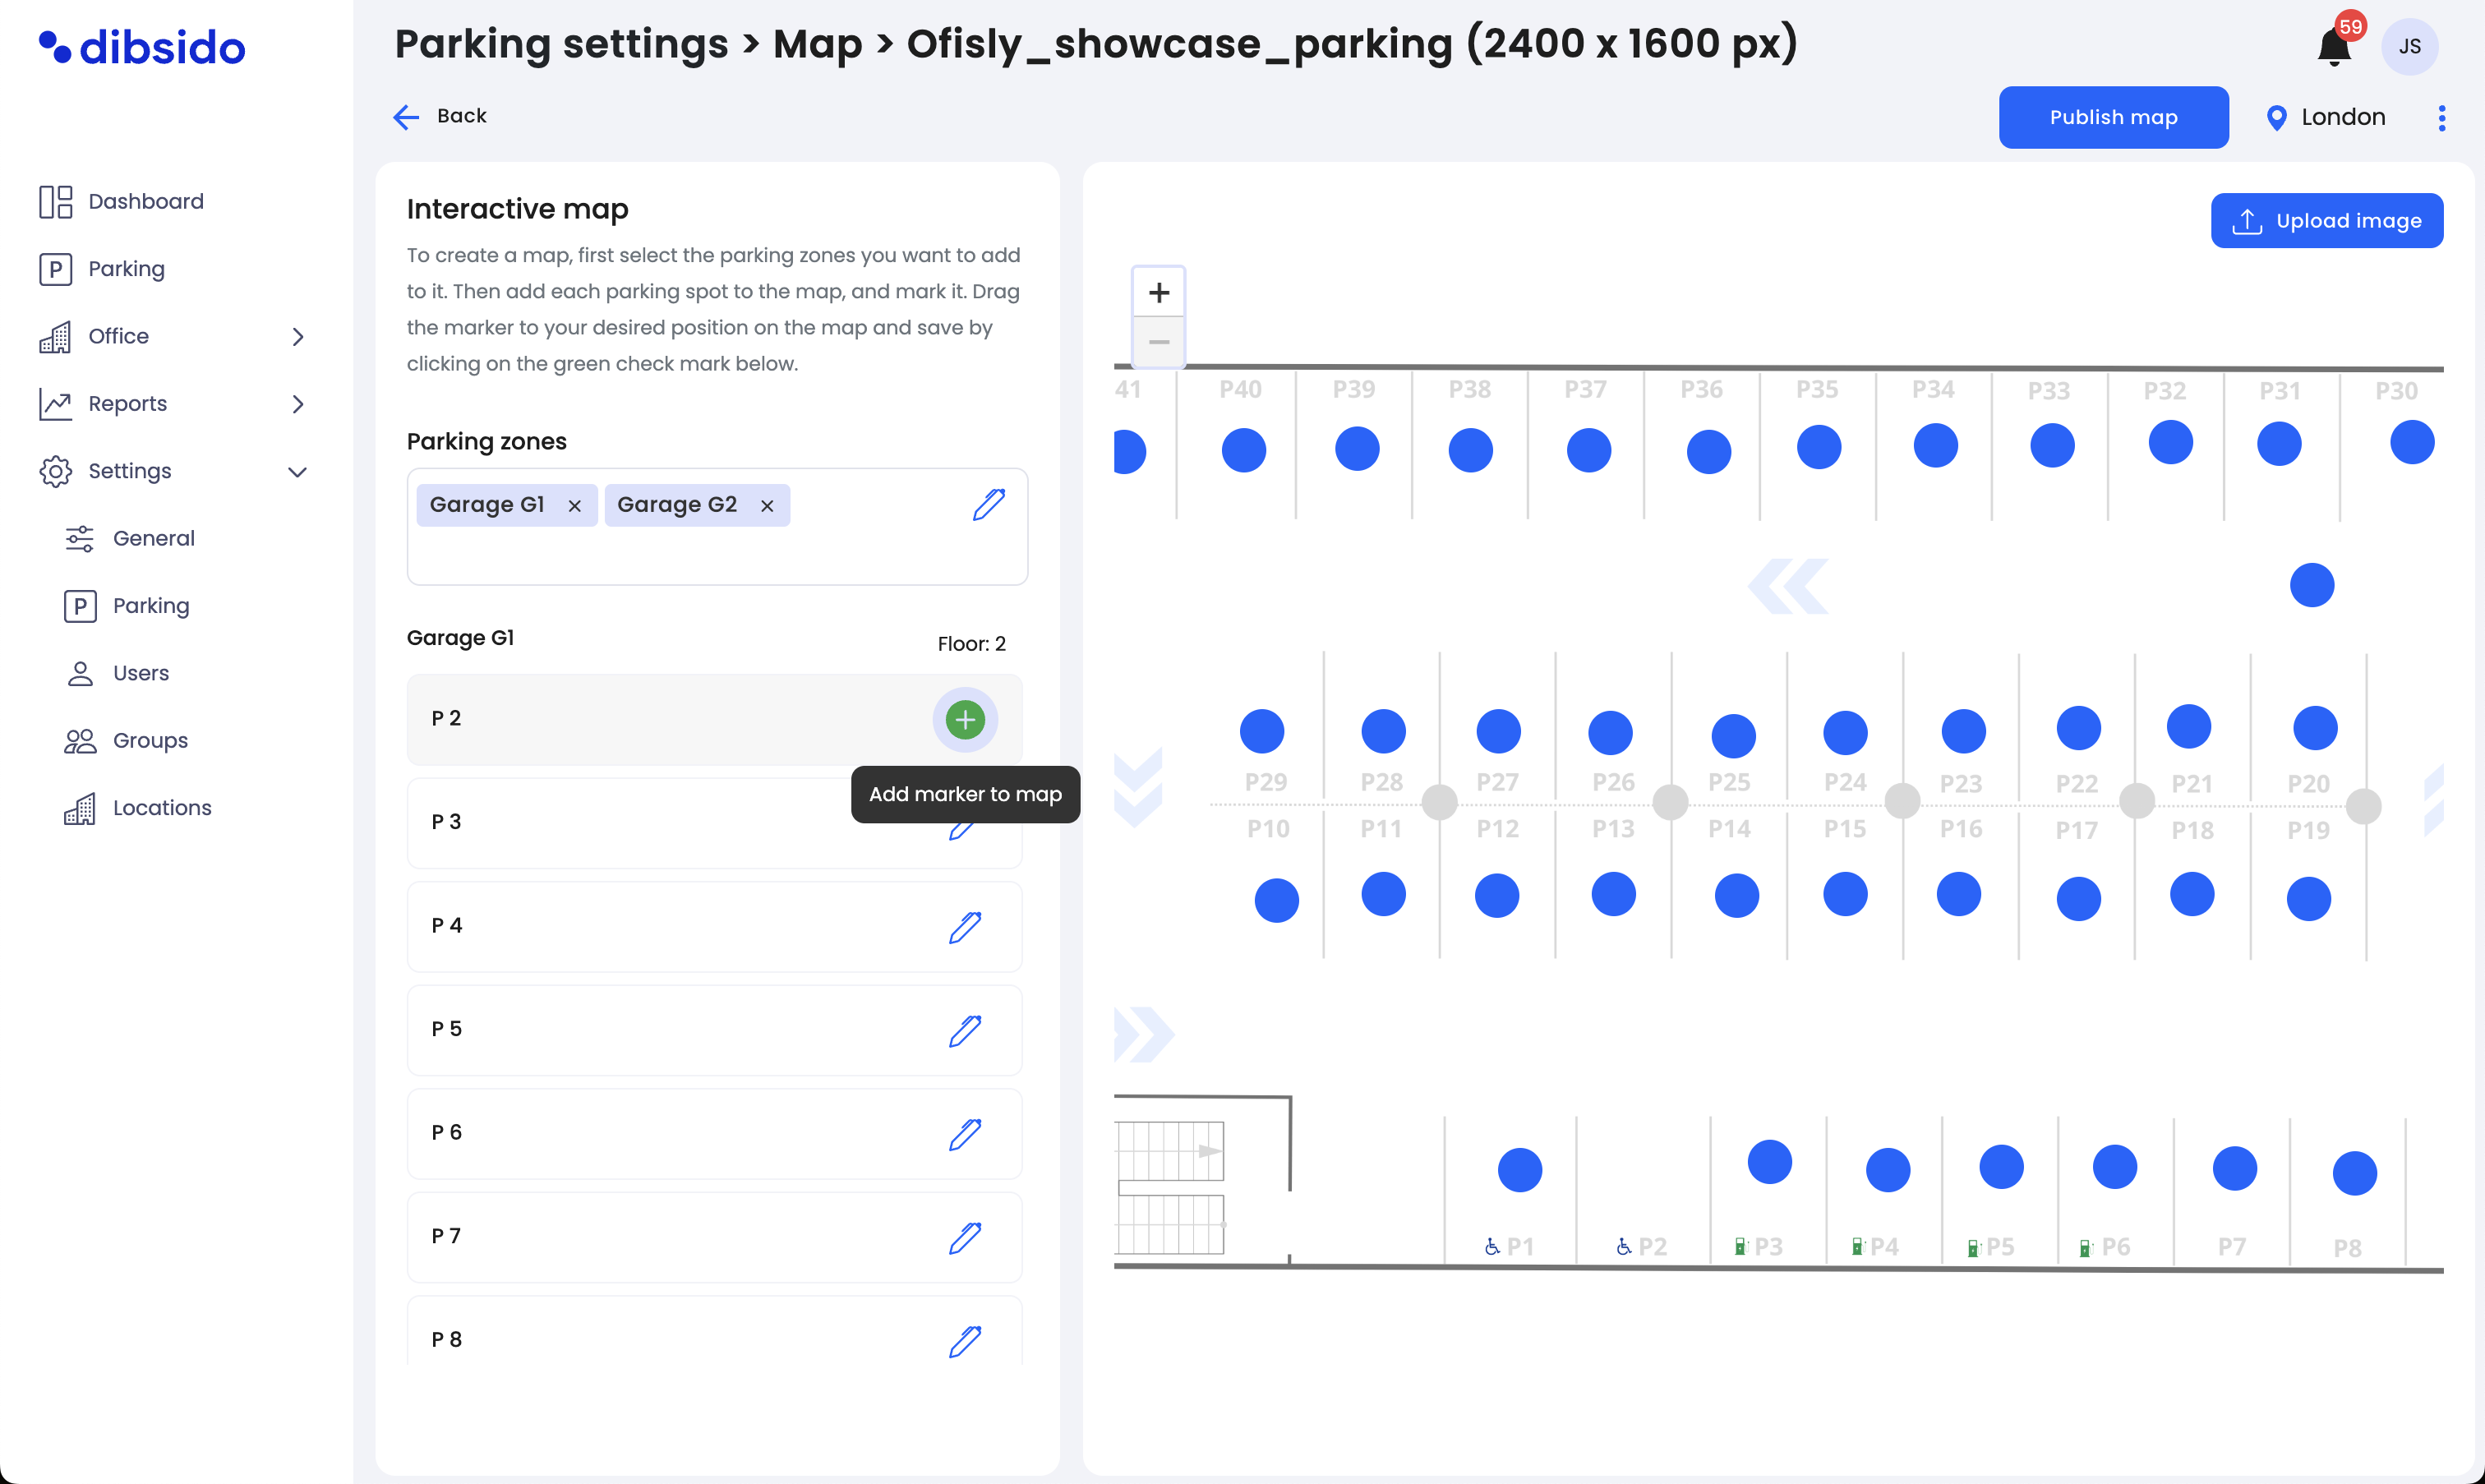
Setting up interactive elements on the floorplan
Select parking spot: From the left column, choose the parking spot you want to add to the map.
Add marker: Click the "+" (plus) button to add a marker for the selected parking spot to the uploaded map.
Position marker: Move the marker to the correct location on your map where the parking spot is situated.
Save: Click the "Save" button to finalize the positioning of the marker.
Publish map: Once all elements are in place, click the "Publish Map" button to make the interactive floorplan available for use.