Navigate to parking settings:
Go to the "Settings" menu within the Dibsido app.
Select the "Parking" option to view your existing parking zones.
Choose the parking zone:
In the parking settings, locate the parking zone associated with the interactive map you want to edit.
Click on the "Edit interactive map" button located in the right corner of the screen. If this option isn’t available, first click on "Create interactive map" and then select the existing map you want to edit.
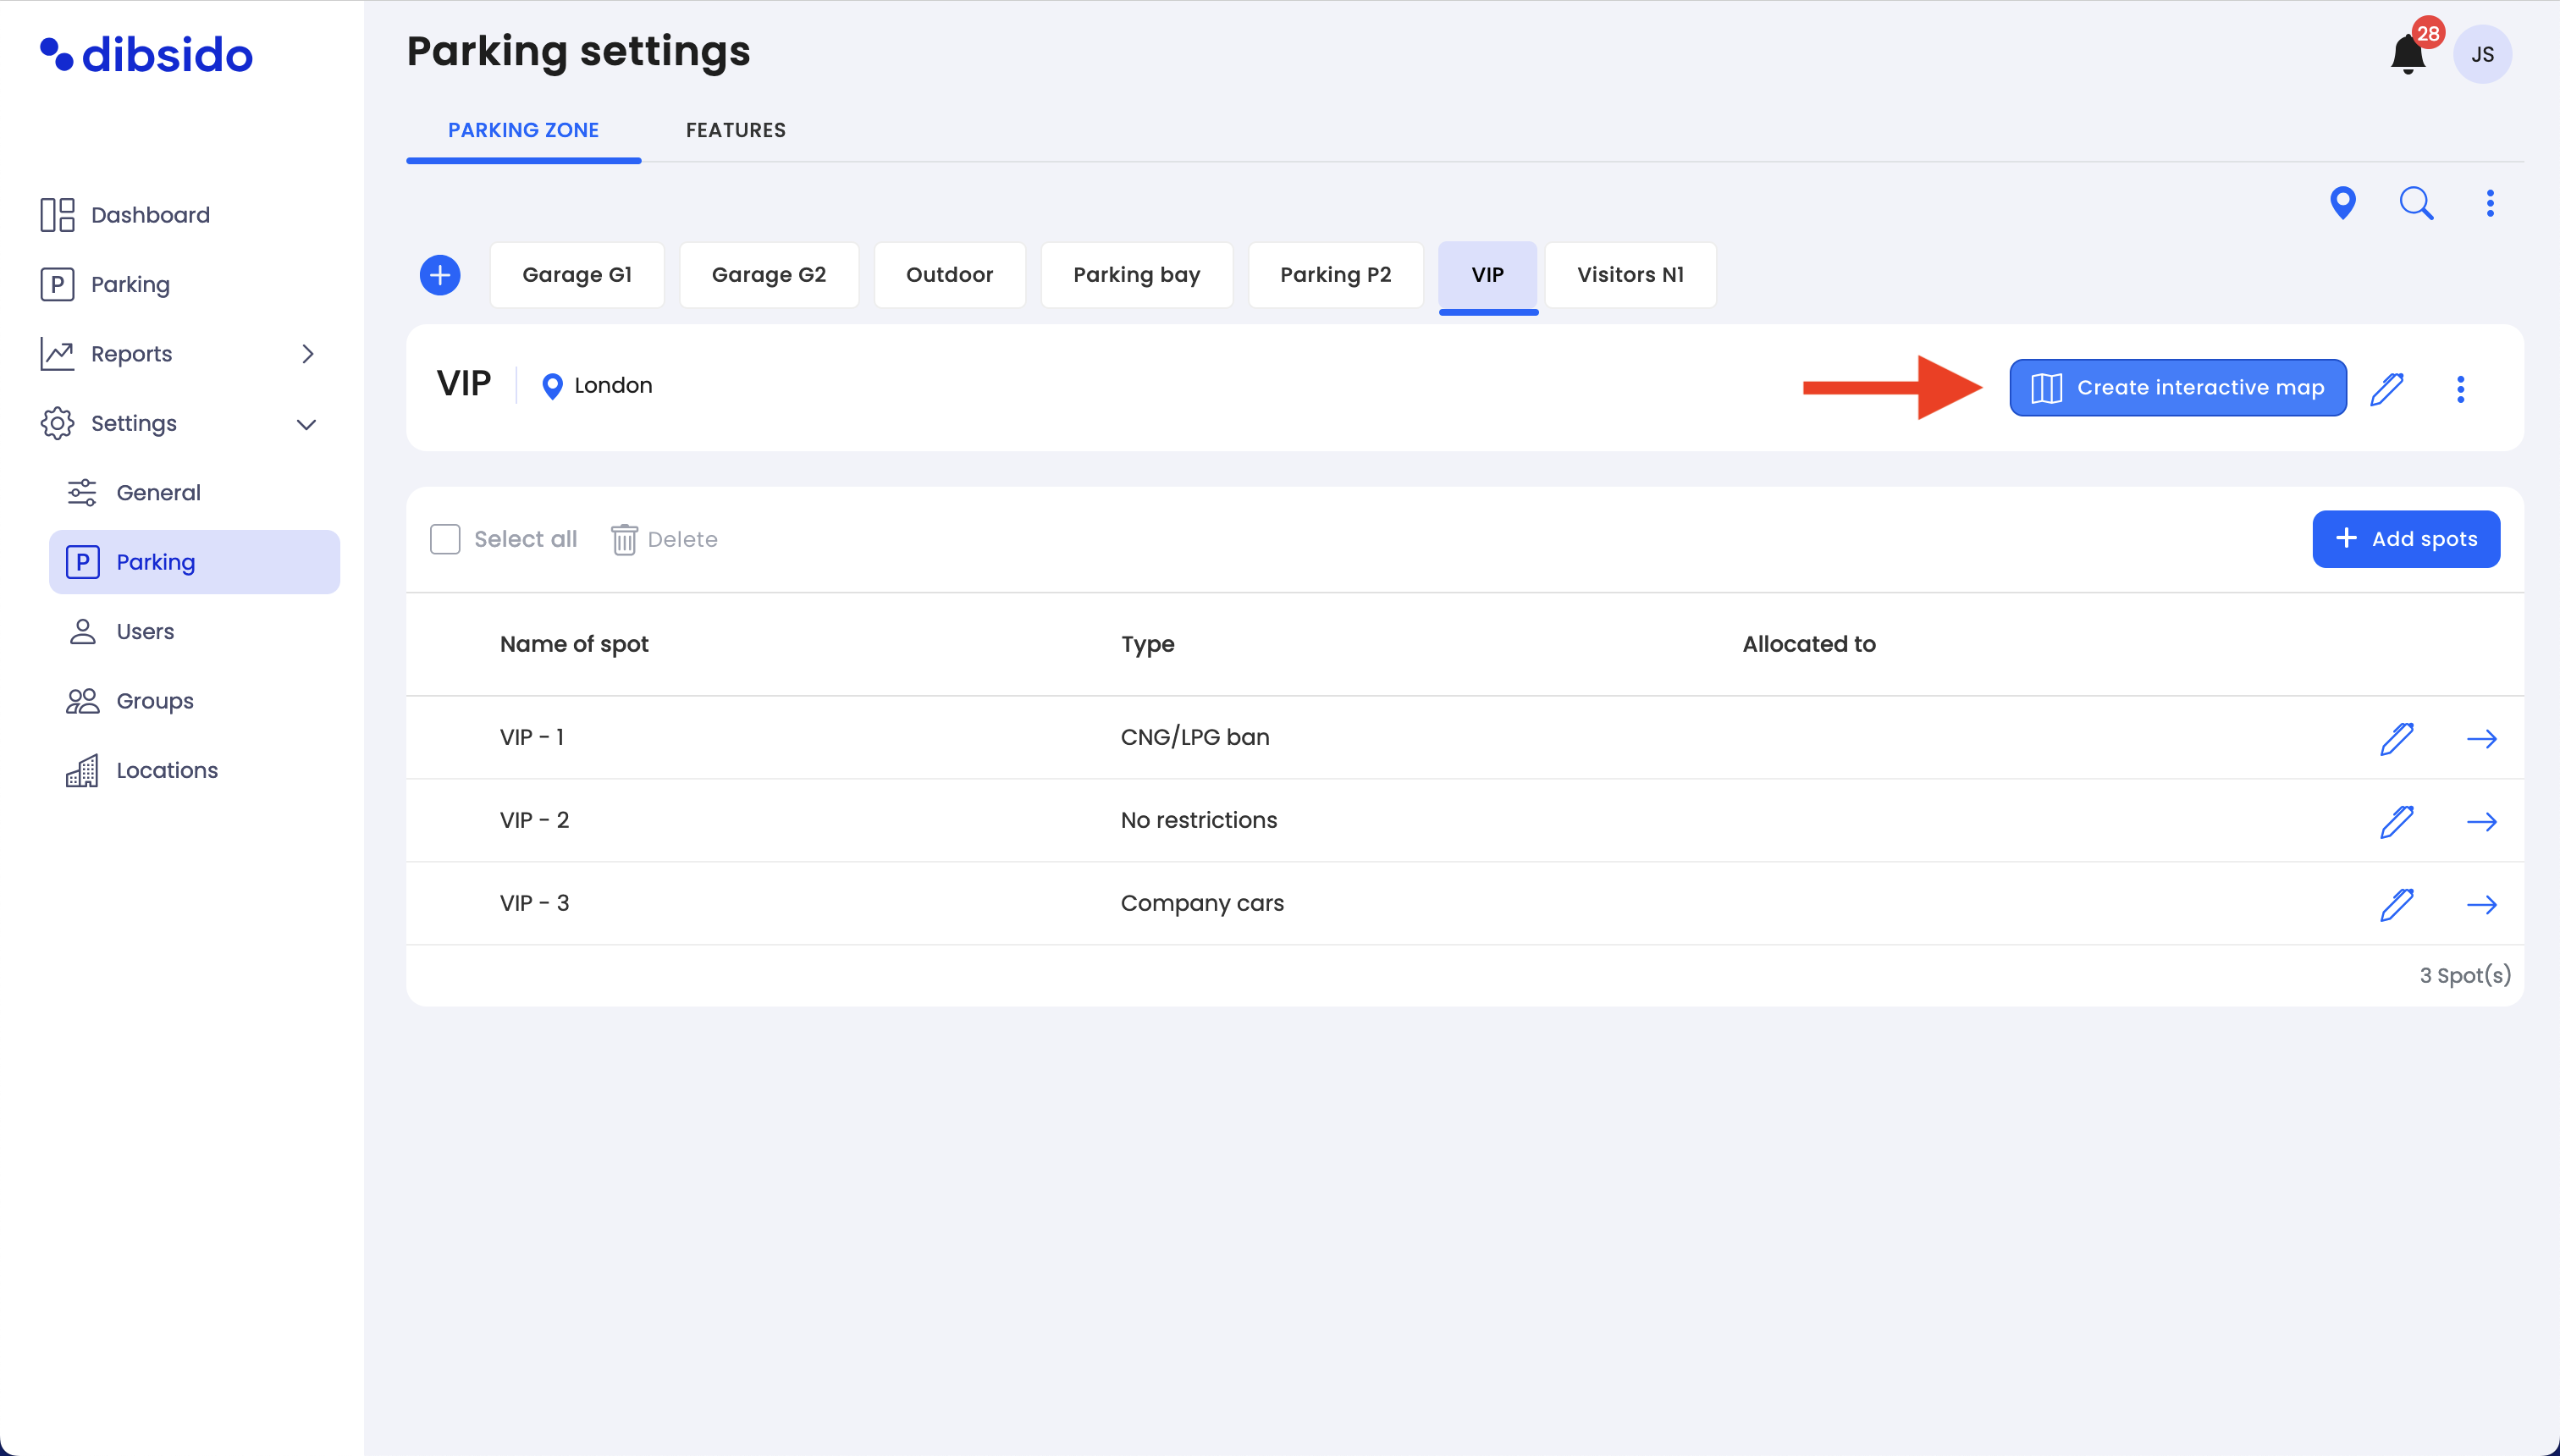
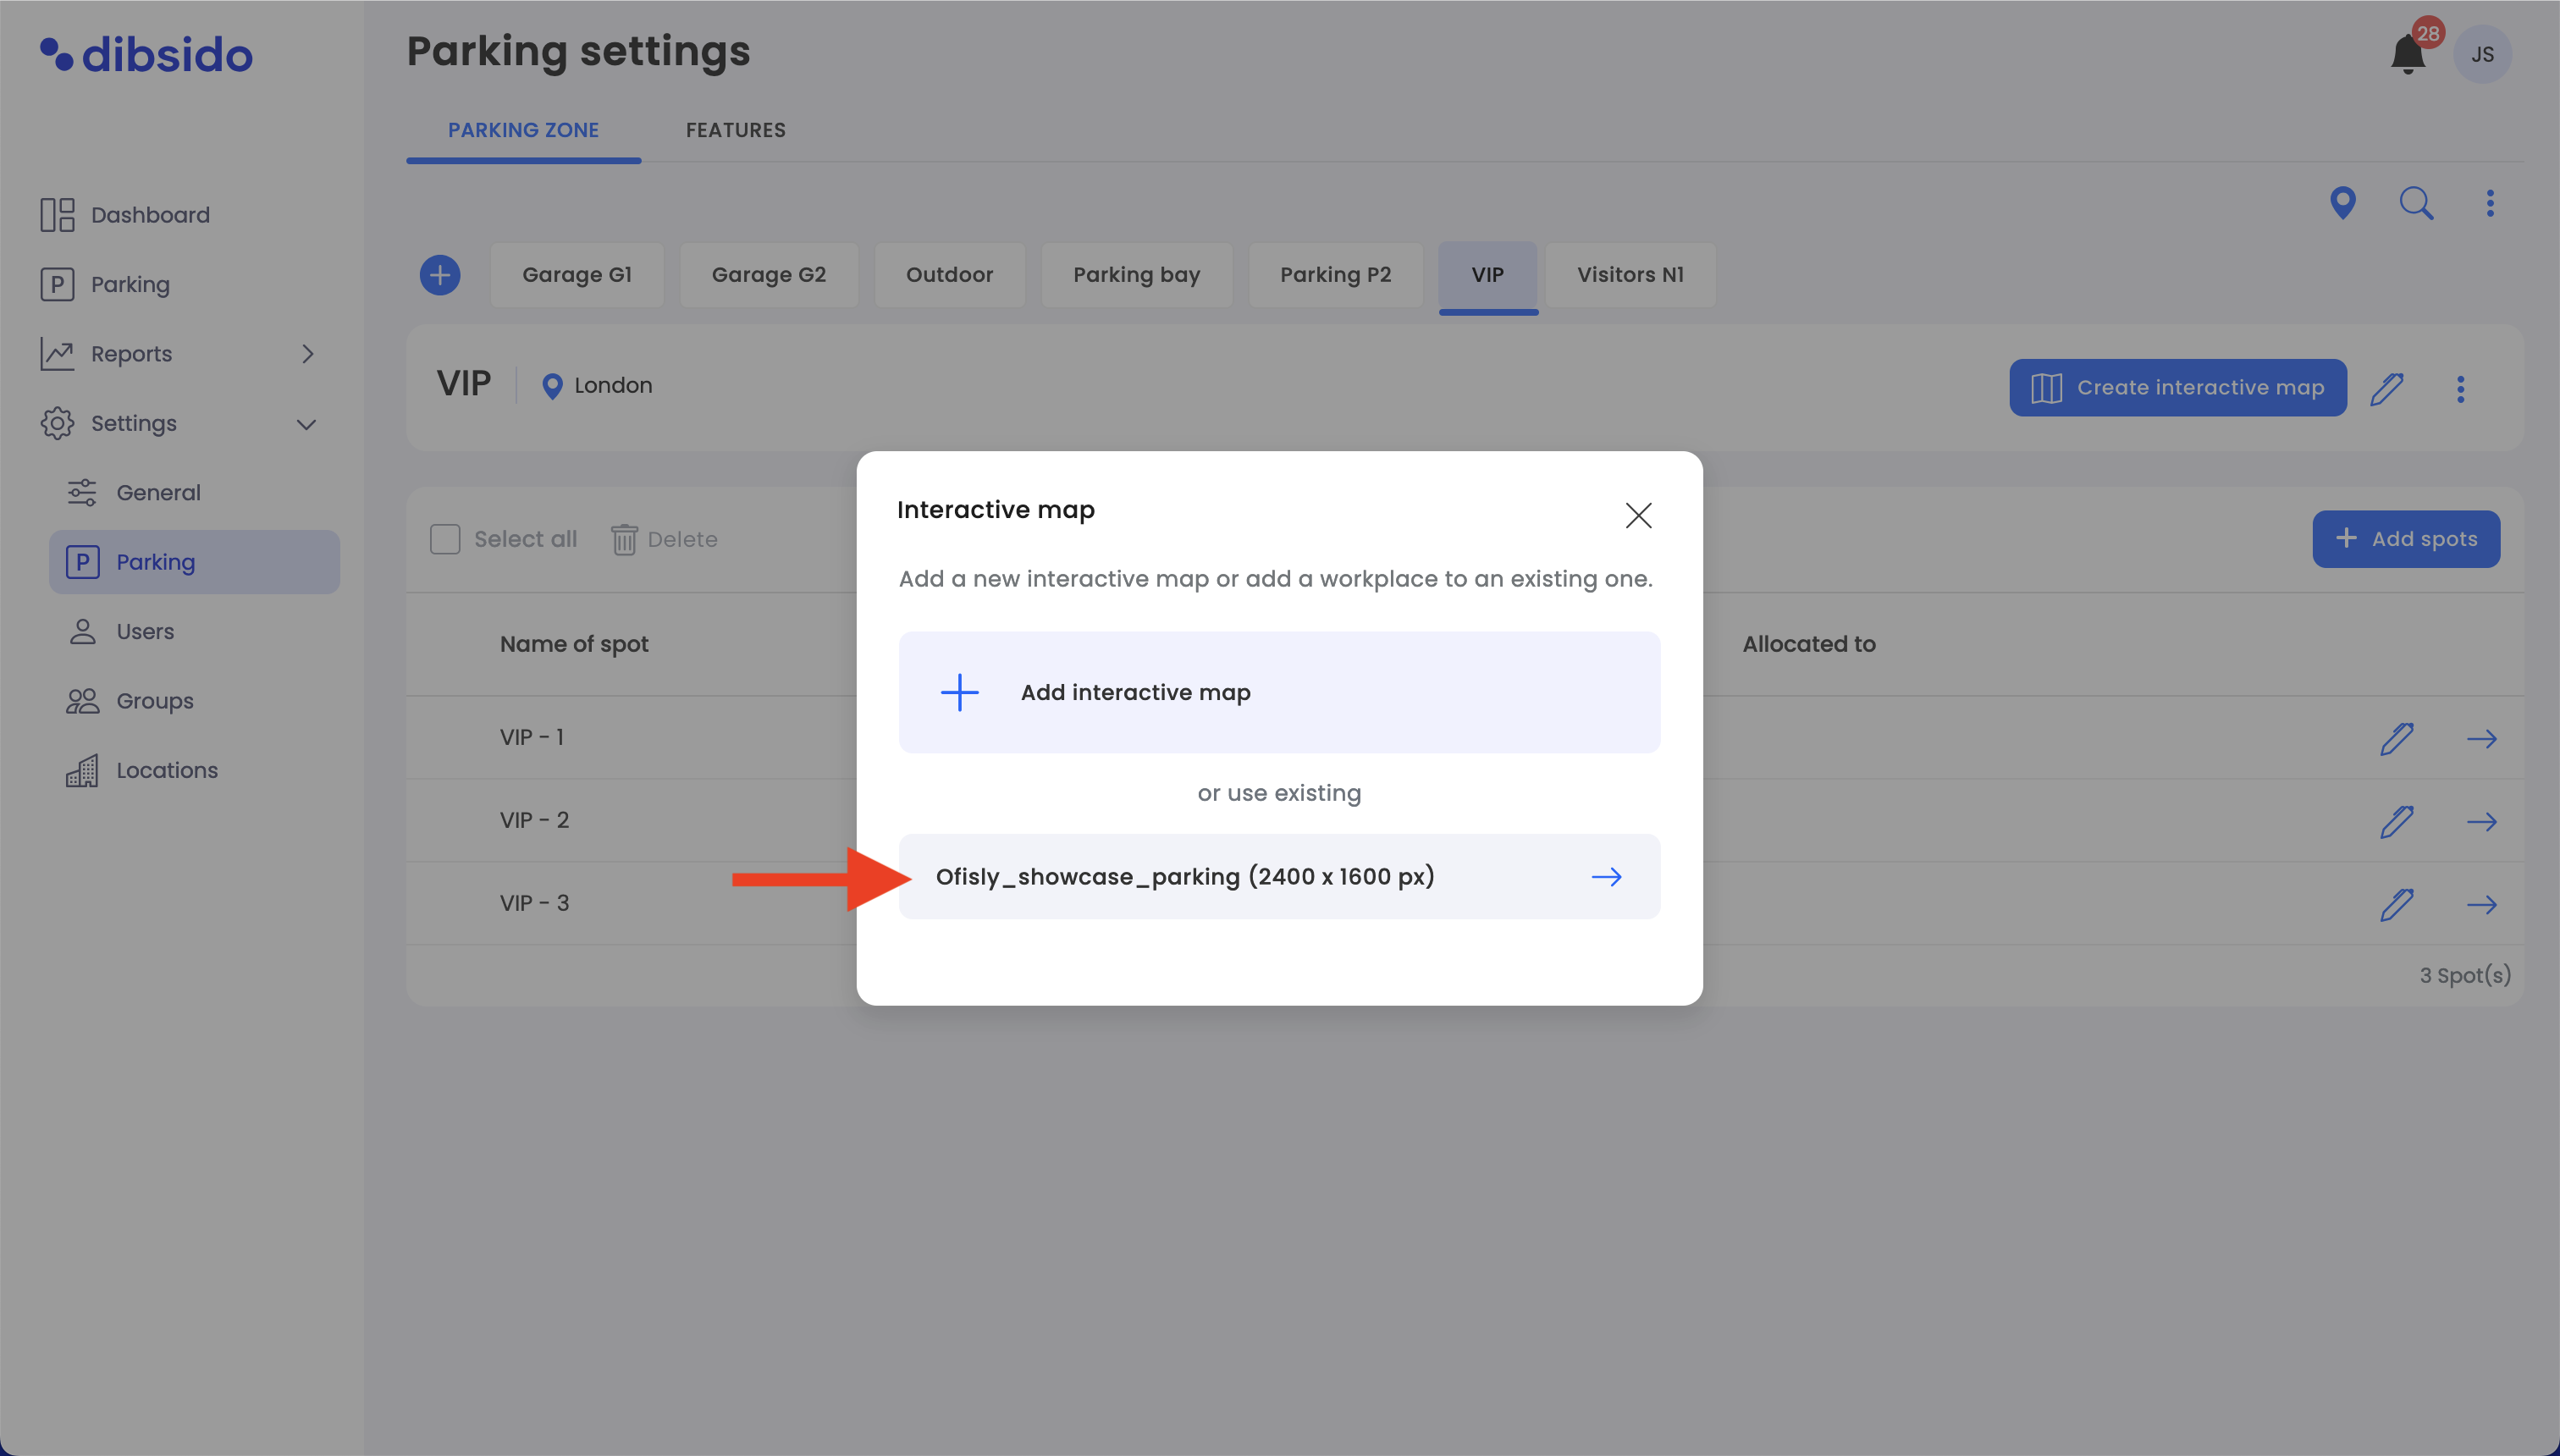
Access the map detail page:
You will be directed to the map detail page where you can edit marker locations on the map. This page shows the current layout of parking spots on the interactive map.
Edit parking zones:
On the left panel of the map detail page, find the section labeled "Parking zones."
Click on the pen icon next to the parking zone you want to edit or expand.
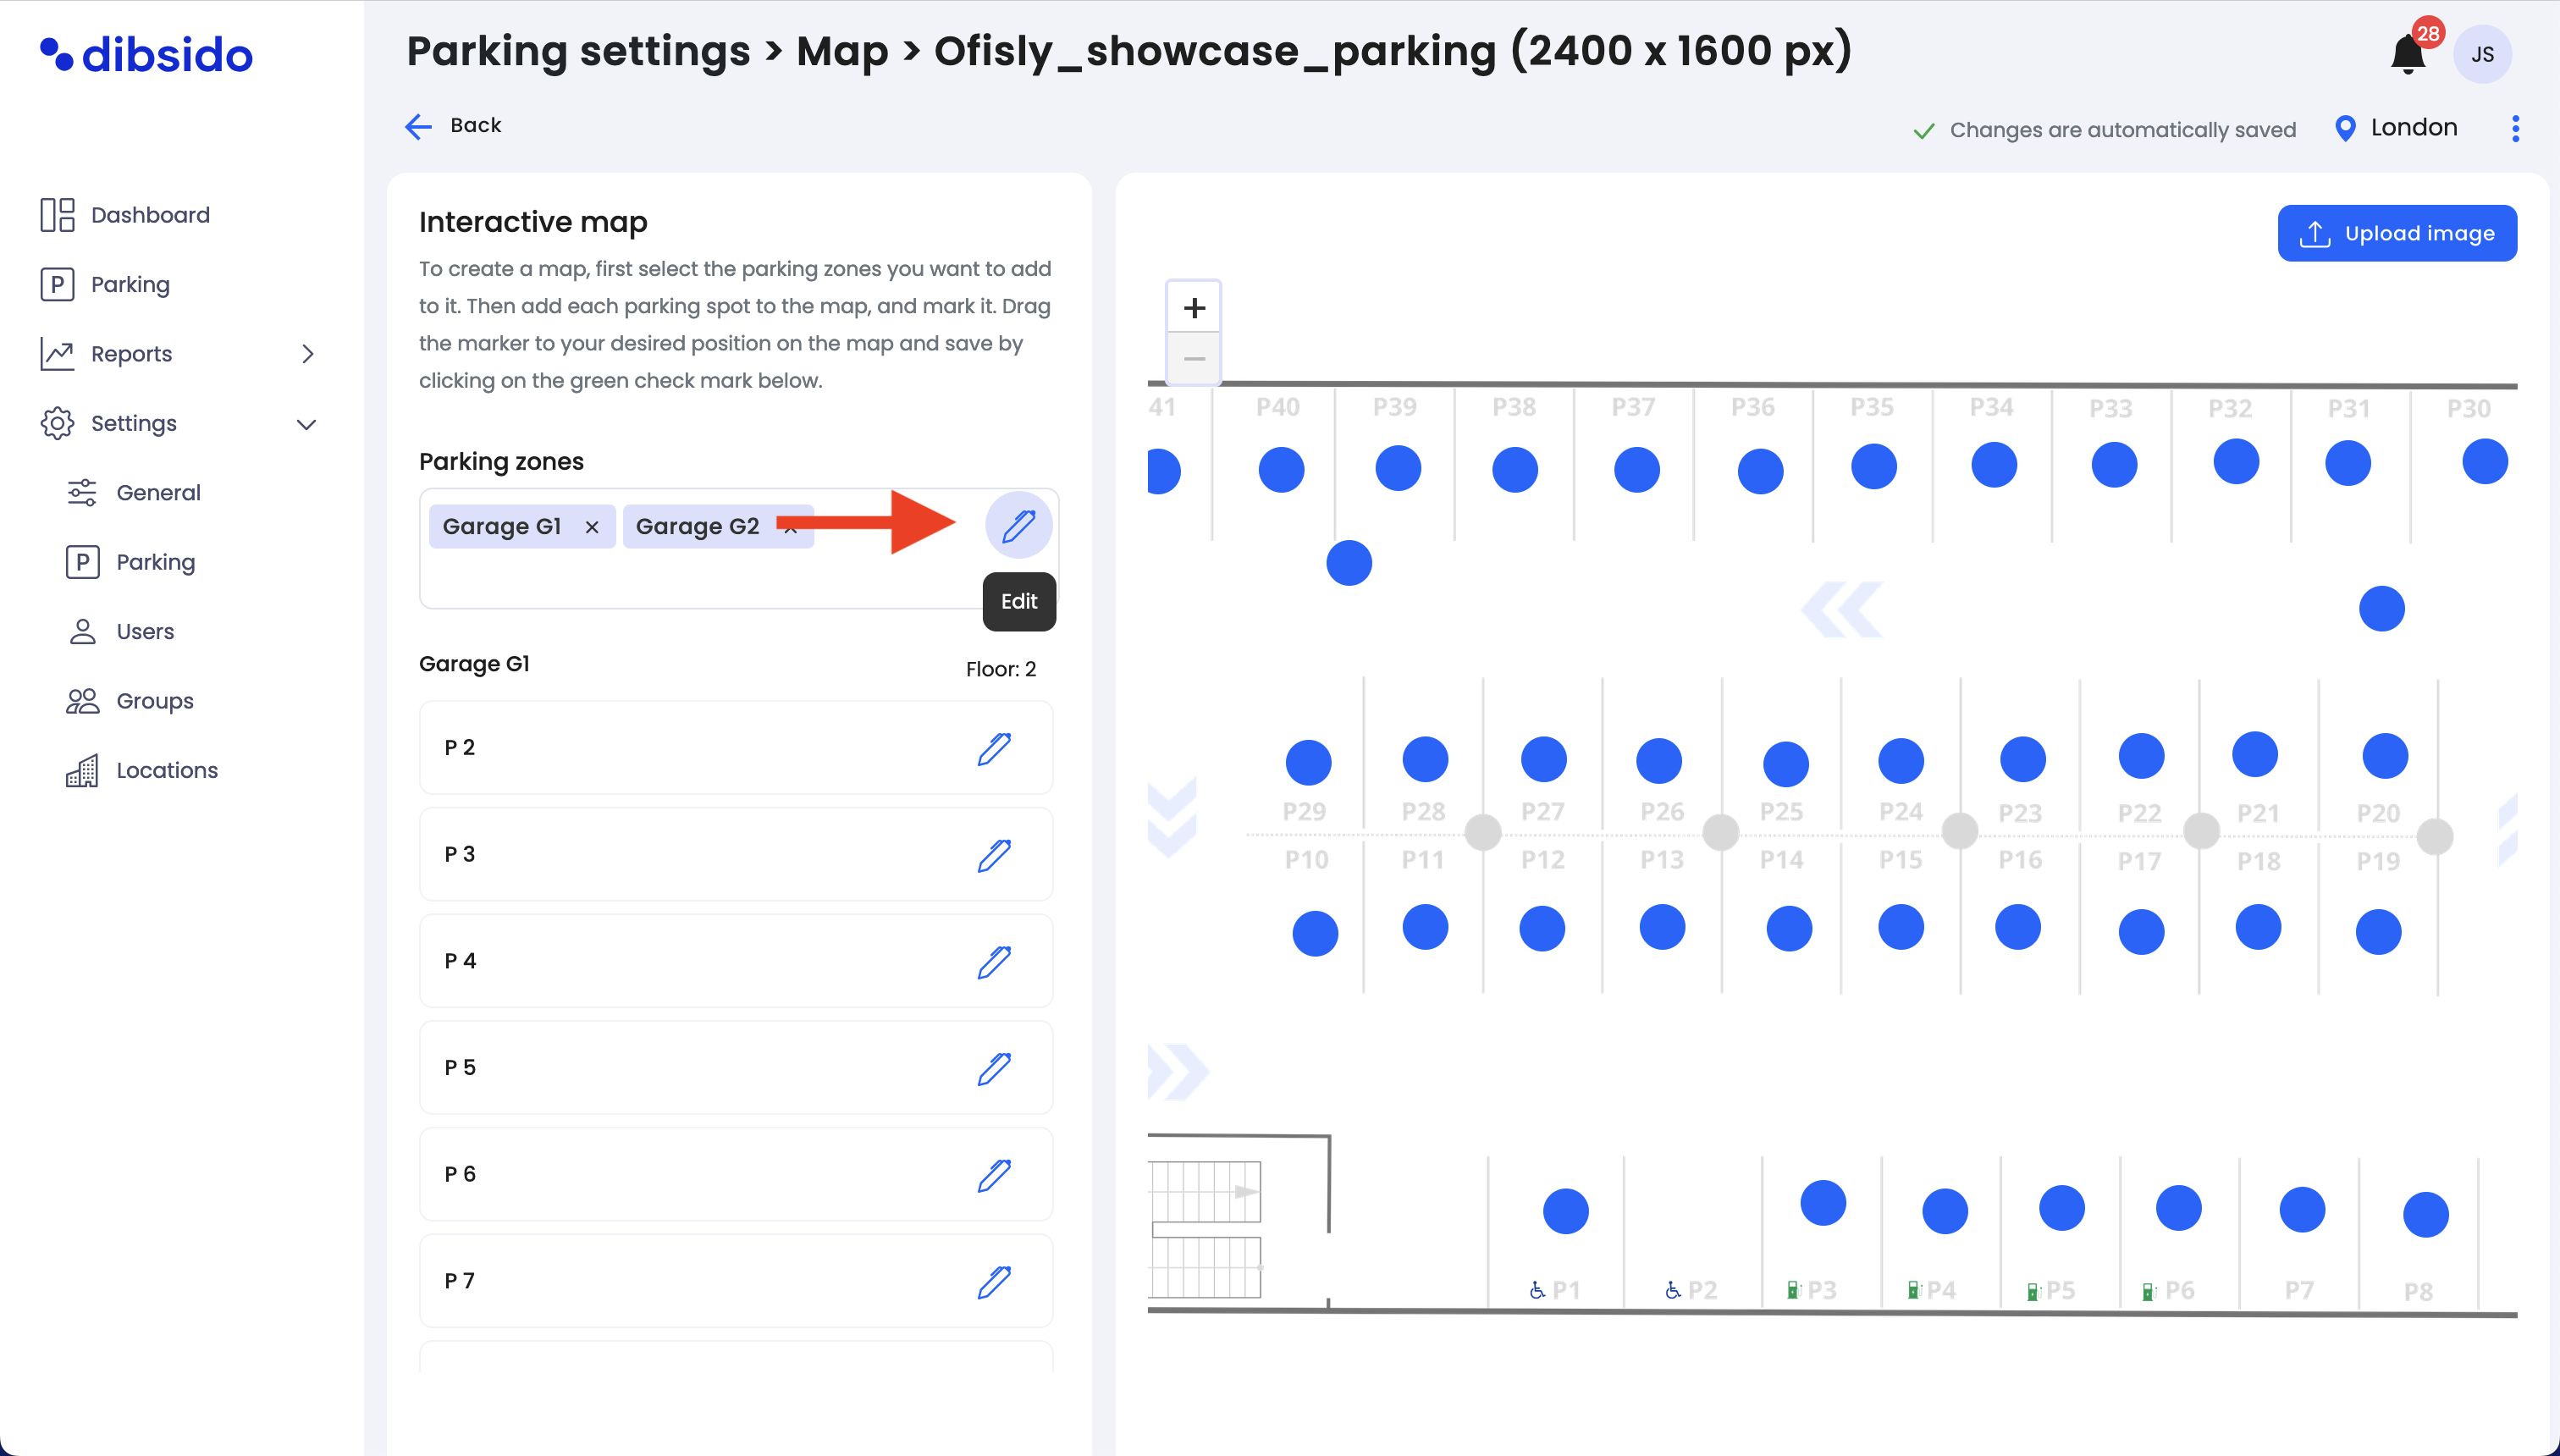
Add more parking zones:
In the parking zone editing panel, you can add additional parking zones as needed. Enter the details for each new parking zone and hit "Save."
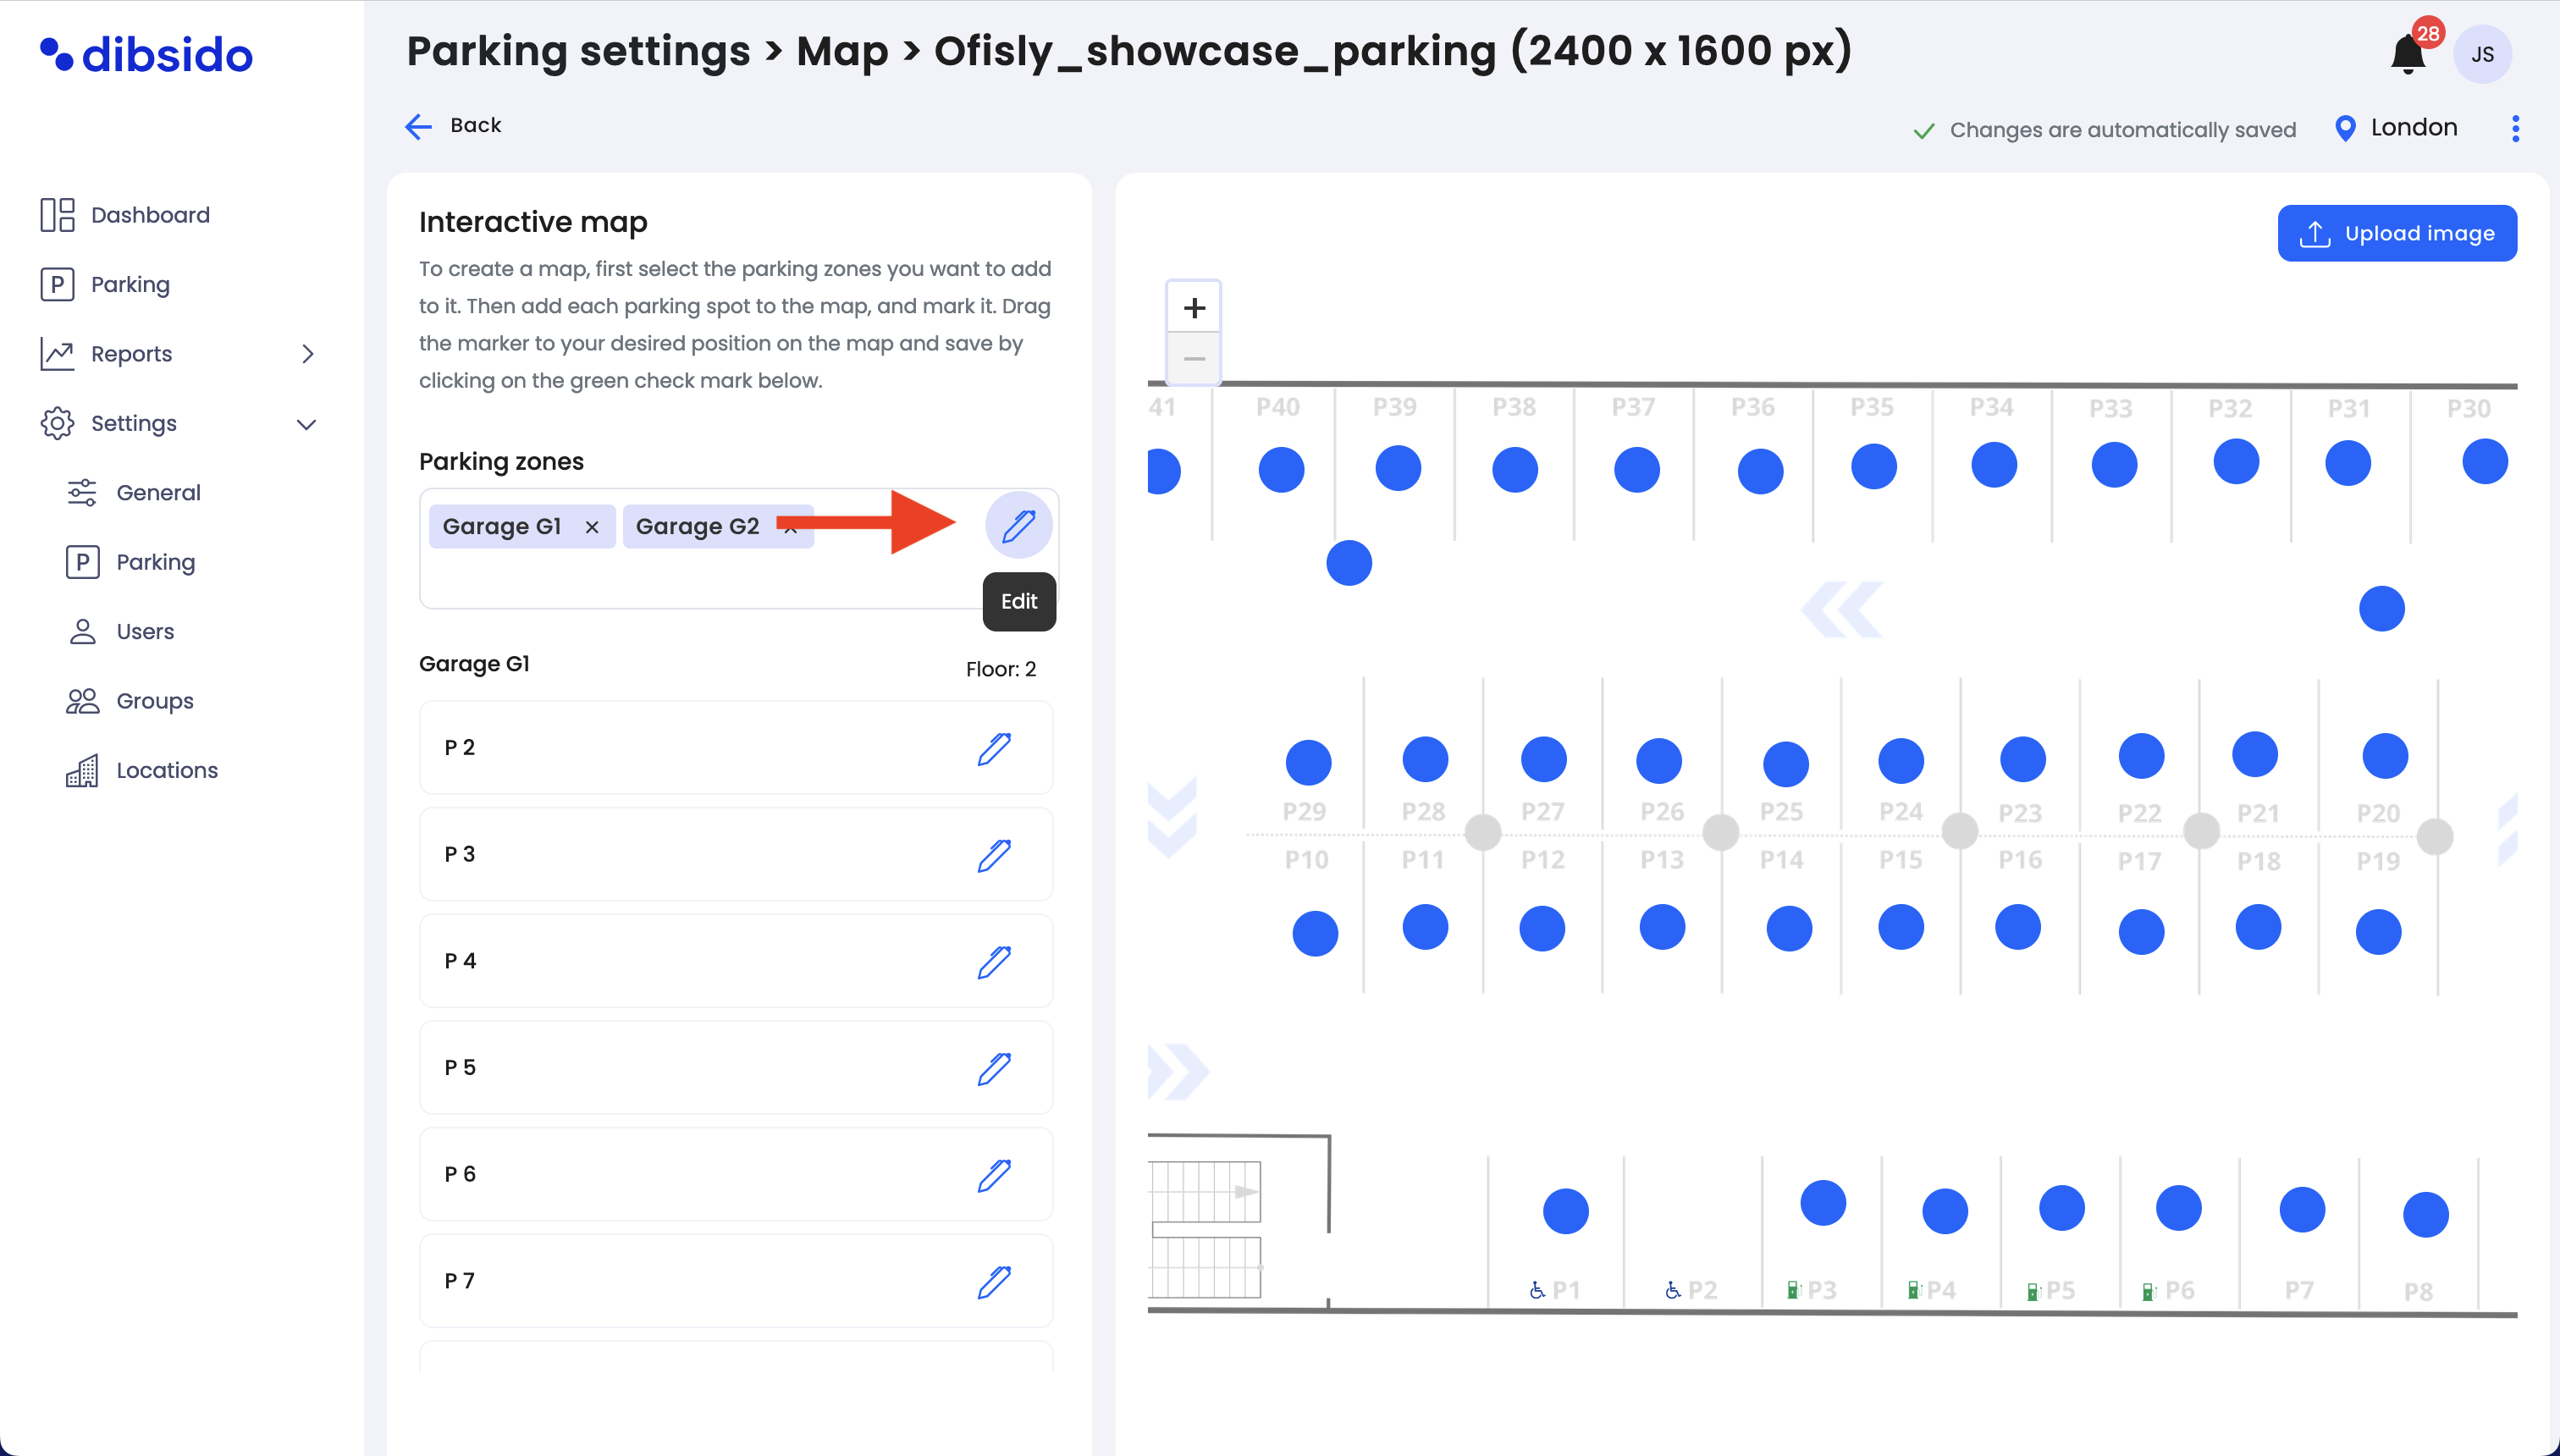
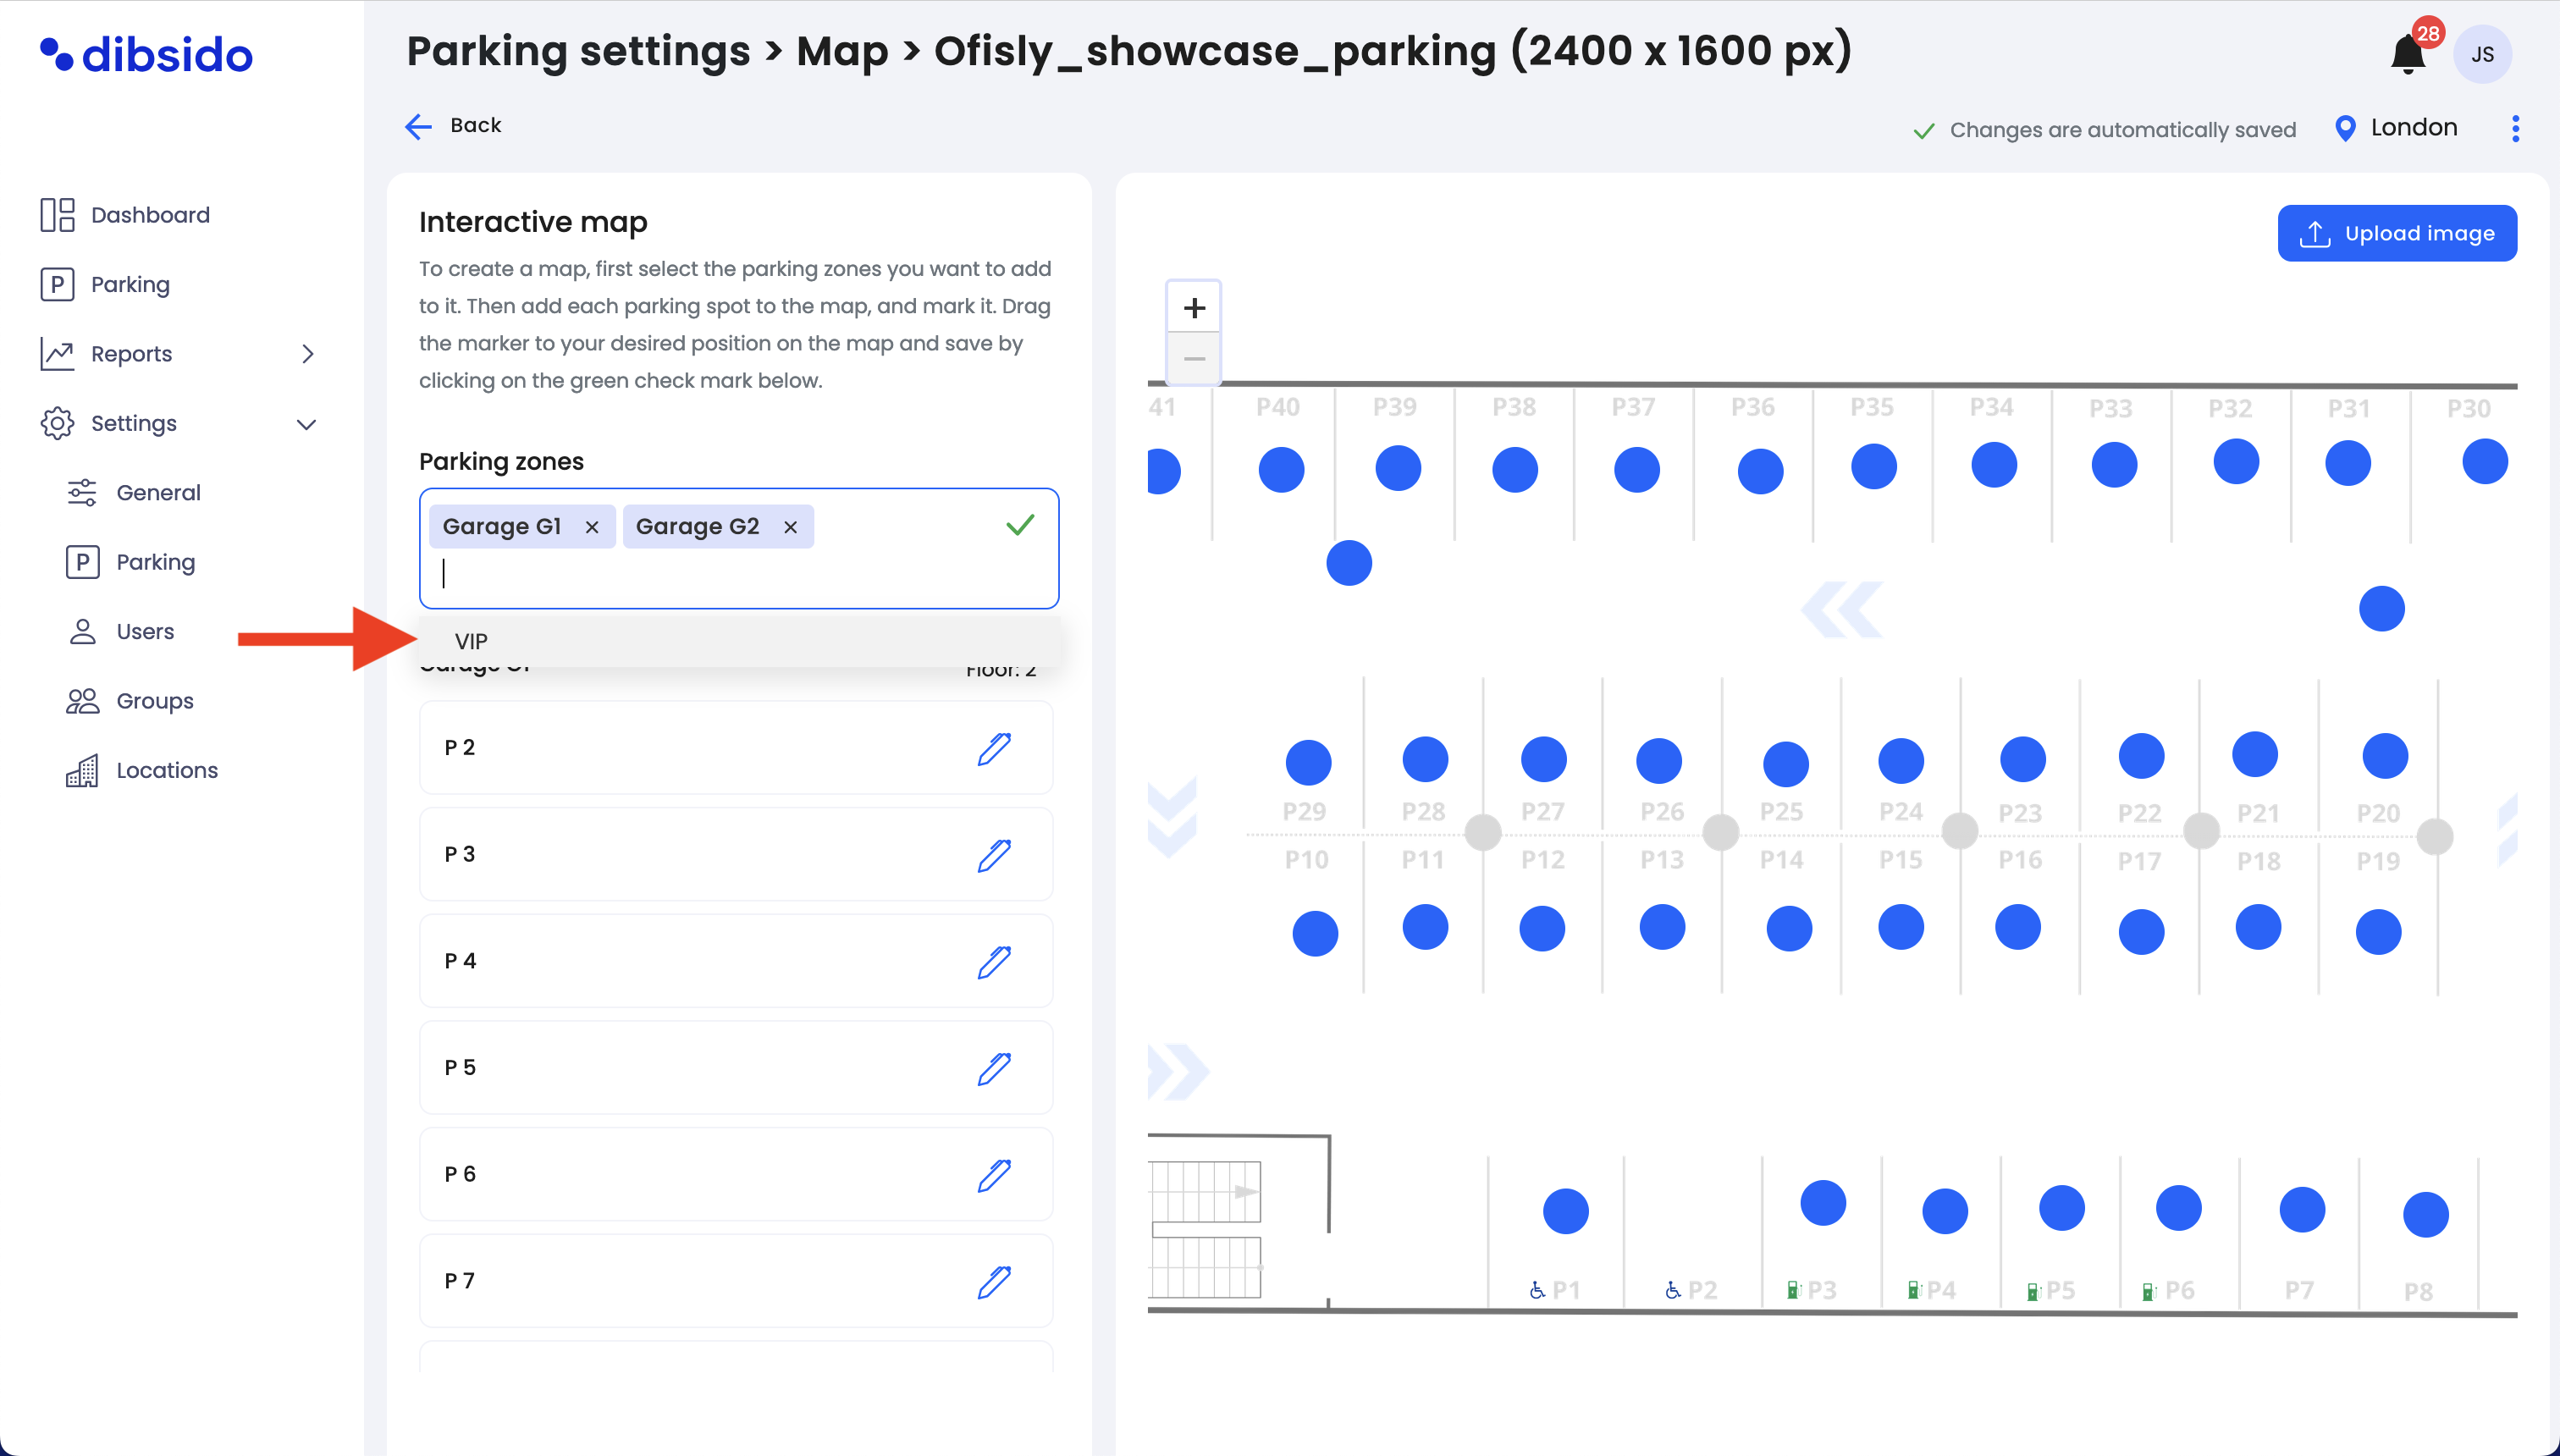
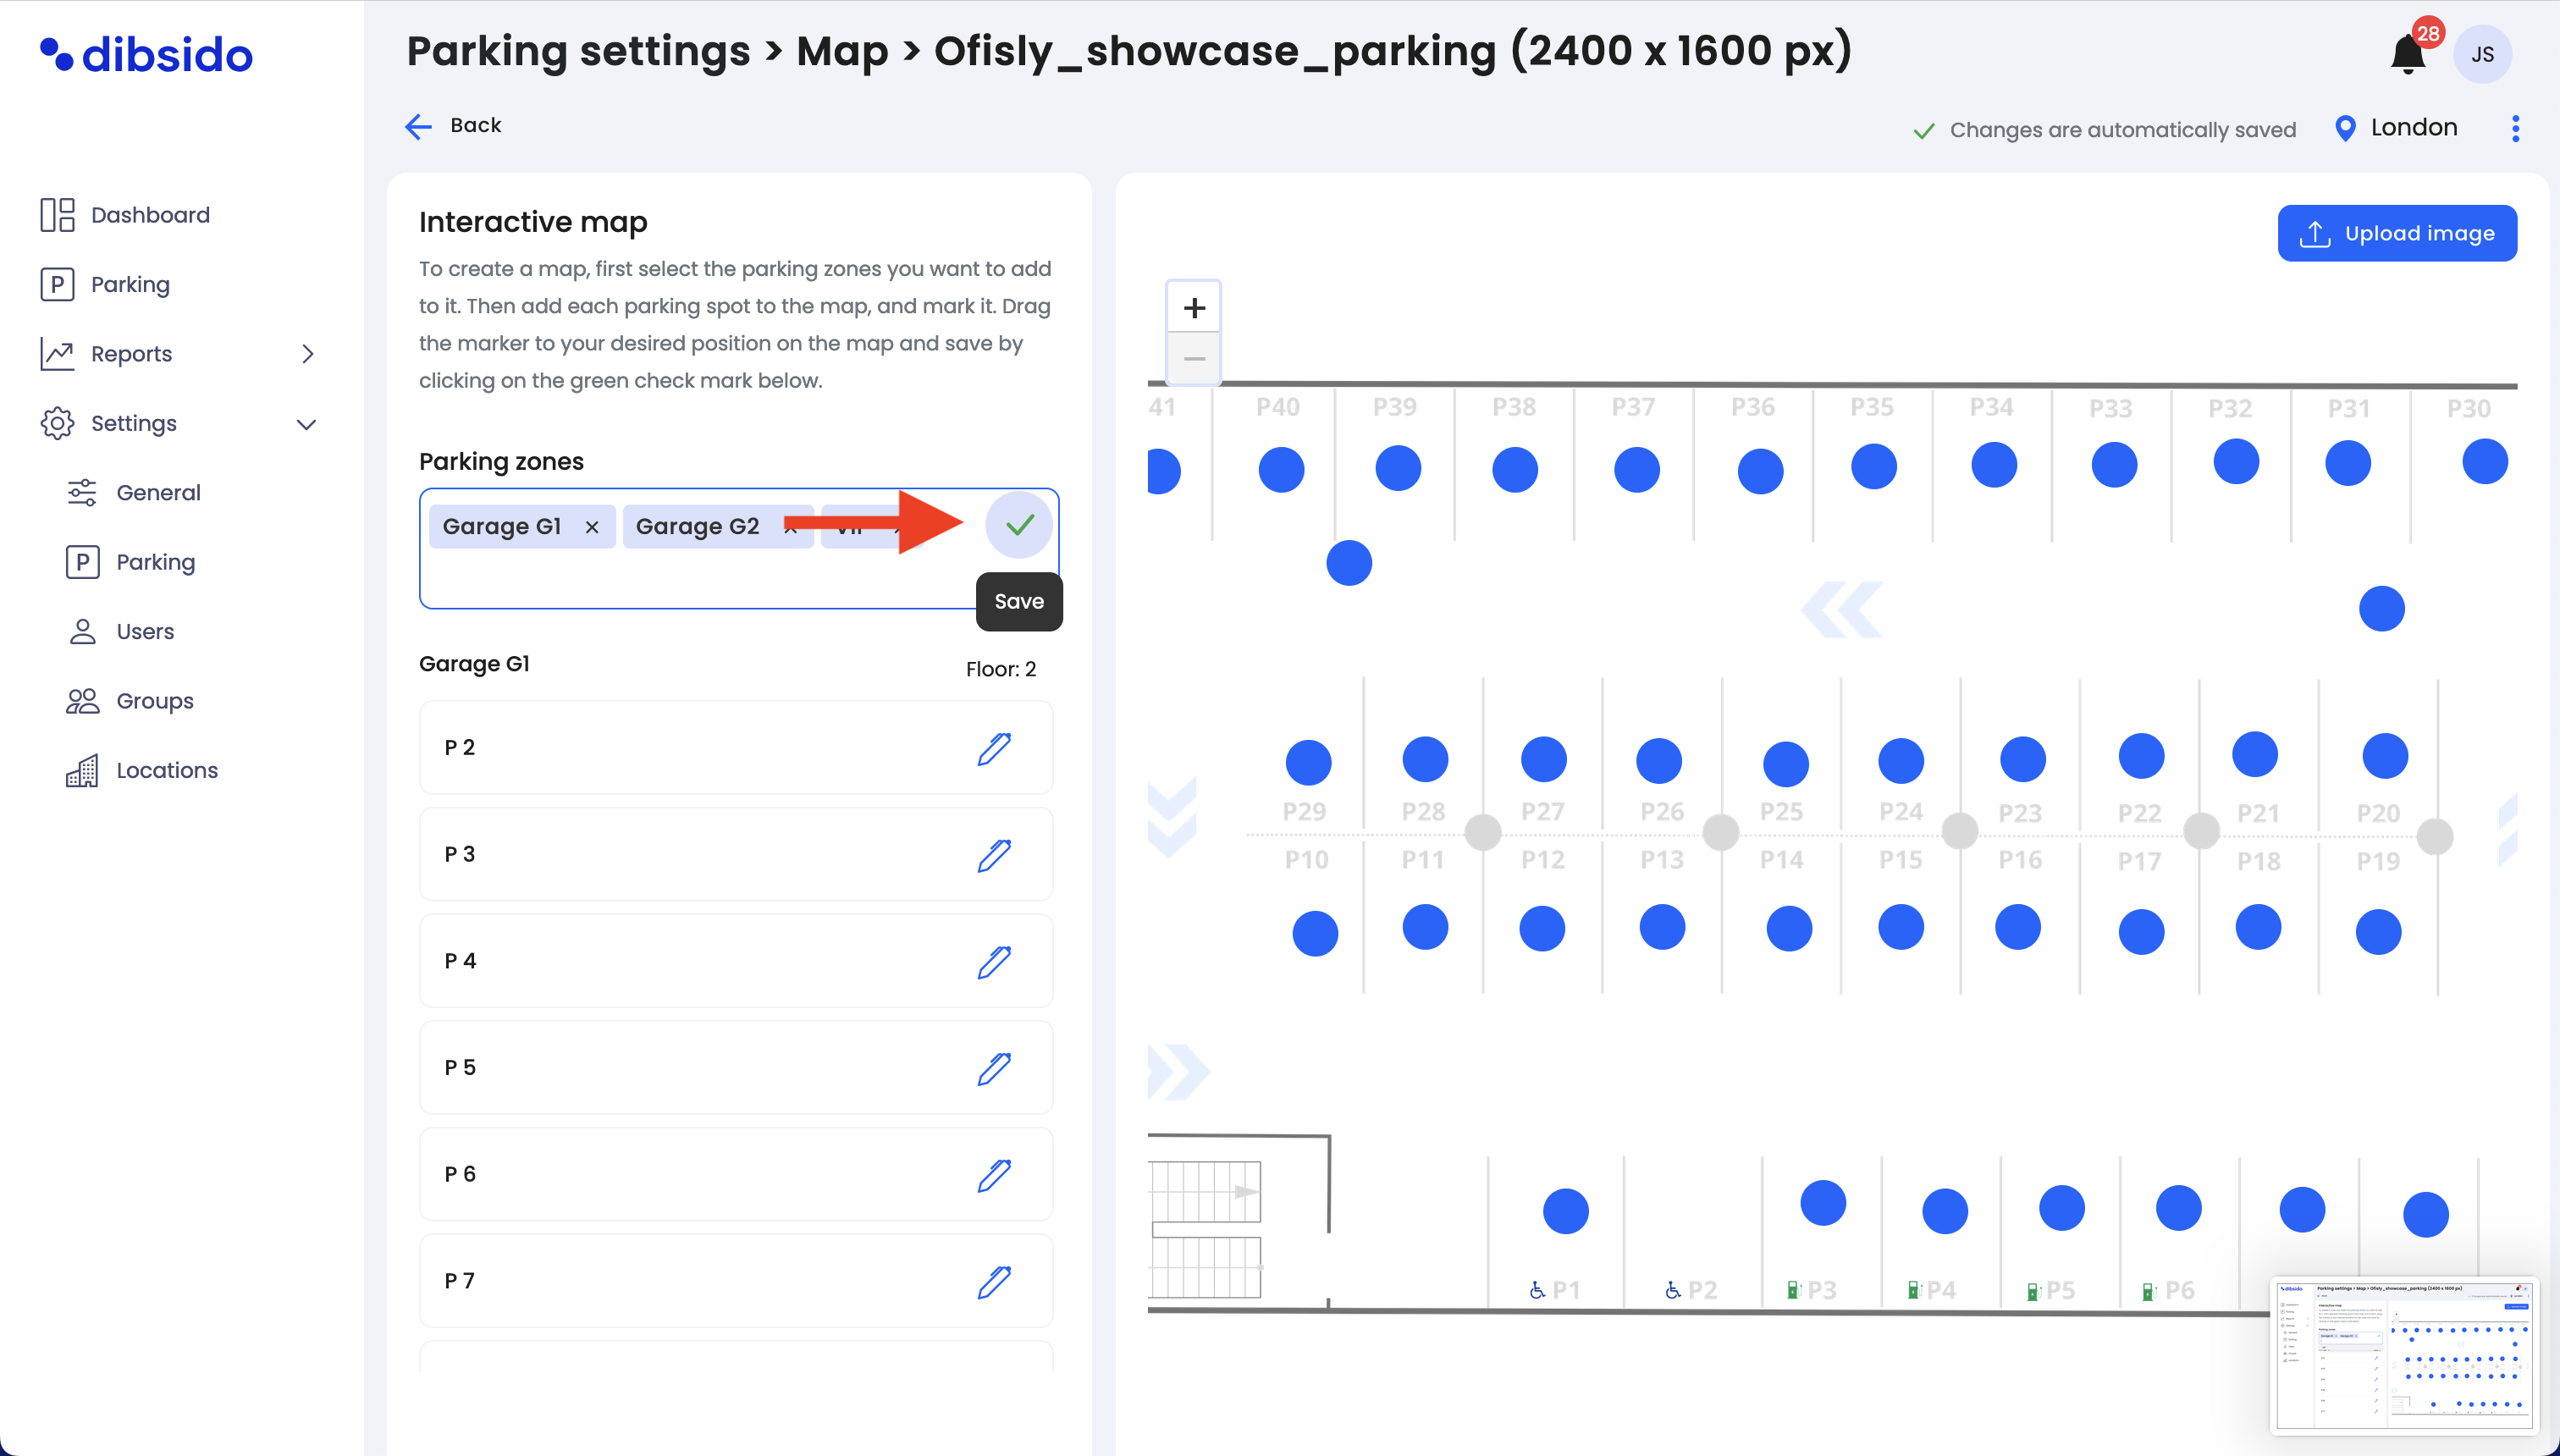
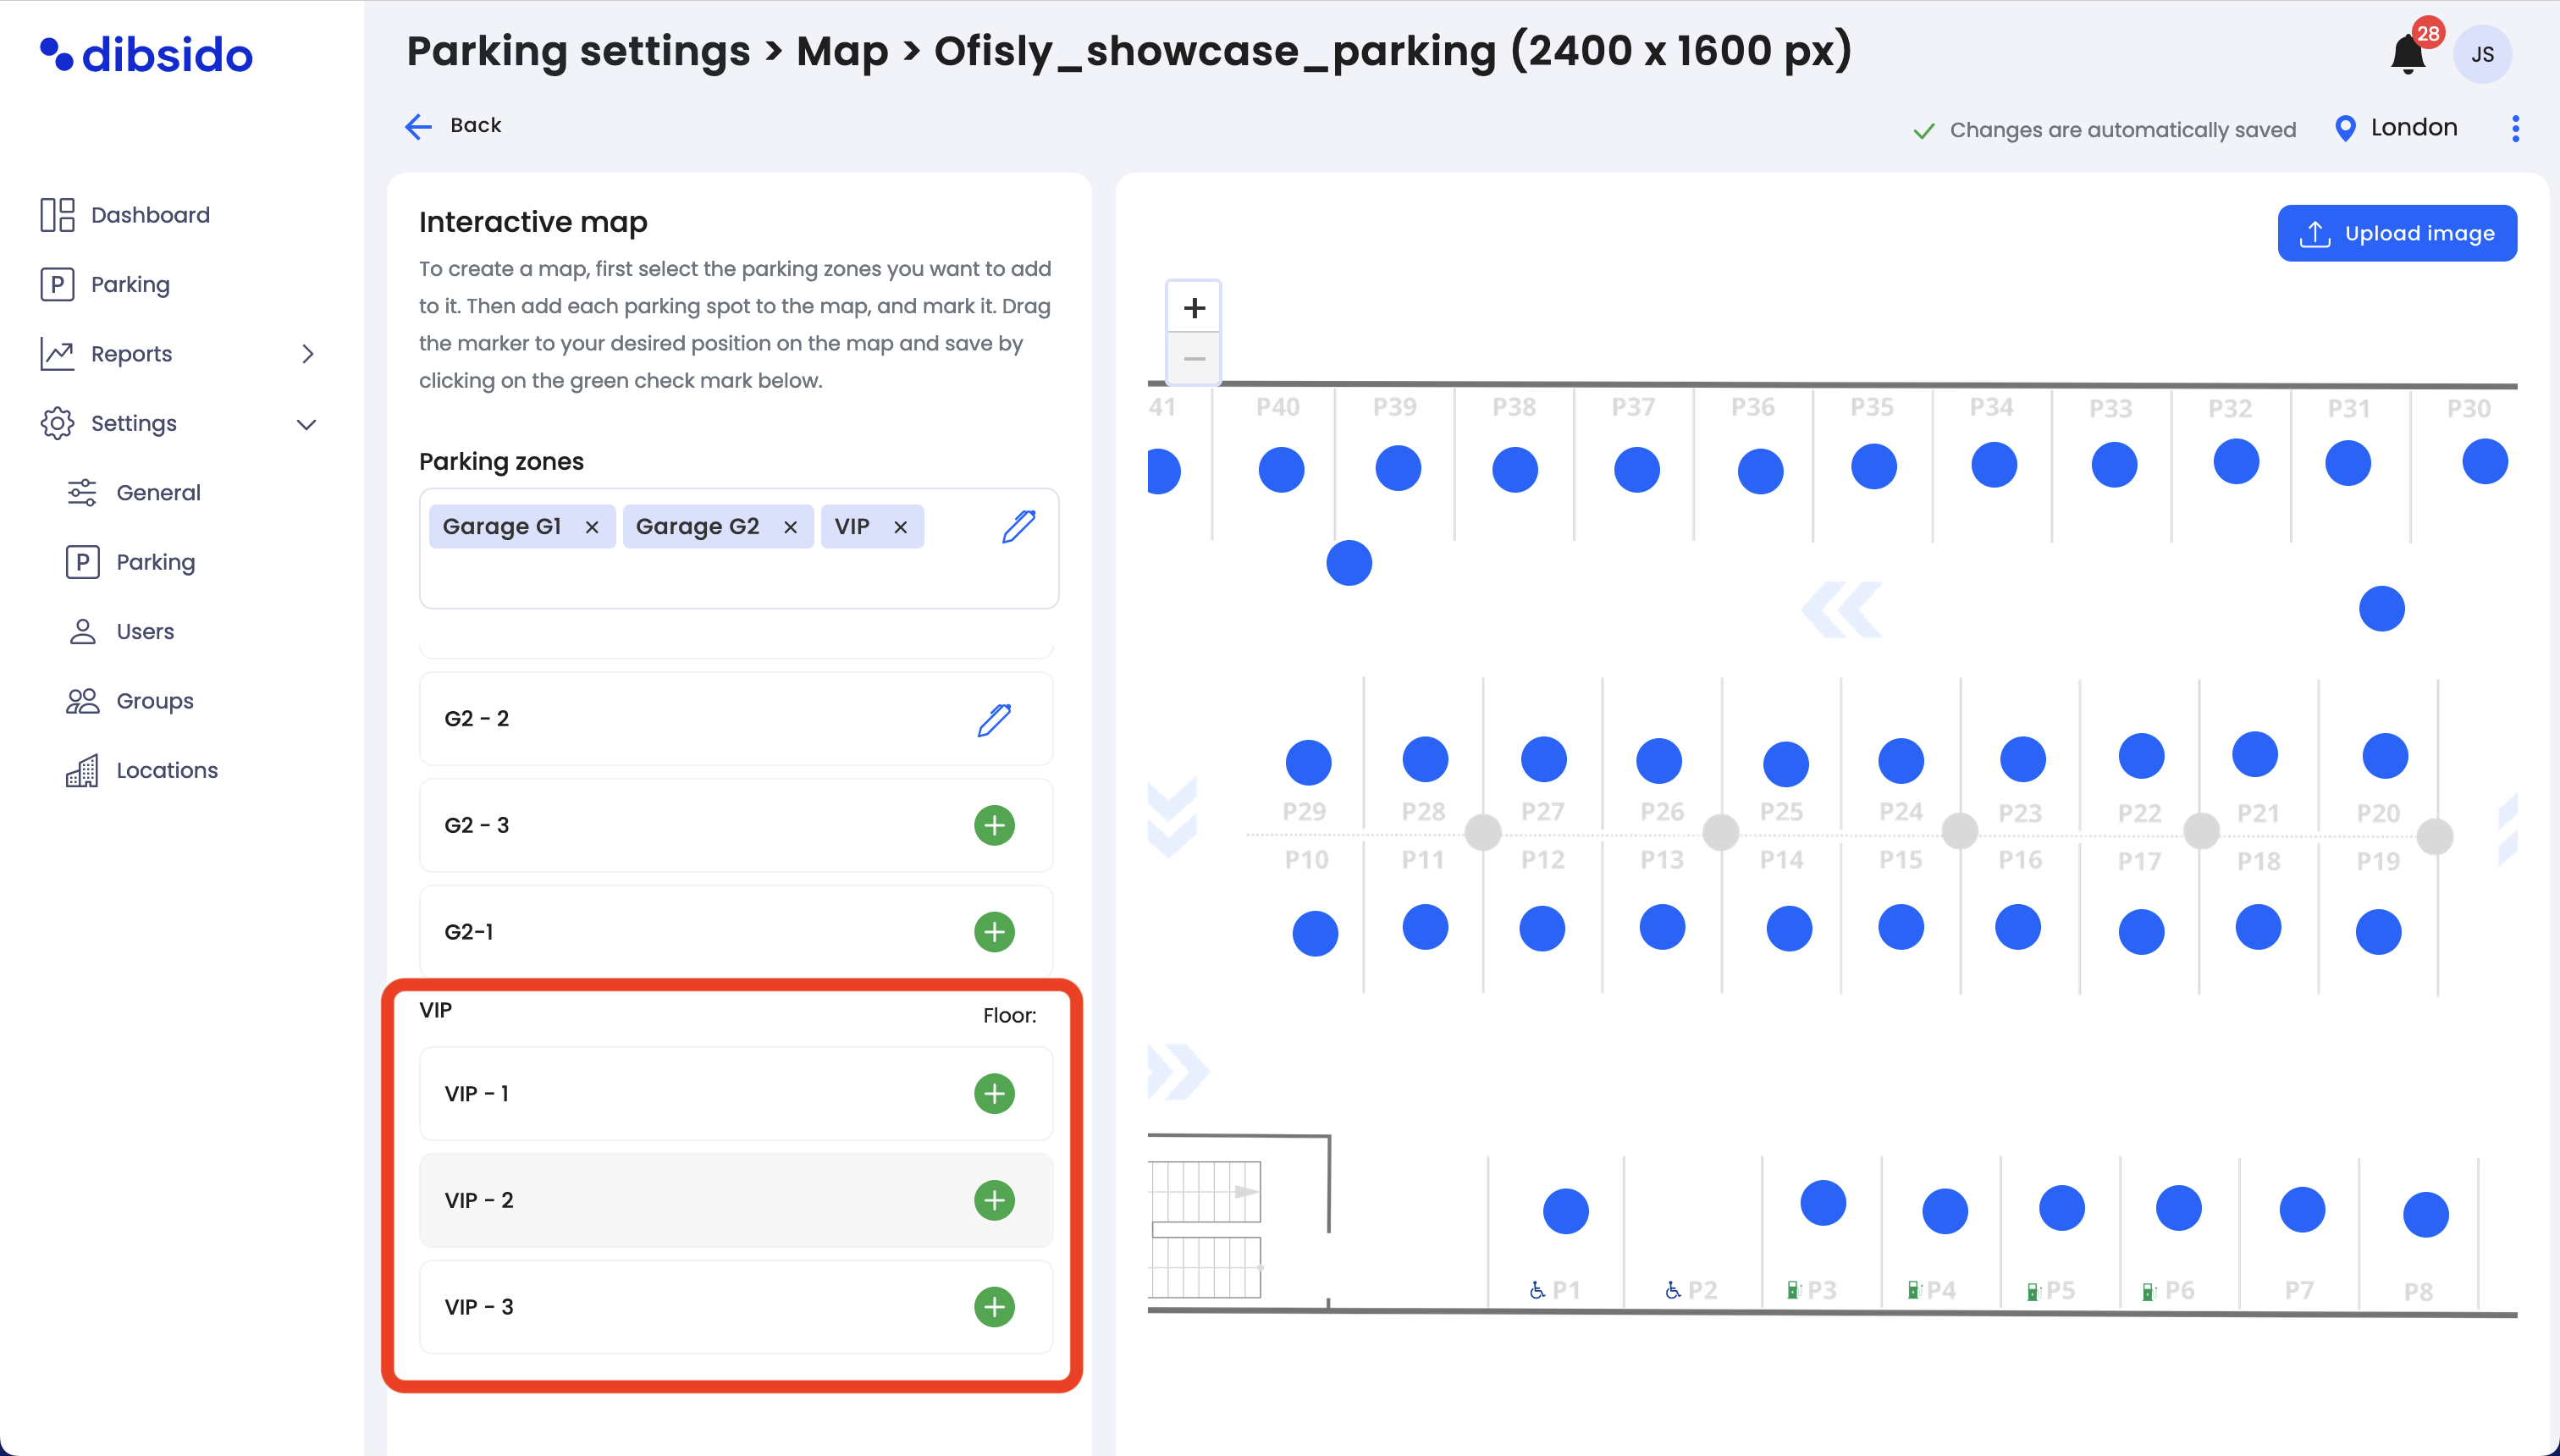
After saving, these new parking zones will appear in the box below the panel.
Add parking spots to the map:
Once the new parking zones are saved, you can start adding parking spots from these zones to the interactive map. Drag and drop the parking spots from the left panel onto the map, placing them in their appropriate locations.
Publish the map:
While changes are saved automatically, remember to publish the map if it’s not already published to make the updates visible to users.
By following these steps, you can easily expand your existing interactive map to include additional parking zones and spots, allowing you to efficiently manage and optimize your parking area.