Navigate to settings:
Click on the "Settings" located in the left menu of the Dibsido interface.
Access the Users tab:
In the Settings menu, click on the "Users" tab to view a list of all users in your workspace.
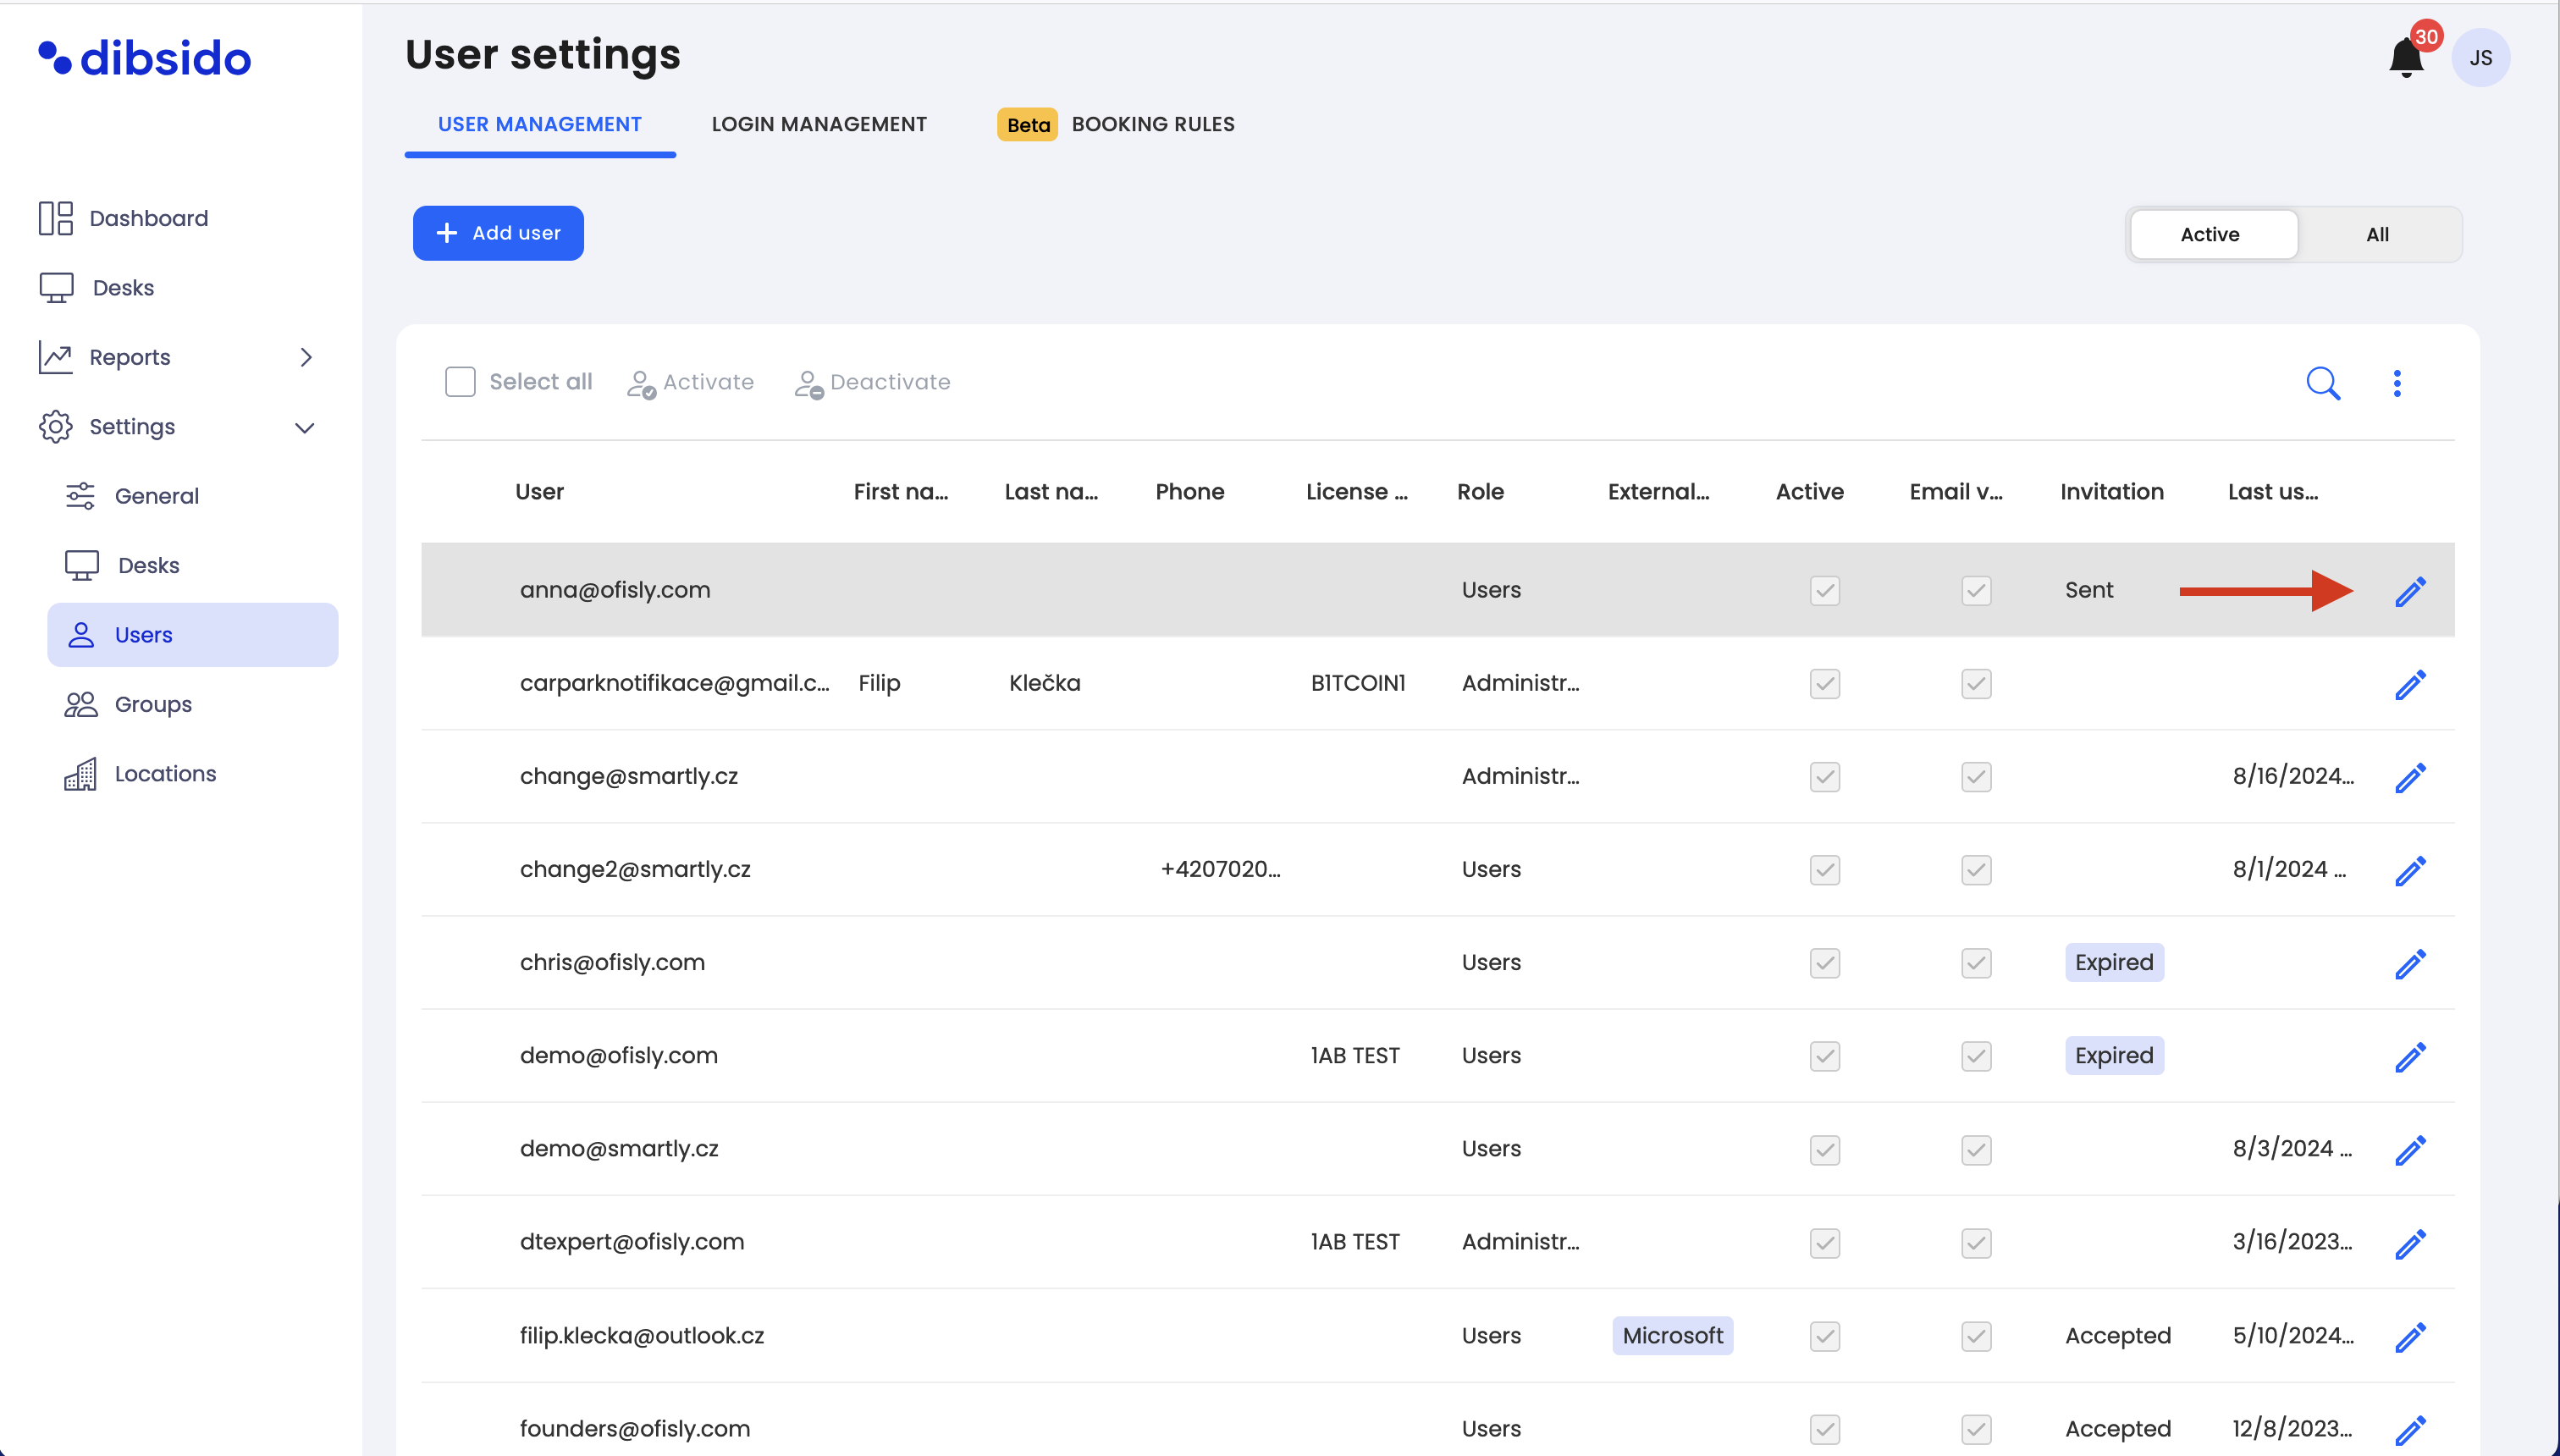
Select a user to edit:
Find the user whose permissions you want to adjust.
Click on the pencil icon next to their name to open their account details.
Set the desired permissions:
Under the "Account Type" section, select the appropriate permissions for the user. This will determine what actions they can perform within Dibsido.
You can choose from different levels of access depending on the user's role in your organization.
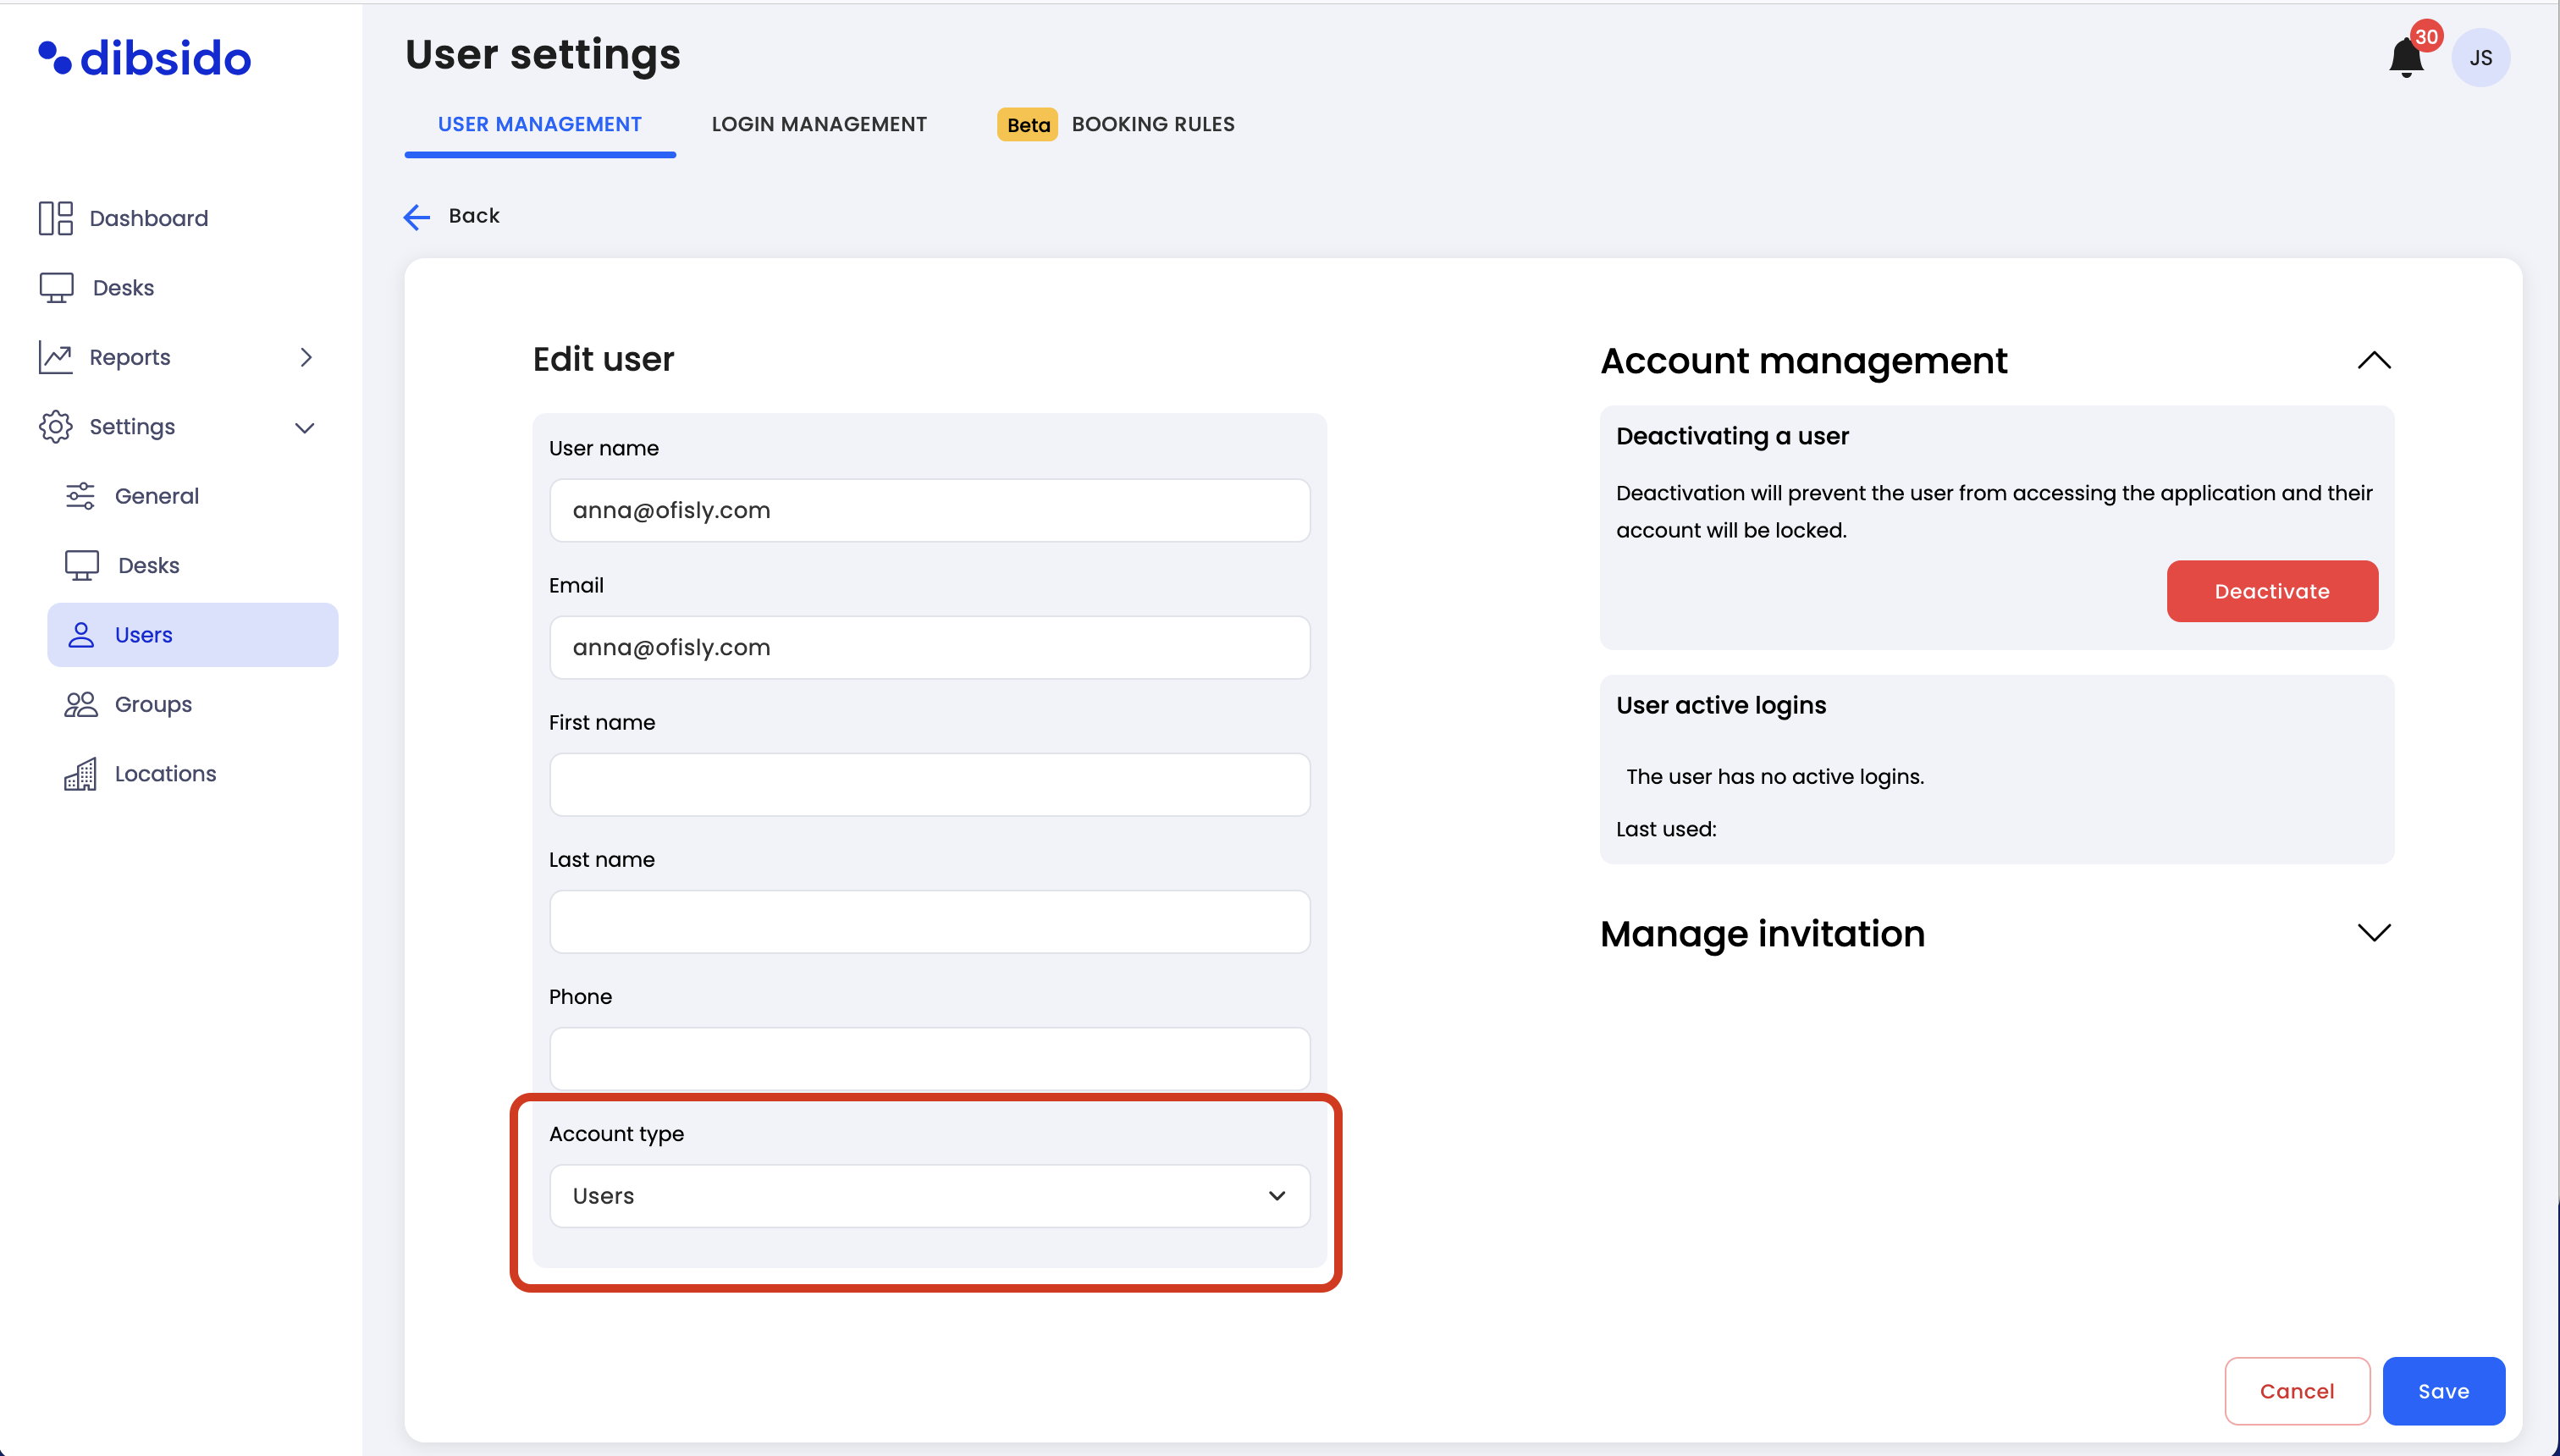
Save the settings:
After selecting the desired permissions, click on the "Save Settings" button to confirm and apply the changes.
For more detailed information on what each permission type entails, please refer to our article on User Roles and Permissions in Dibsido. This article provides an overview of the different account types available and what each role is allowed to do within the app.
Permissions and user roles
This article provides an overview of the user roles and permissions in Dibsido, helping you understand the different levels of access and responsibilities within the platform.
This article provides an overview of the different account types available and what each role is allowed to do within the app.
By following these steps, you can effectively manage user permissions in Dibsido, ensuring that each team member has the right level of access to perform their tasks efficiently.
