Navigate to settings: Start by going to the settings menu in Dibsido.
Select desks settings: Under settings, choose the "Desks" option.
View desk layout: Within the desks settings, navigate to the layout that displays all desks.
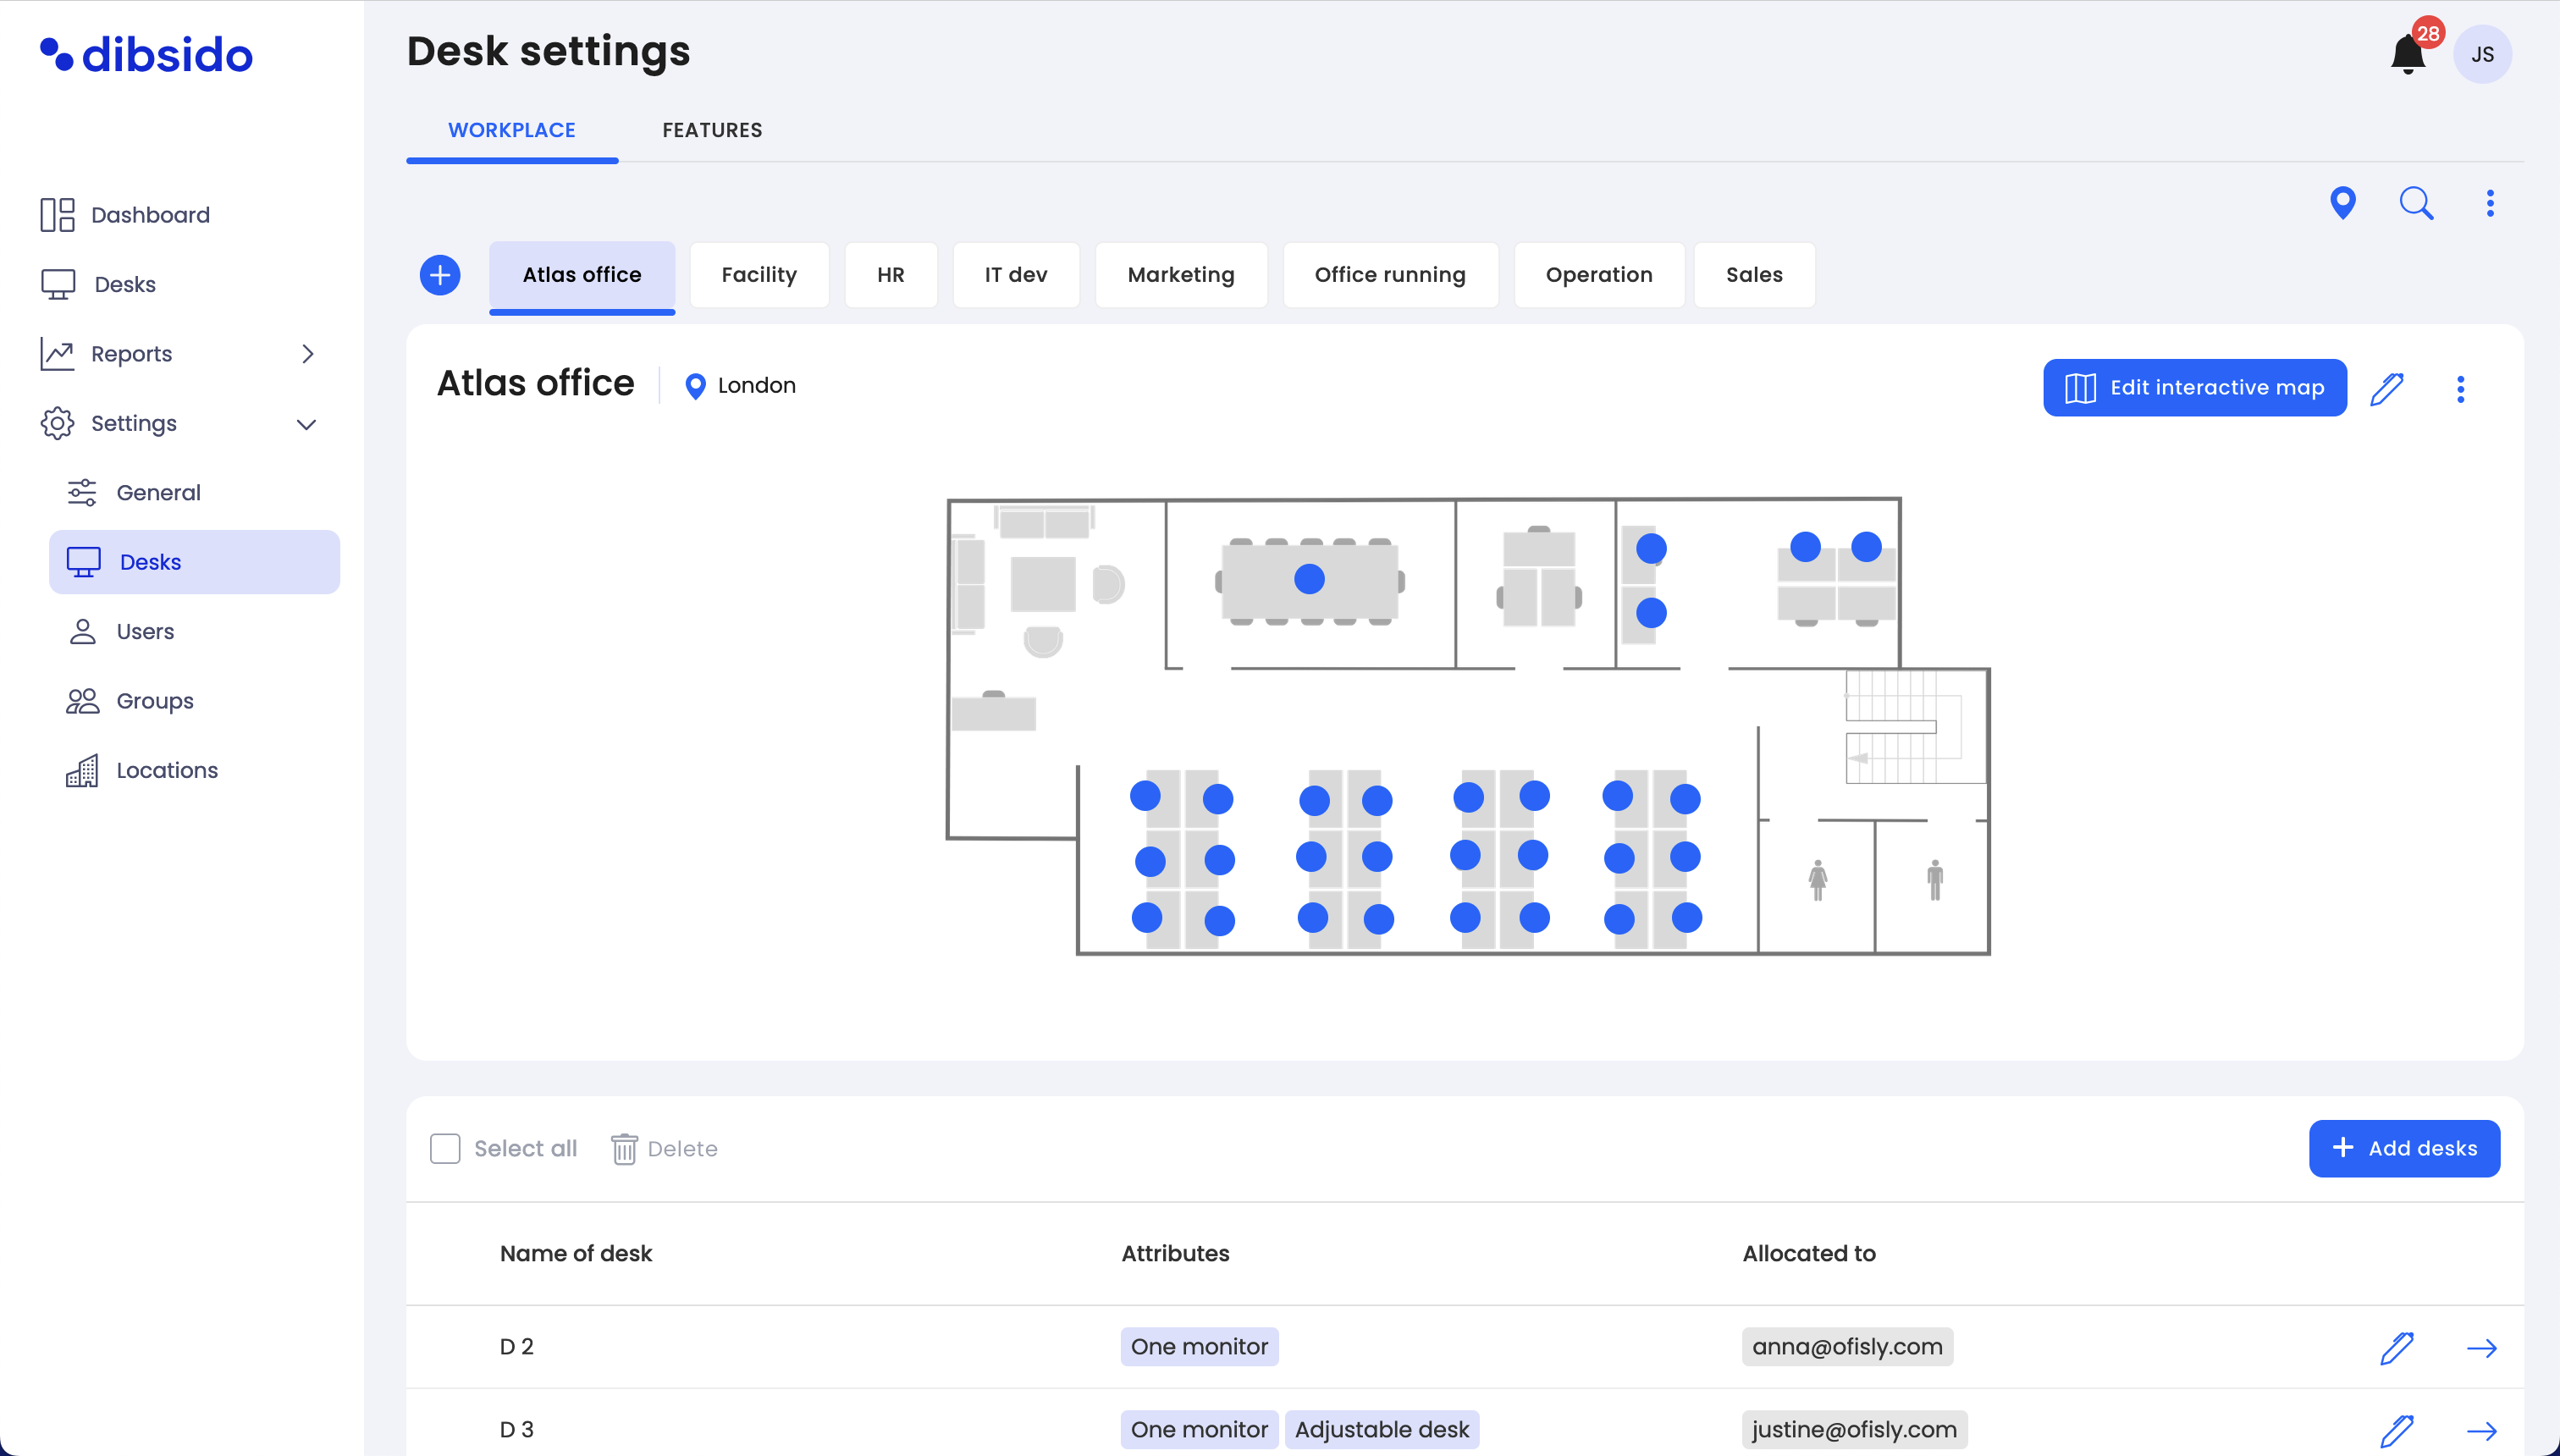
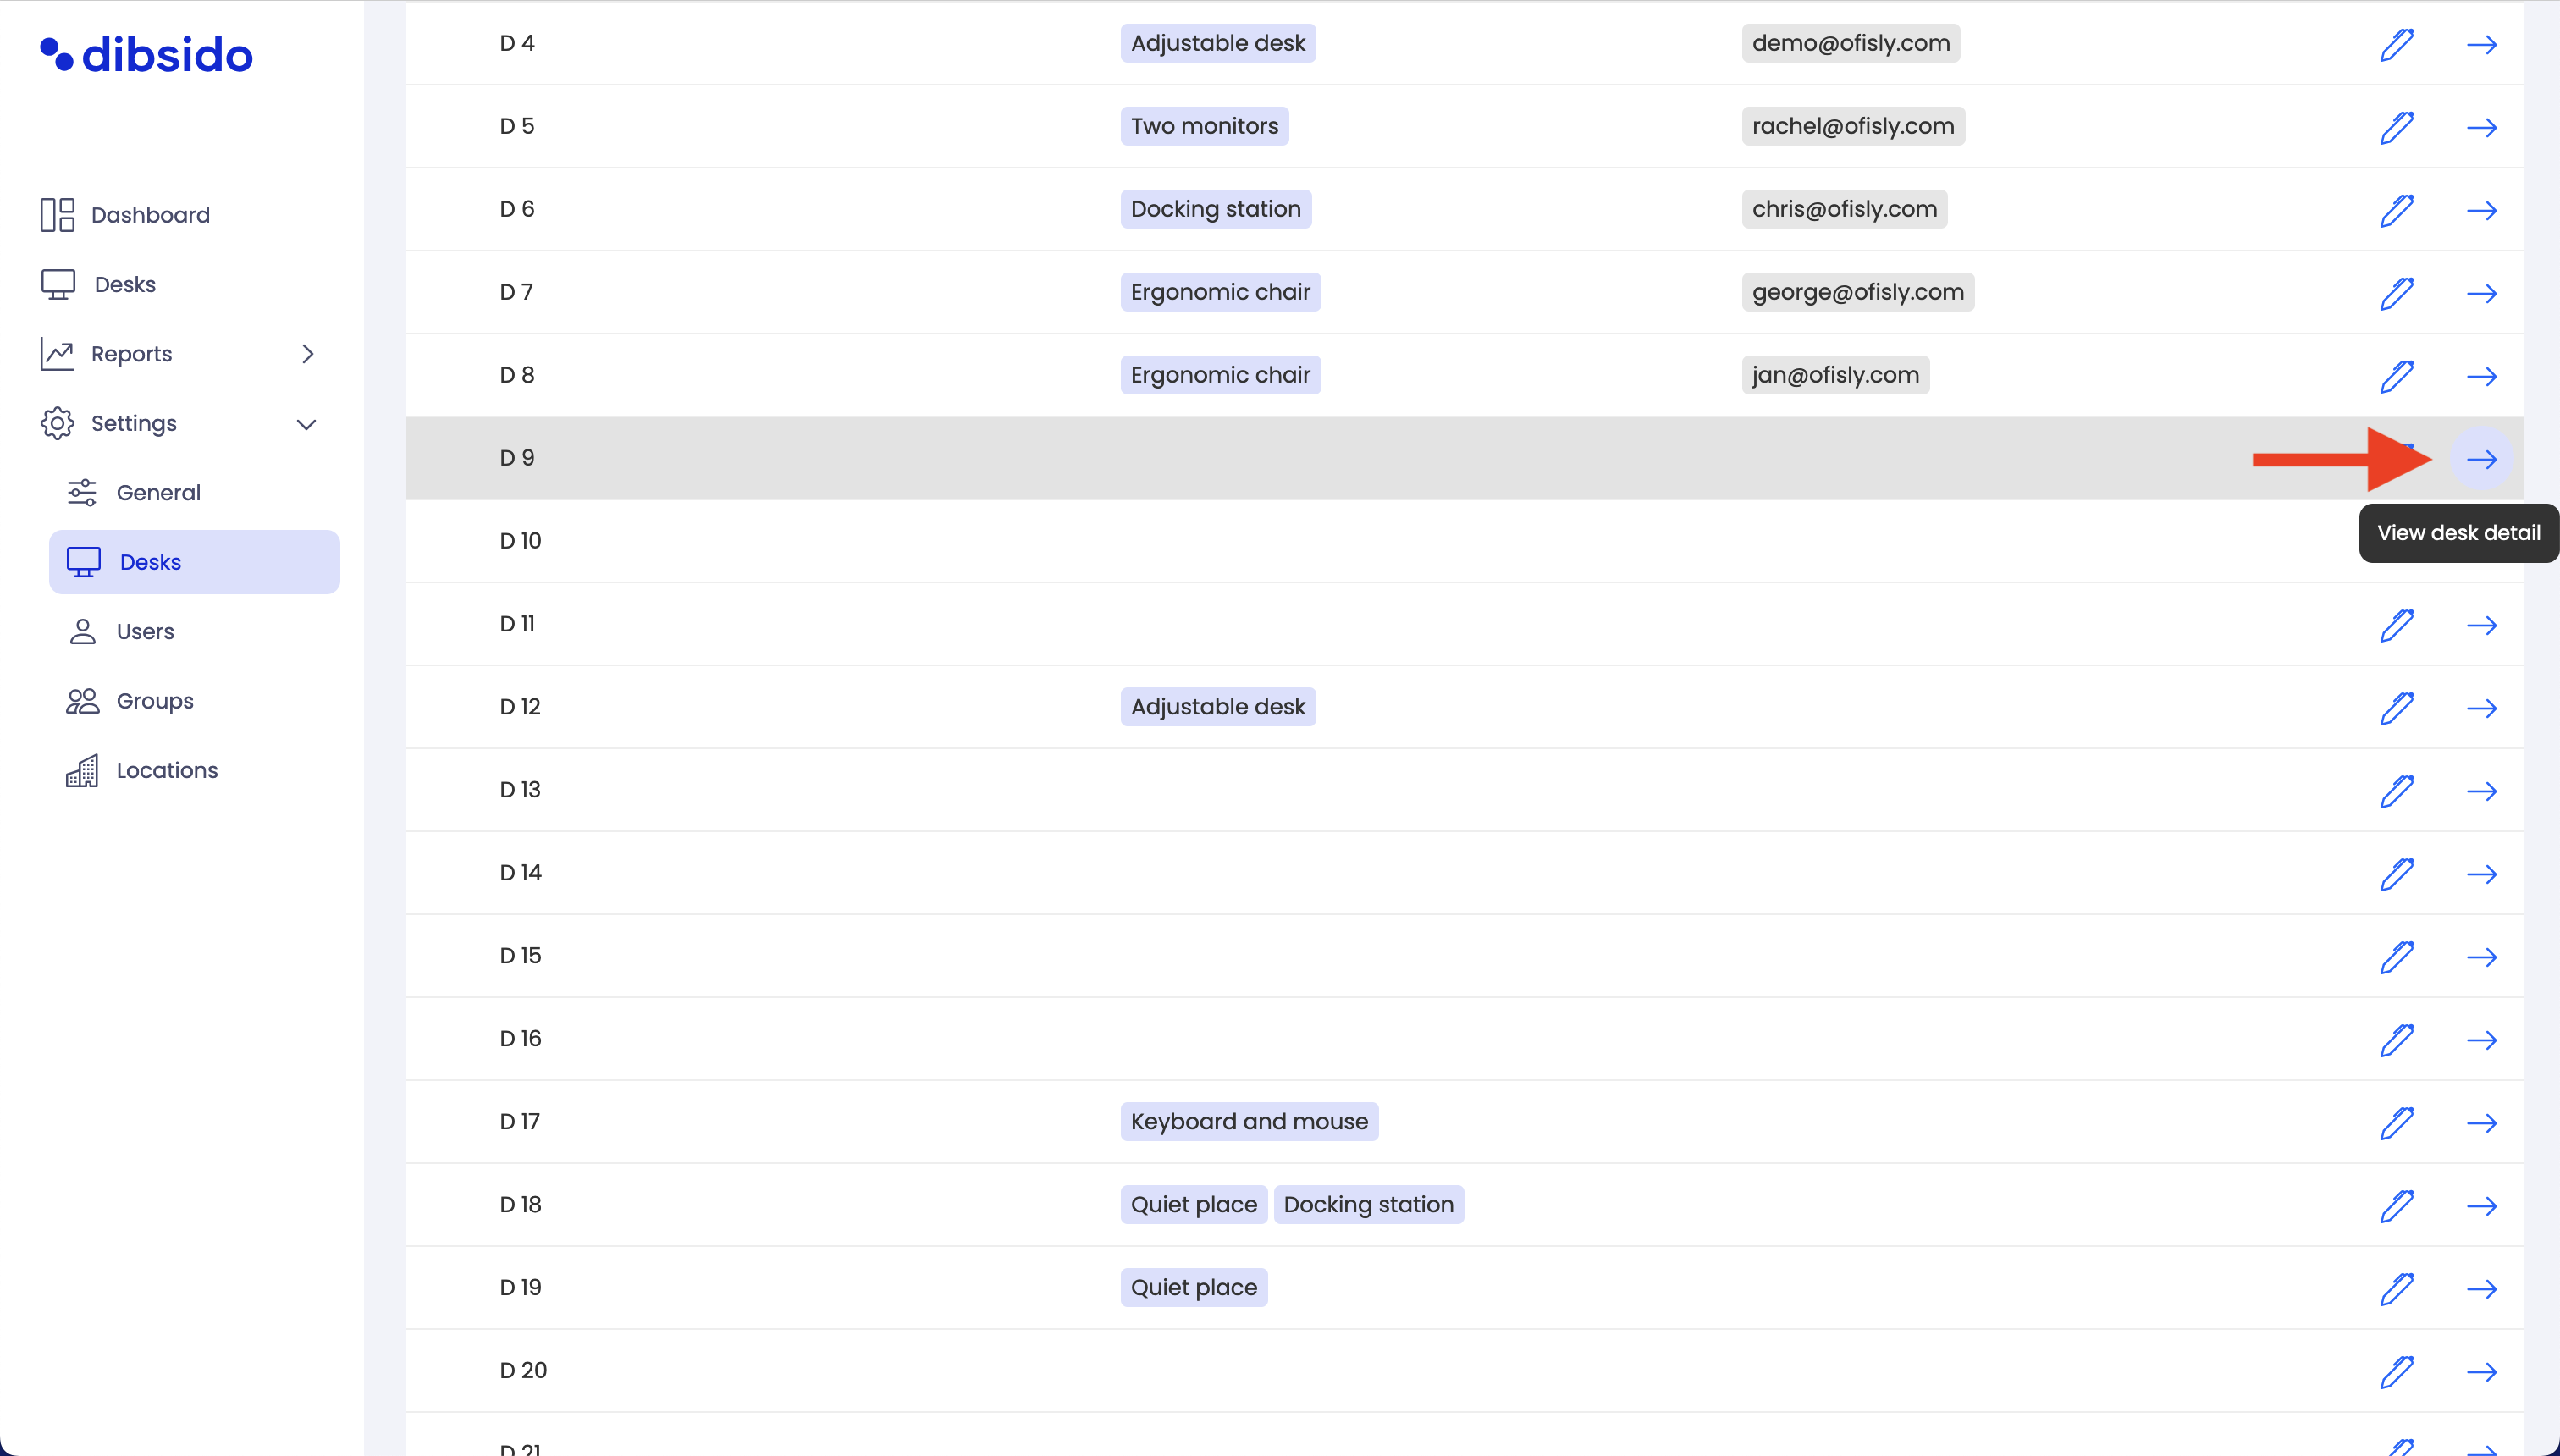
Access desk details: Click on the arrow next to the desk you want to allocate to see its detail page.
Allocate the desk:
On the detail page, find the option to allocate the desk.
Select the employee to whom you want to allocate the desk.
Choose the specific days that should be allocated.
If needed, you can also edit the time for the allocation.
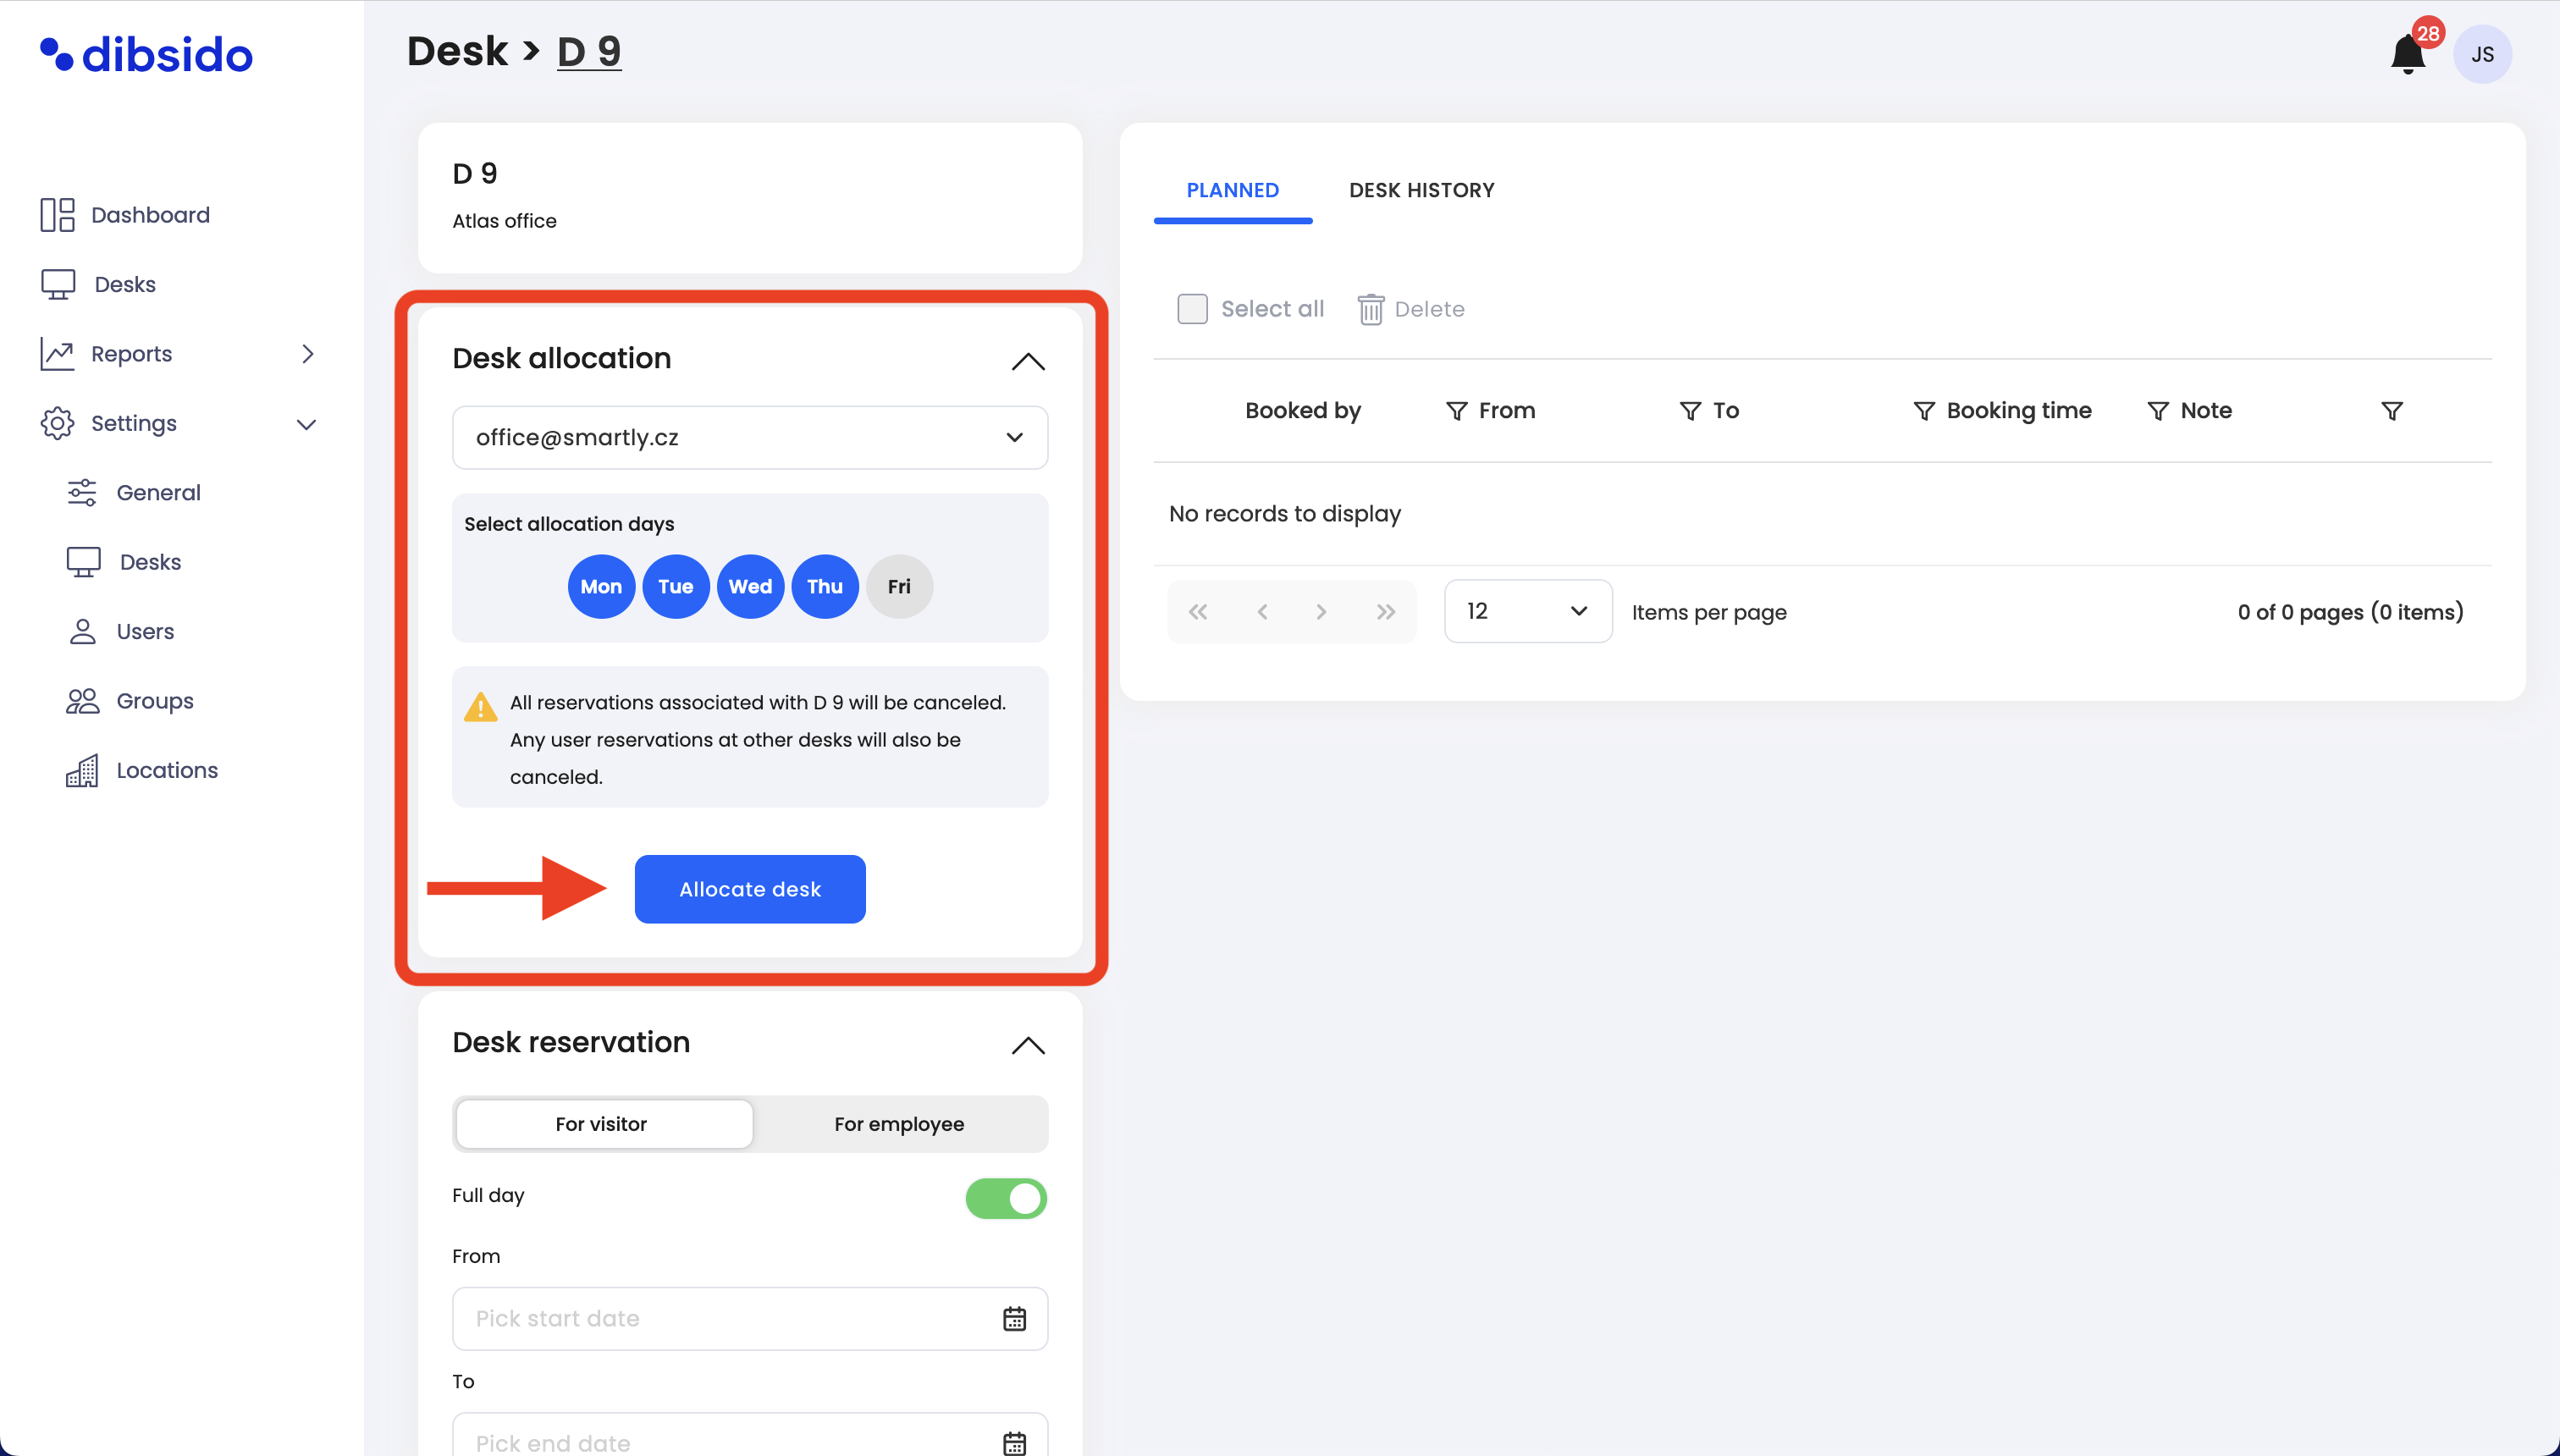
Confirm allocation: Once you've set the days and times, confirm the allocation.
Reservation creation: The app will automatically create a reservation for the selected desk one year in advance. It is the employee's responsibility to cancel the reservation if they are not coming to the office. However, admins and operators also have the ability to cancel these reservations if needed.
This process allows for effective desk management, ensuring that workspaces are reserved for employees who require them while providing the flexibility to adjust allocations as necessary.
