Navigate to settings: Start by going to the settings menu in Dibsido.
Select desks settings: Under settings, choose the "Desks" option.
Access the attribute settings: In the desks section, locate the three dots in the right corner of the screen. Hover over these dots, and you'll see an option labeled "Edit Attributes." Click on it to open the attribute management popup.
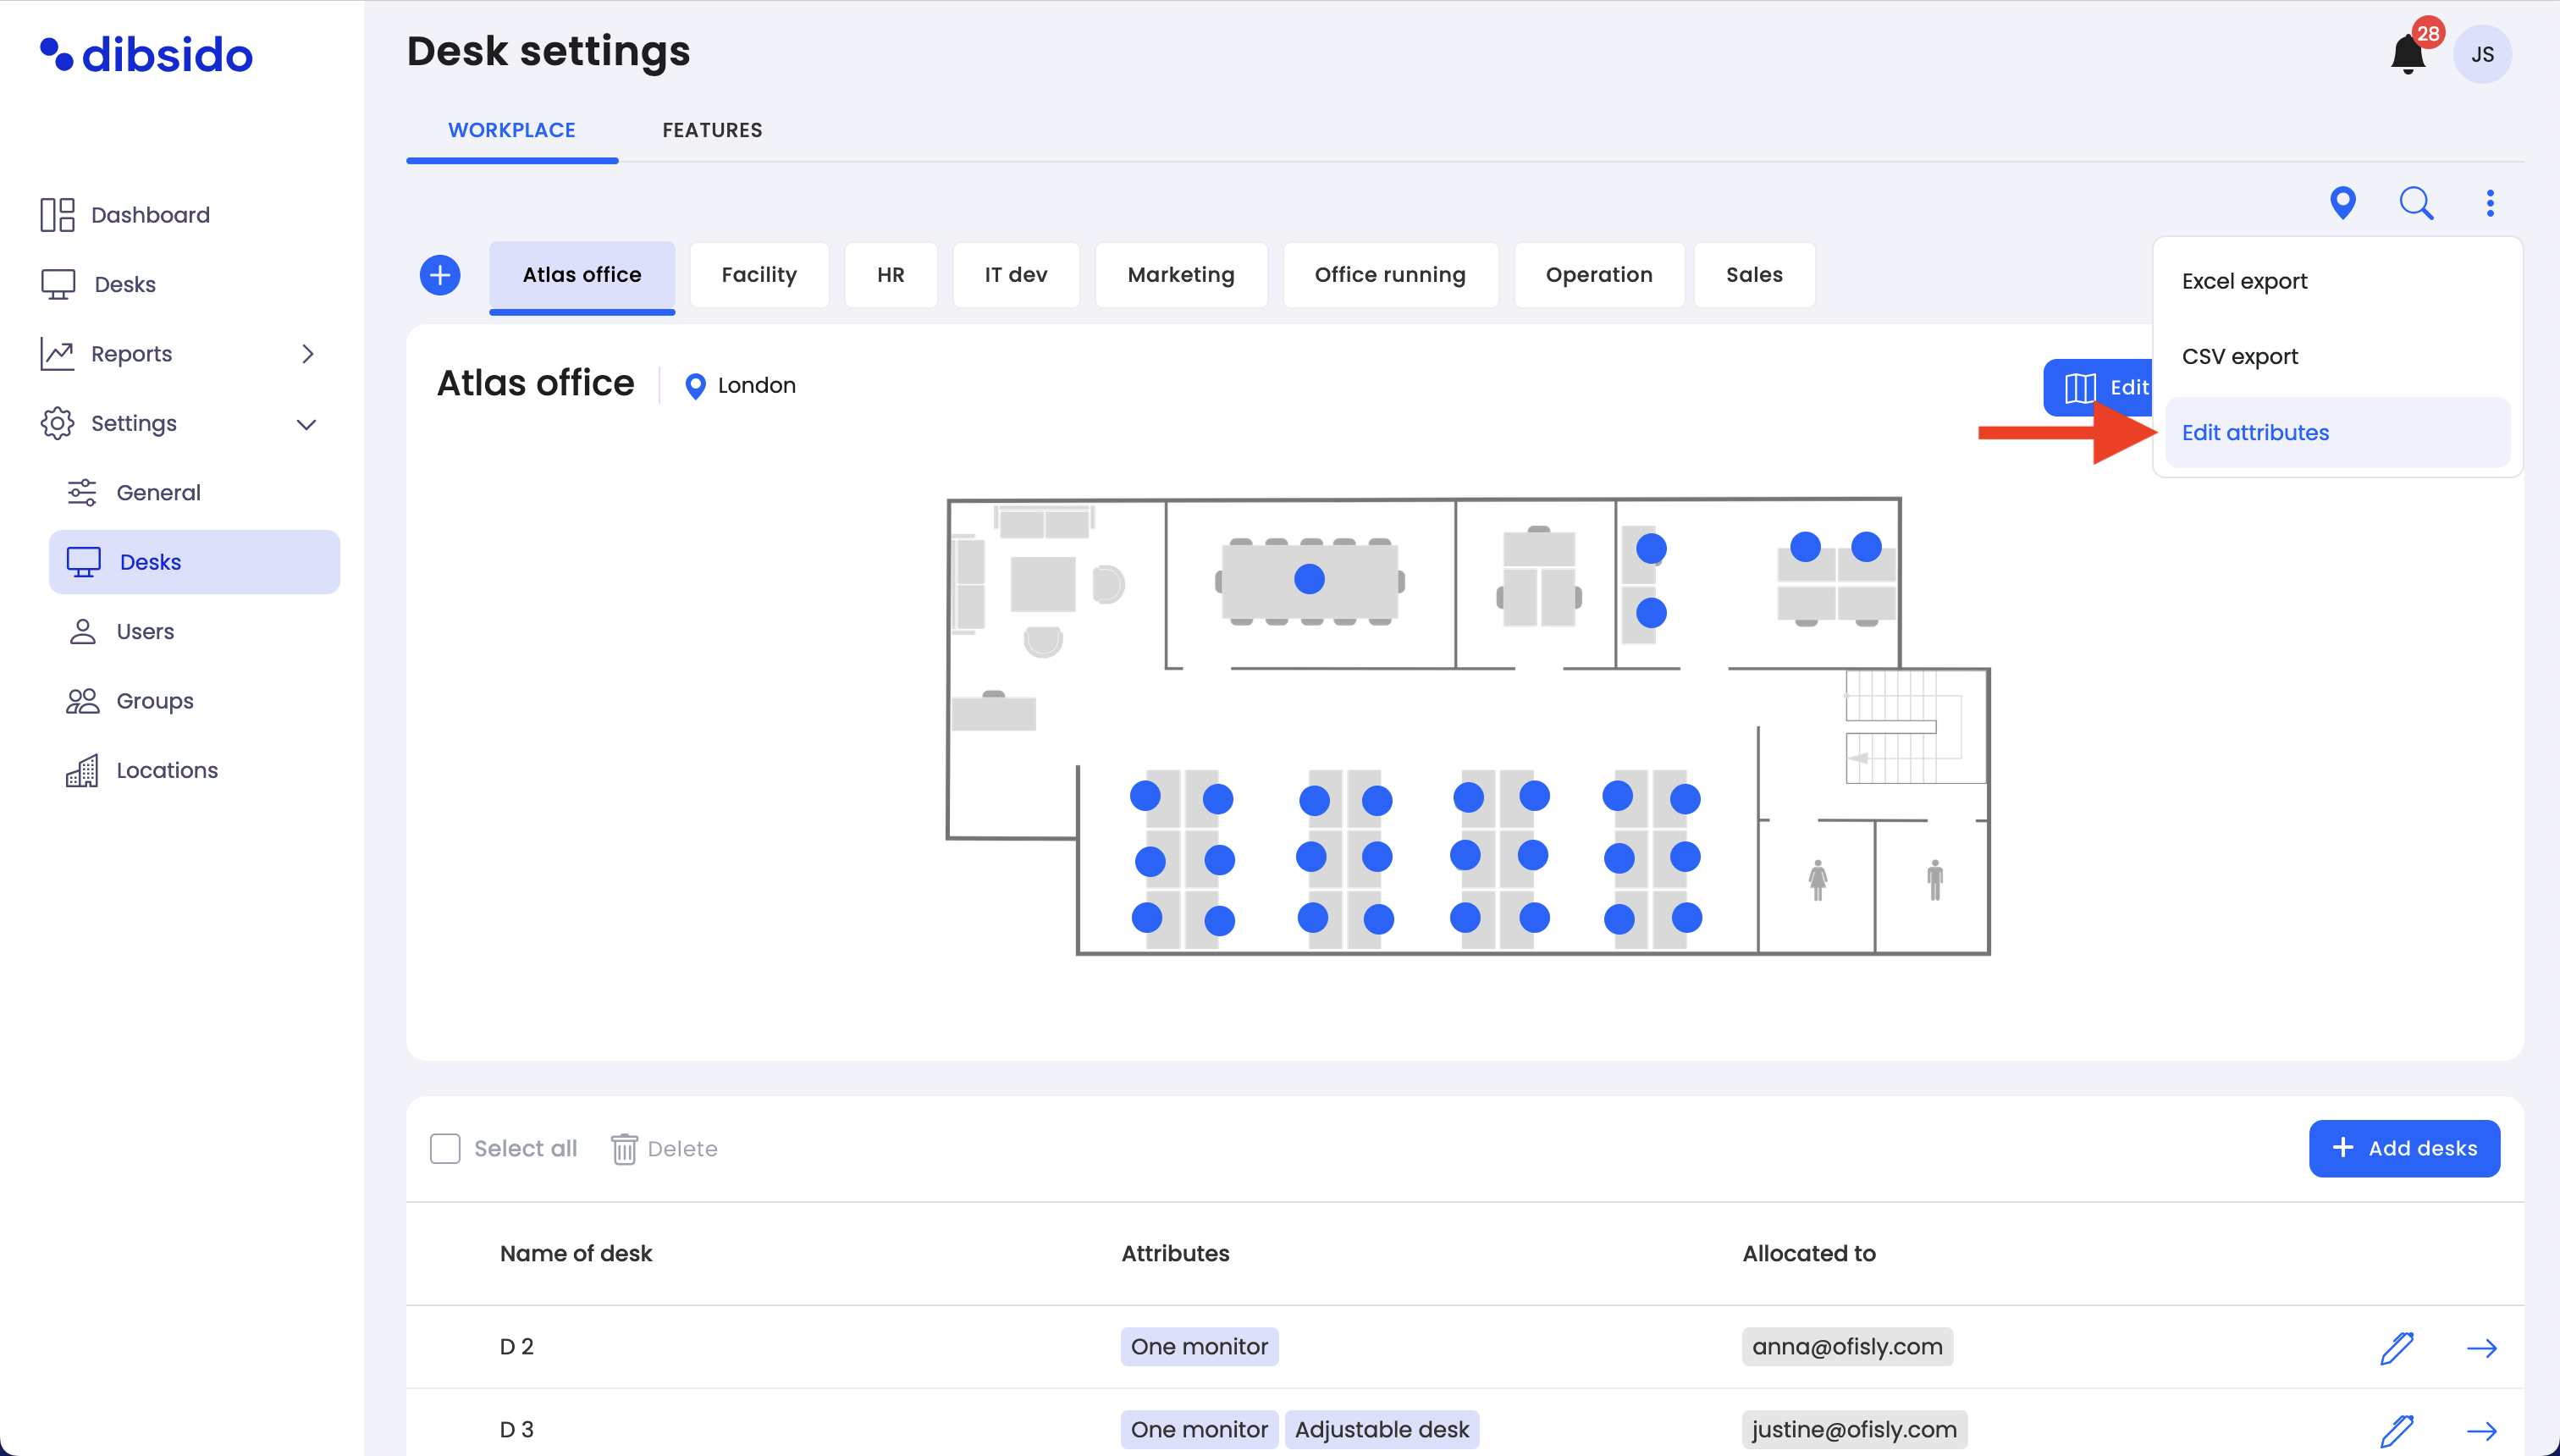
Add a new attribute:
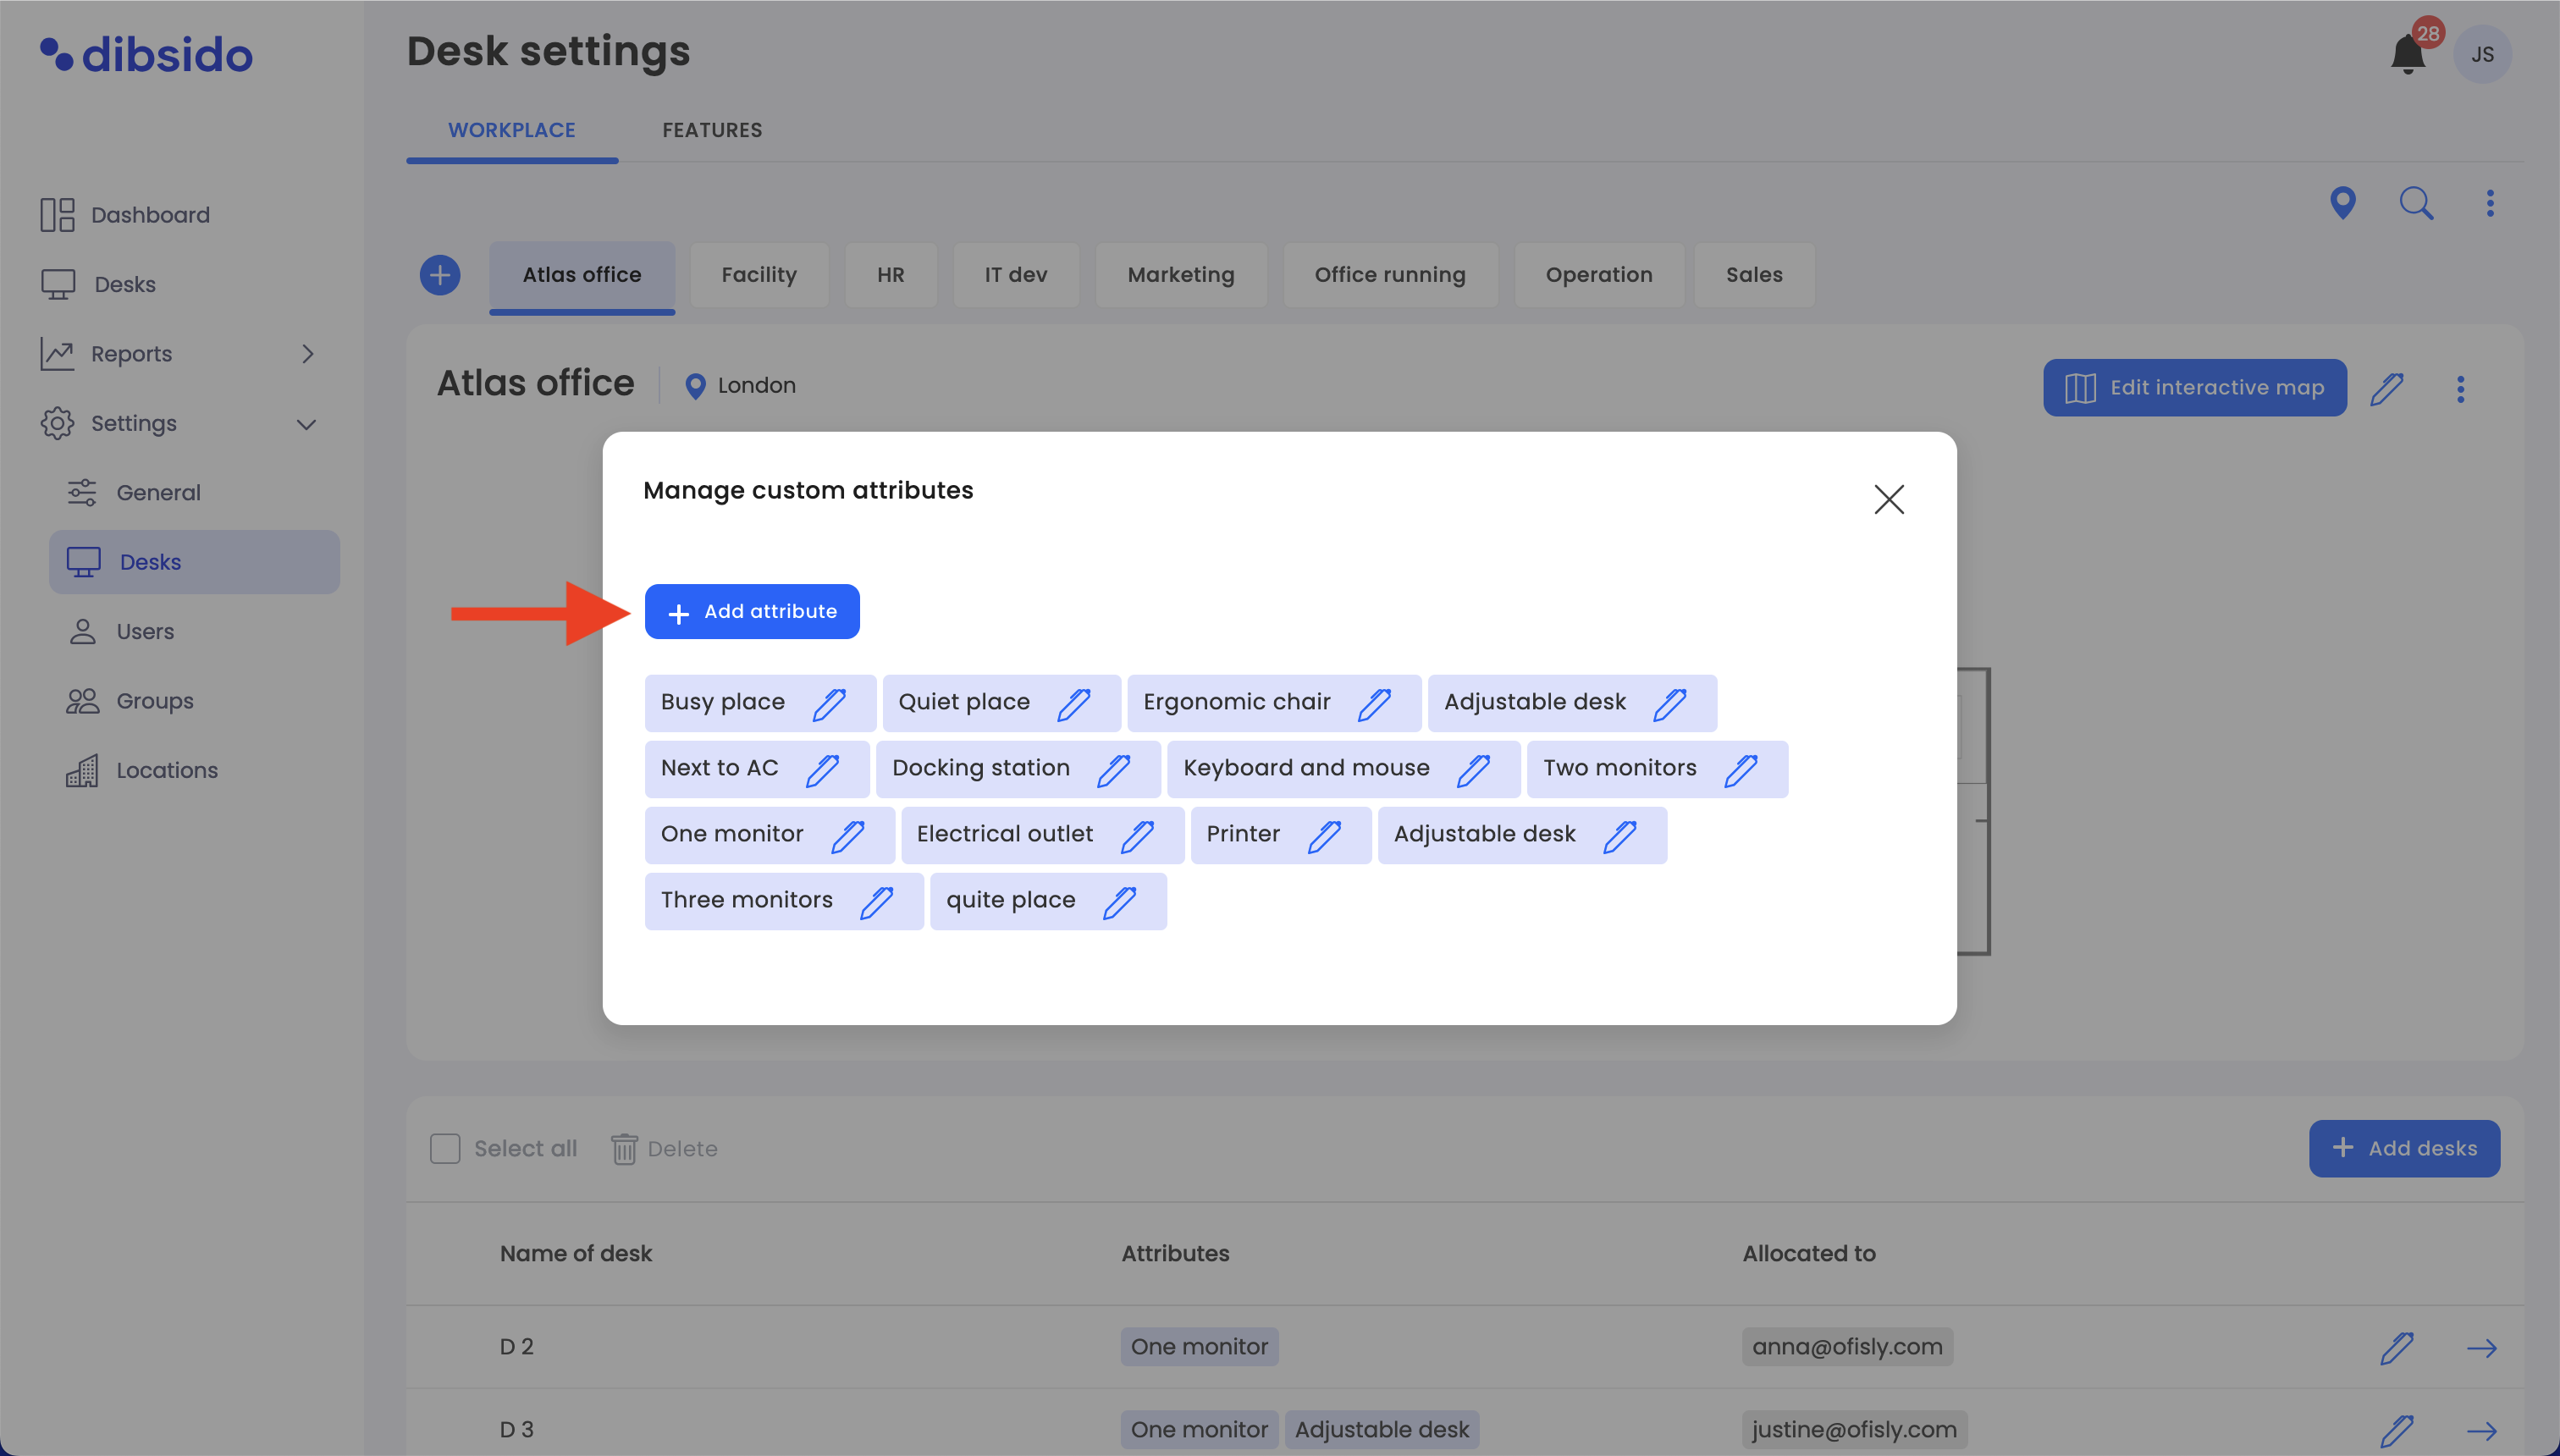
In the popup, click on the "Add Attribute" button.
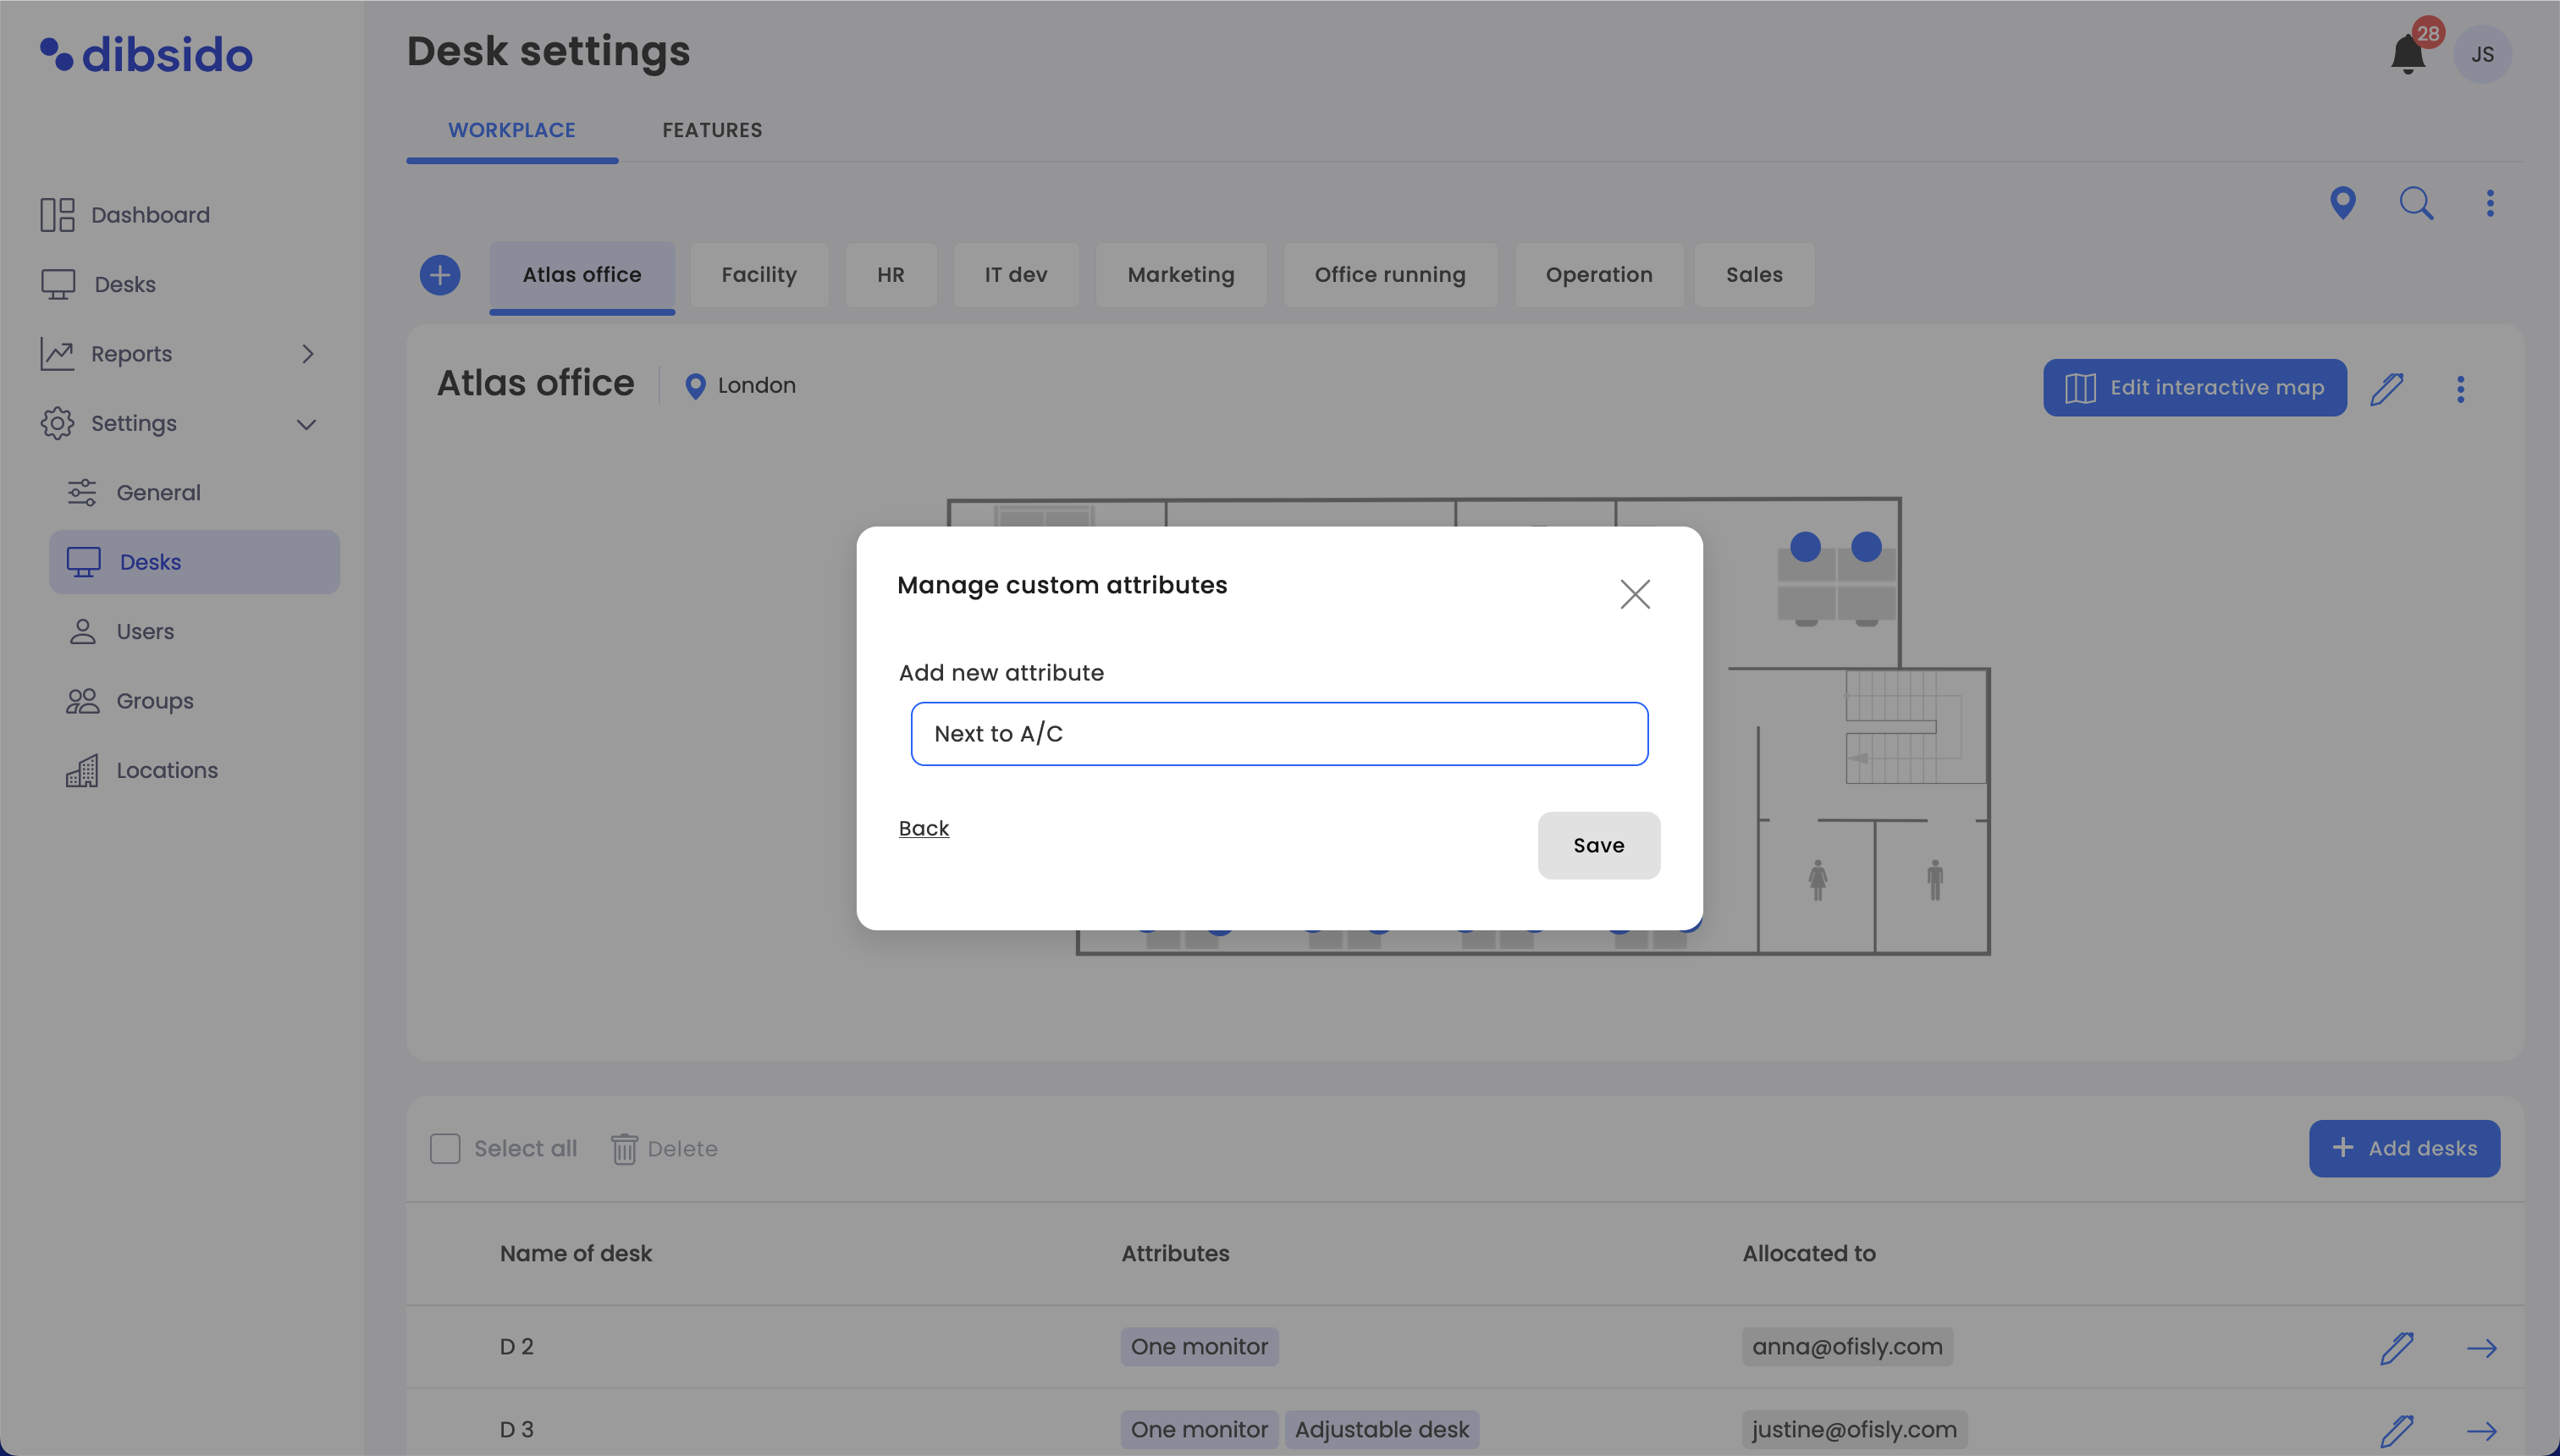
Enter the name of your custom attribute. This could be anything that helps describe or enhance your workspace, such as "Standing Desk," "Extra Lighting," or "Noise-Cancelling Headphones."
Once you've written down your attribute, click "Save" to add it to the list.
Assign attributes to desks:
After adding your custom attributes, you can assign them to specific desks. To do this, go to the desk editing popup and select the appropriate attributes from the list.
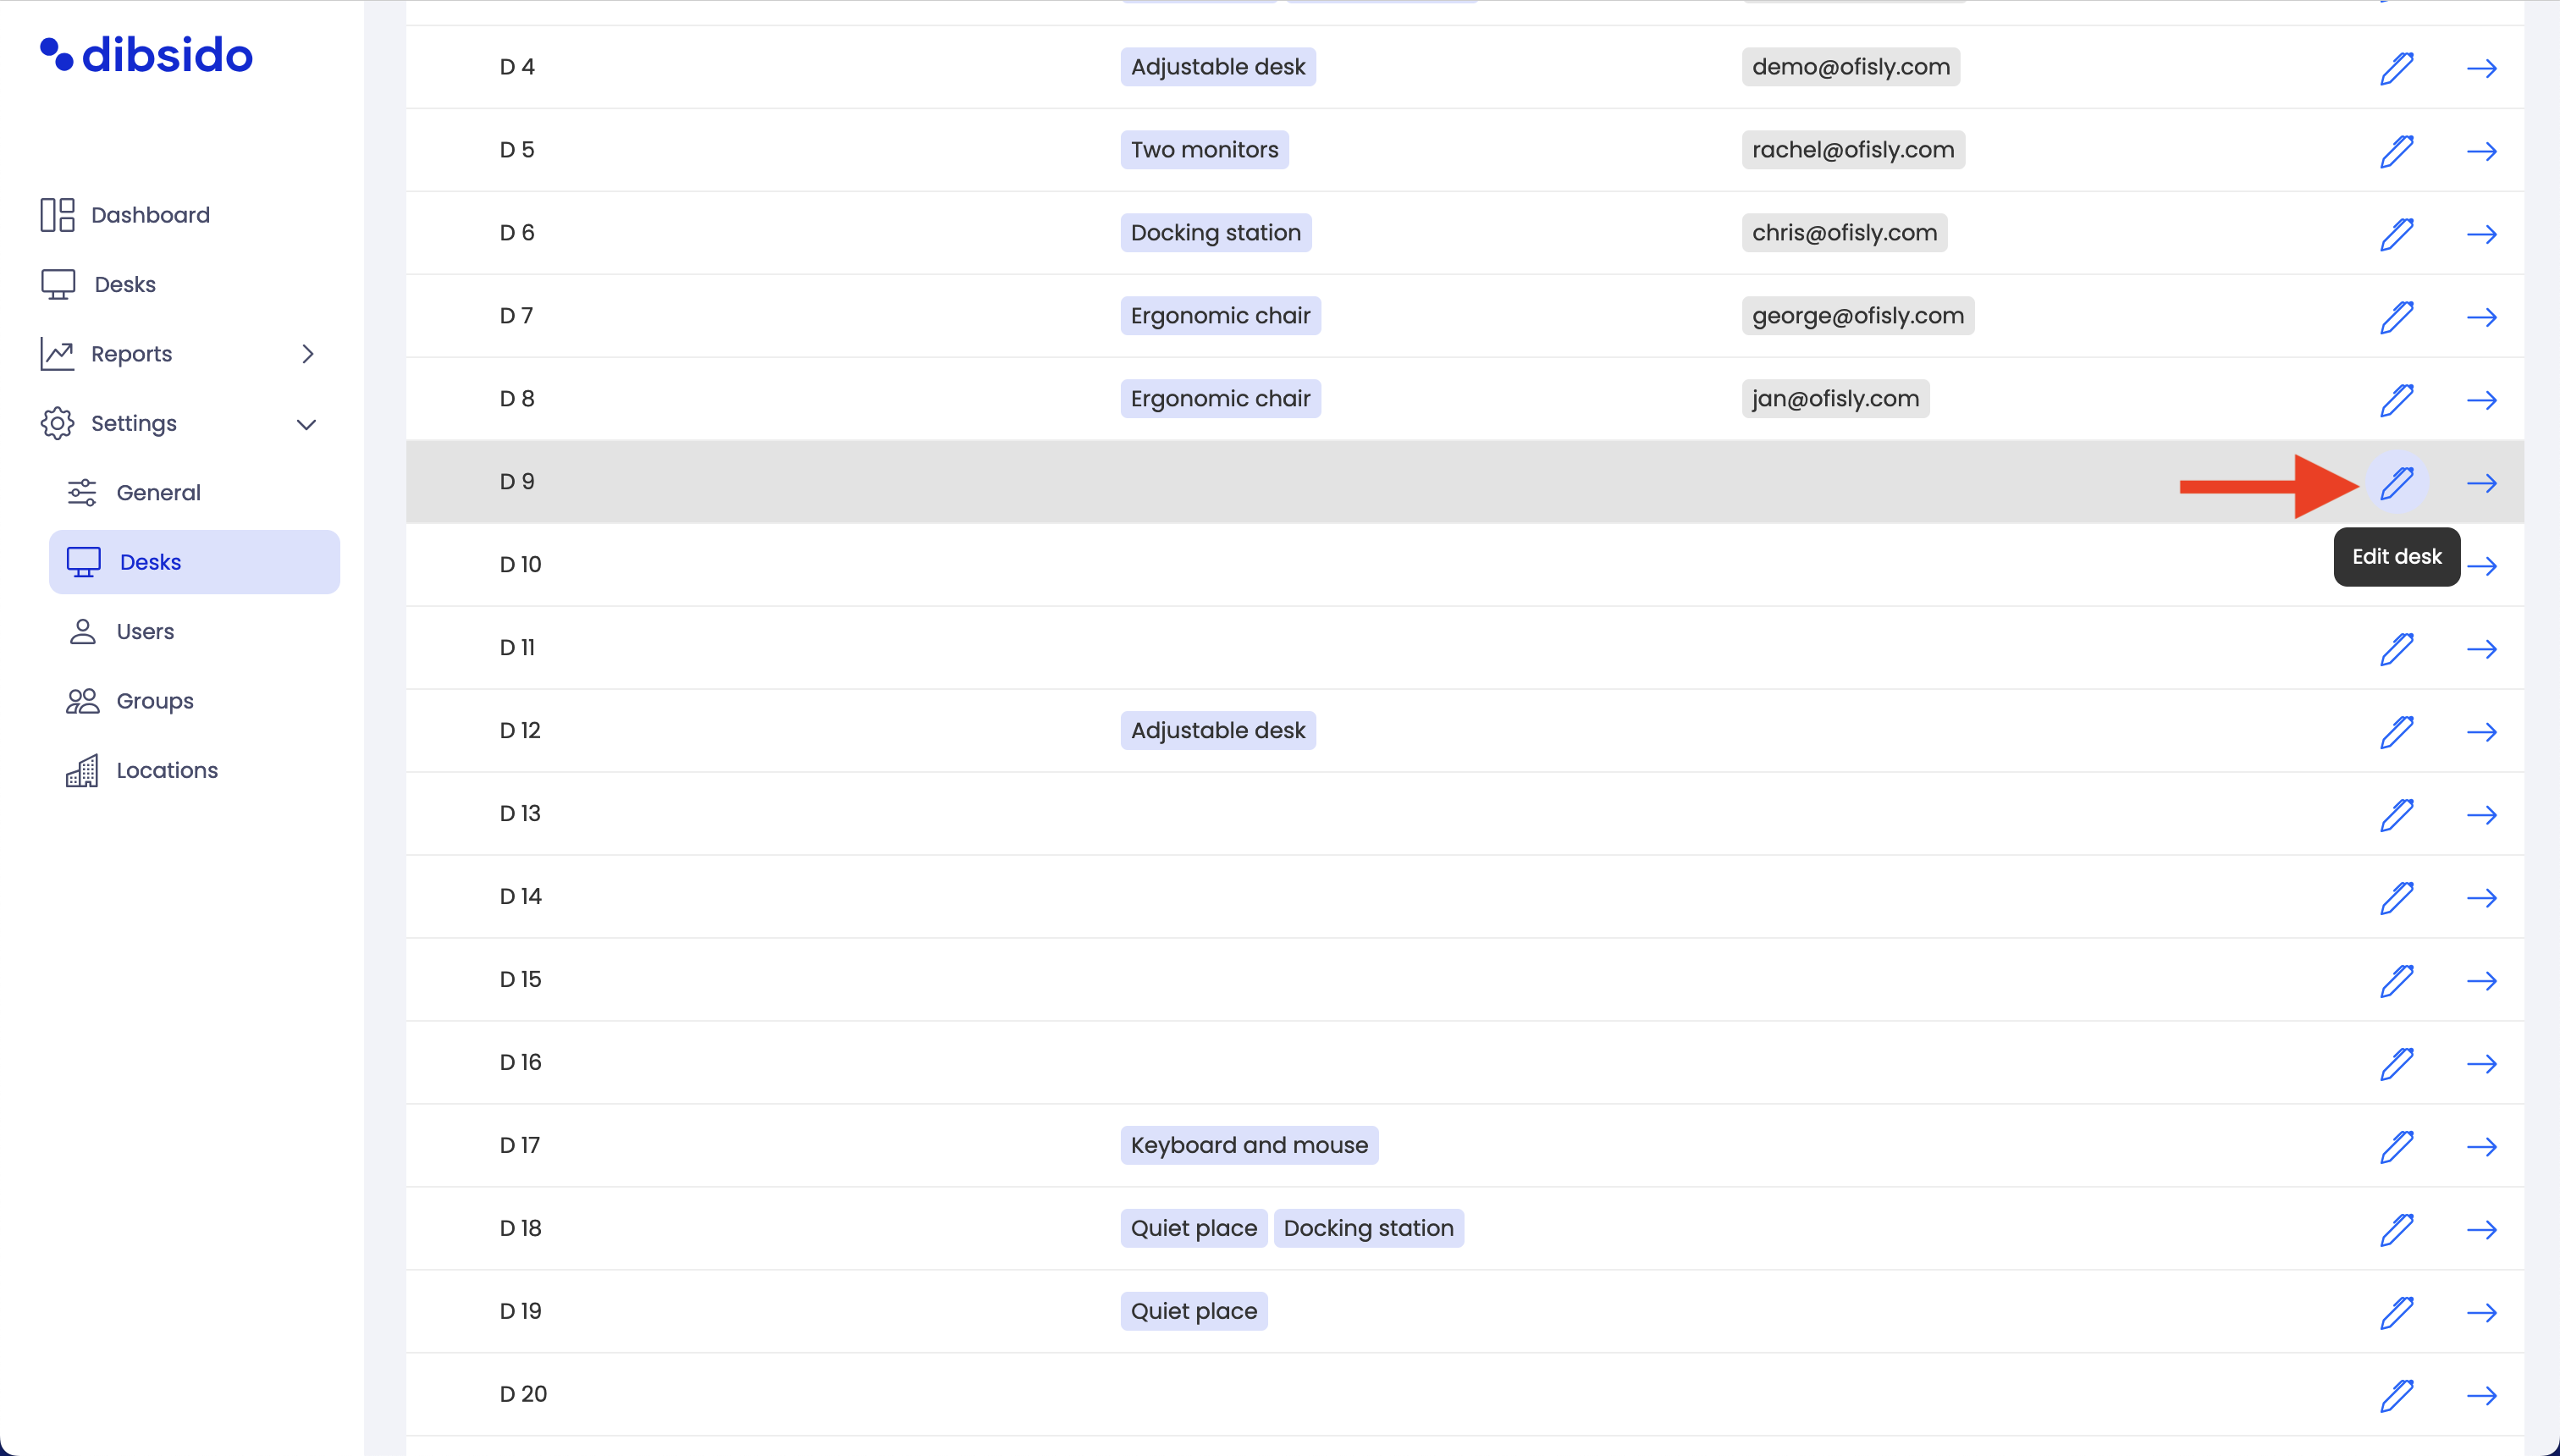
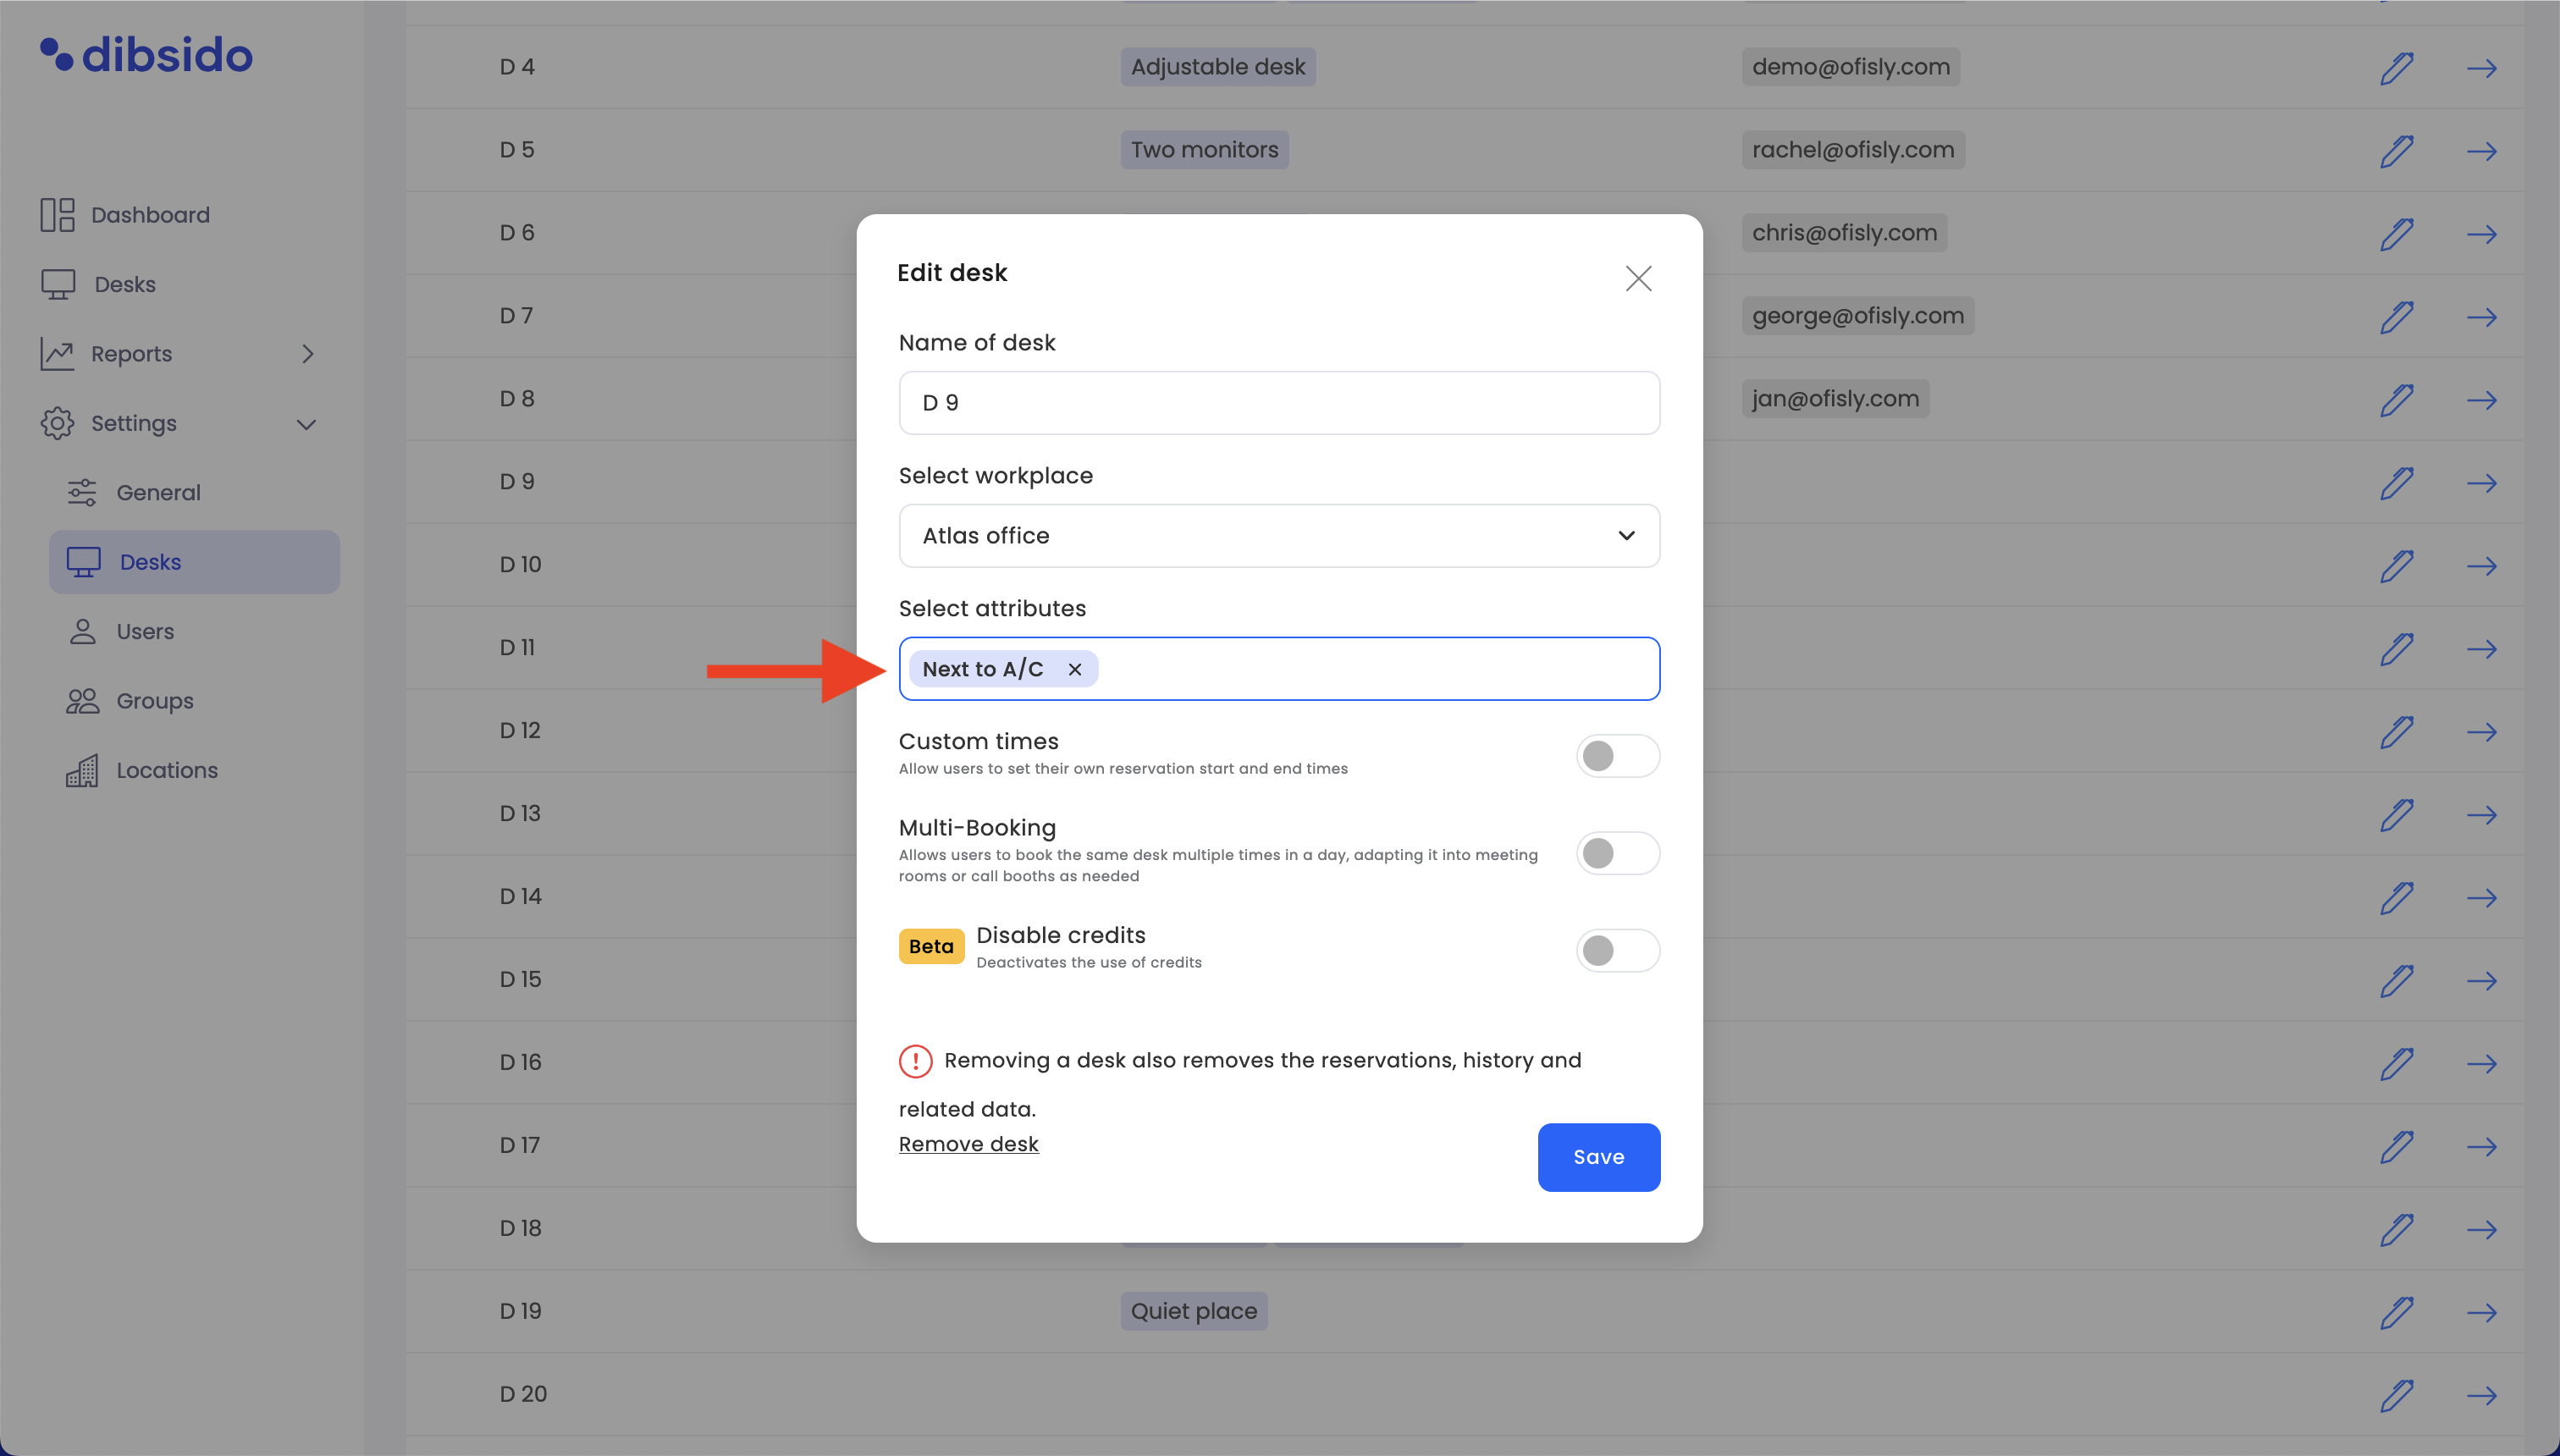
These attributes can then be used to help employees choose the best workspace that fits their needs.
Customize your workplace: Custom attributes are a great way to personalize and optimize your office environment. By clearly labeling desks with attributes like "2 Monitors," "Ergonomic Chair," or "Electric Plugs," you help employees find the workspace that best suits their needs.
Pre-added attributes: Dibsido already includes a few helpful attributes like "2 Monitors," "Ergonomic Chair," and "Electric Plugs" to get you started. You can add more based on your specific office requirements.
By using custom attributes, you can create a more tailored and efficient booking experience for your employees, ensuring they have access to the resources and equipment they need to work comfortably and effectively.