For more detailed setup or adding additional workplaces later, you can use the settings menu.
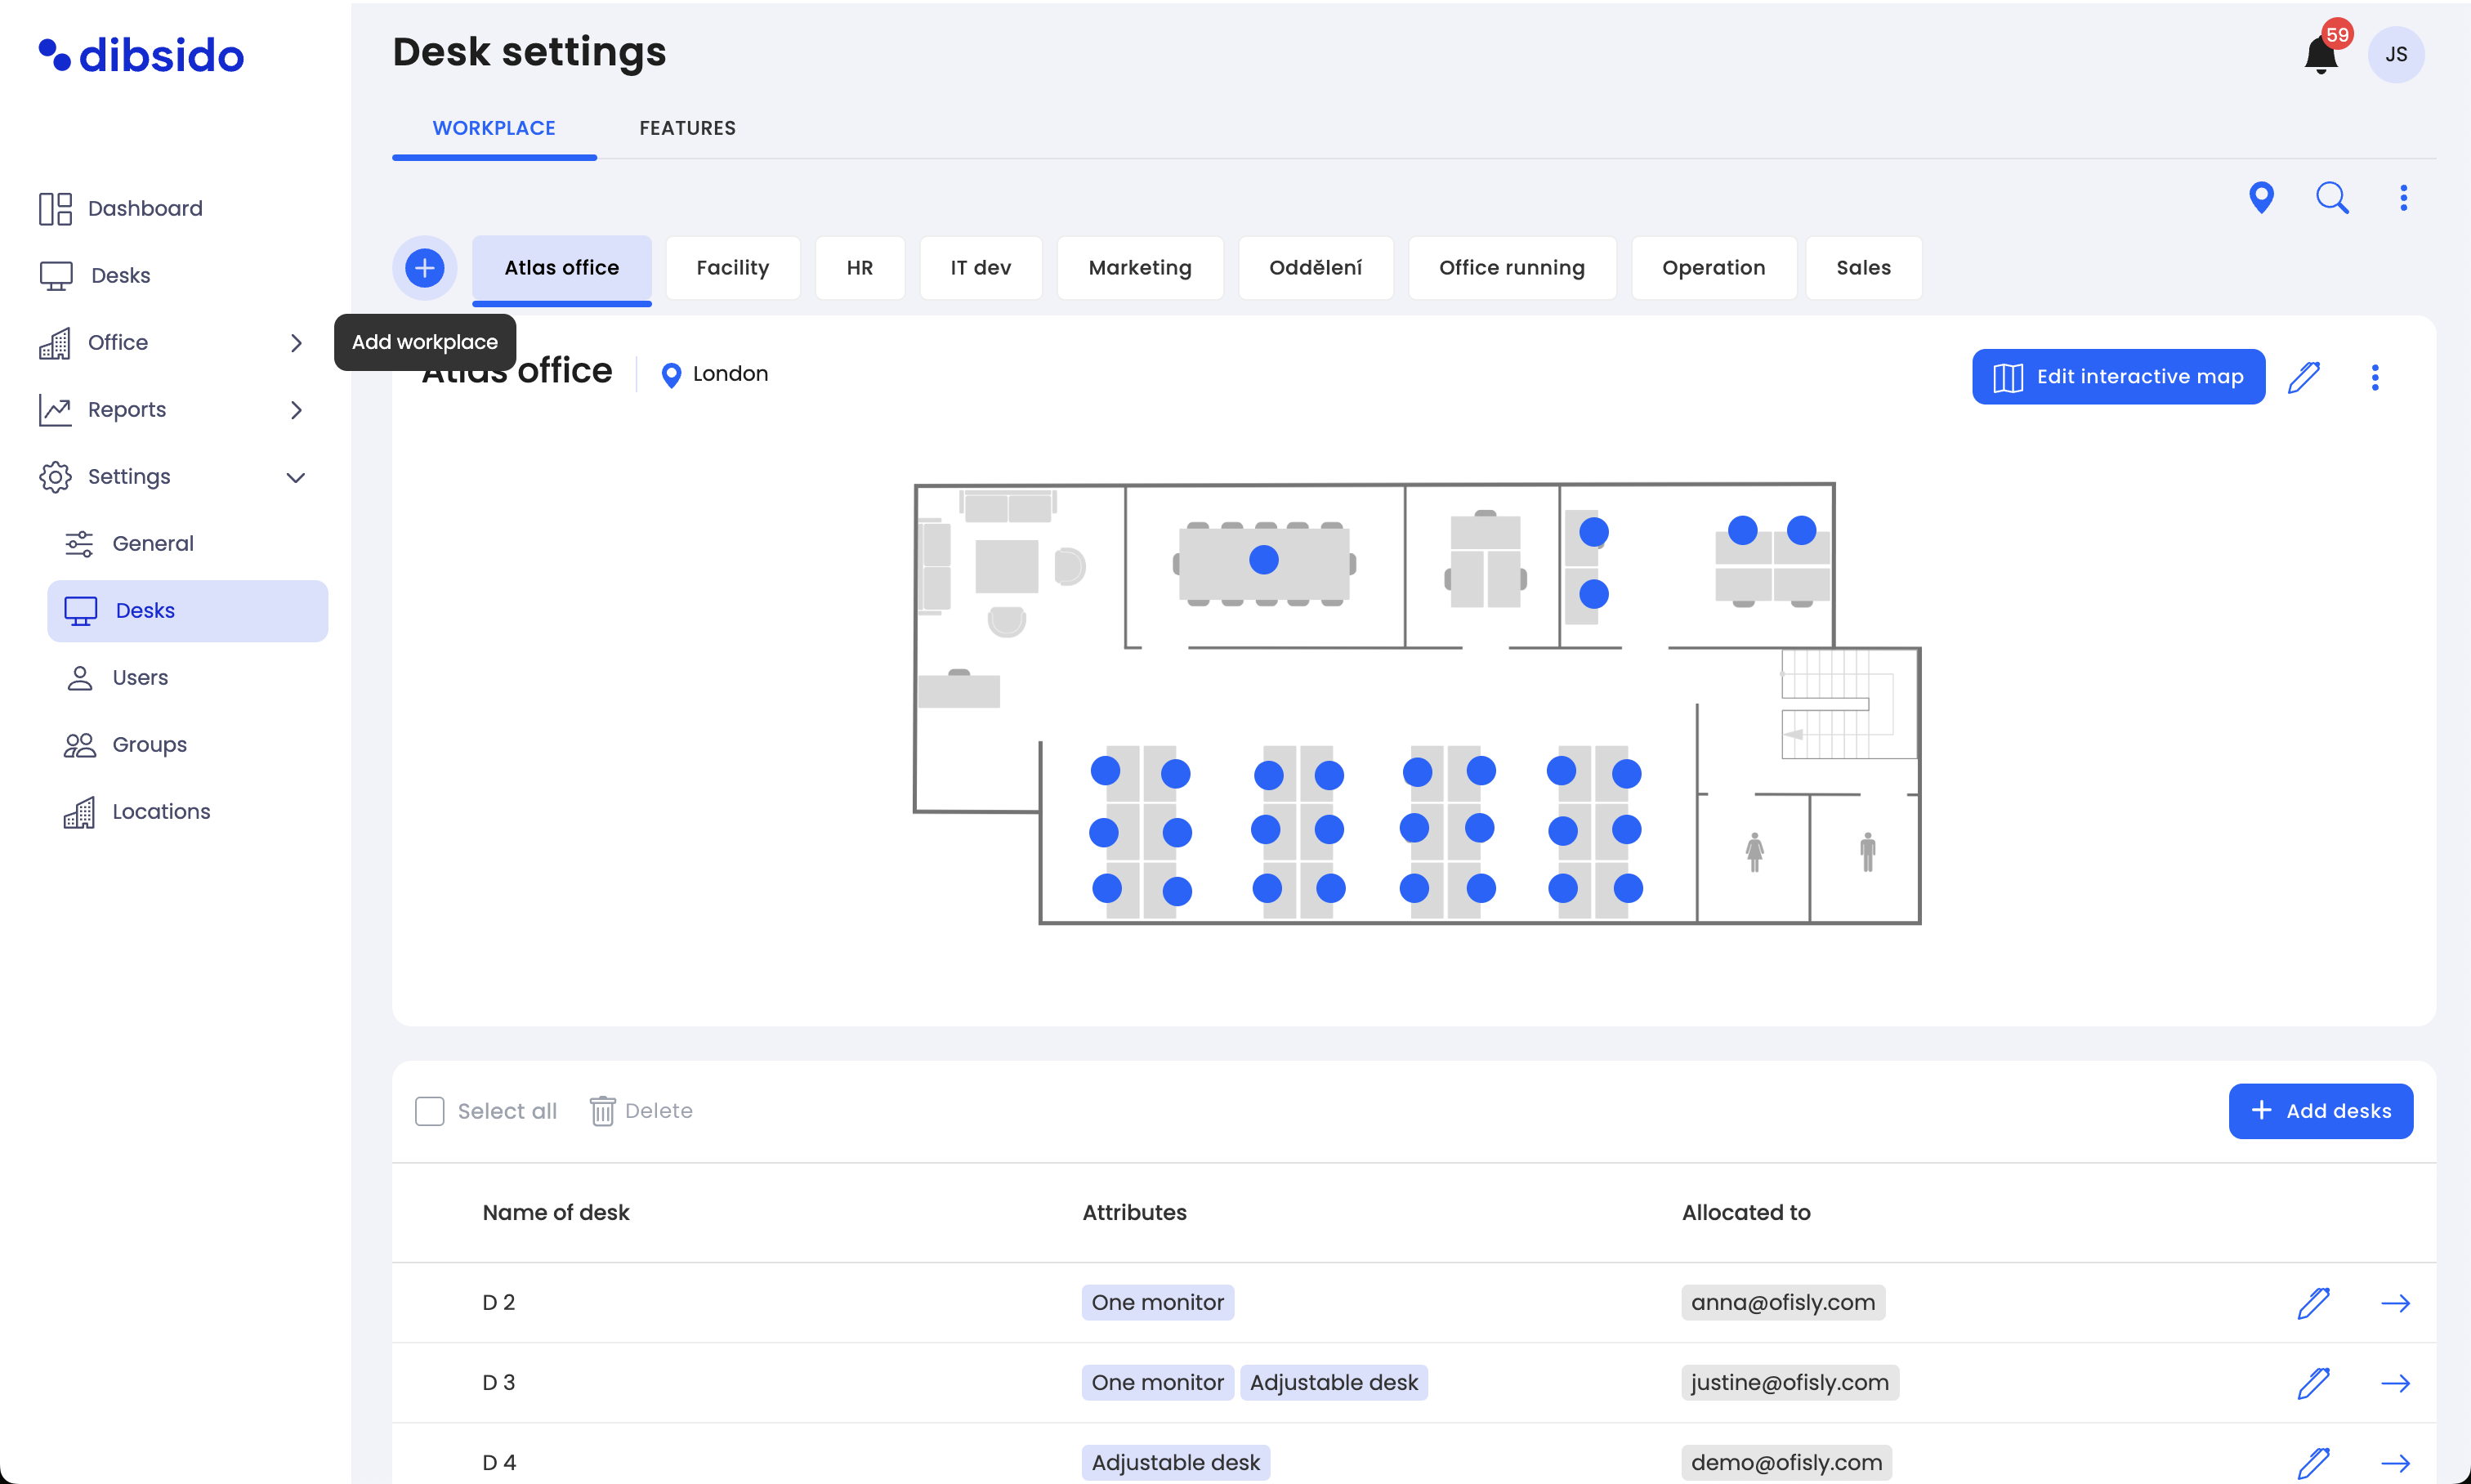
Navigate to settings: Go to the settings menu within the Dibsido app.
Add workplace: Click the "Add Workplace" button, represented by the (+) icon.
Input details: Enter the name of the workplace and the number of desks you want to create.
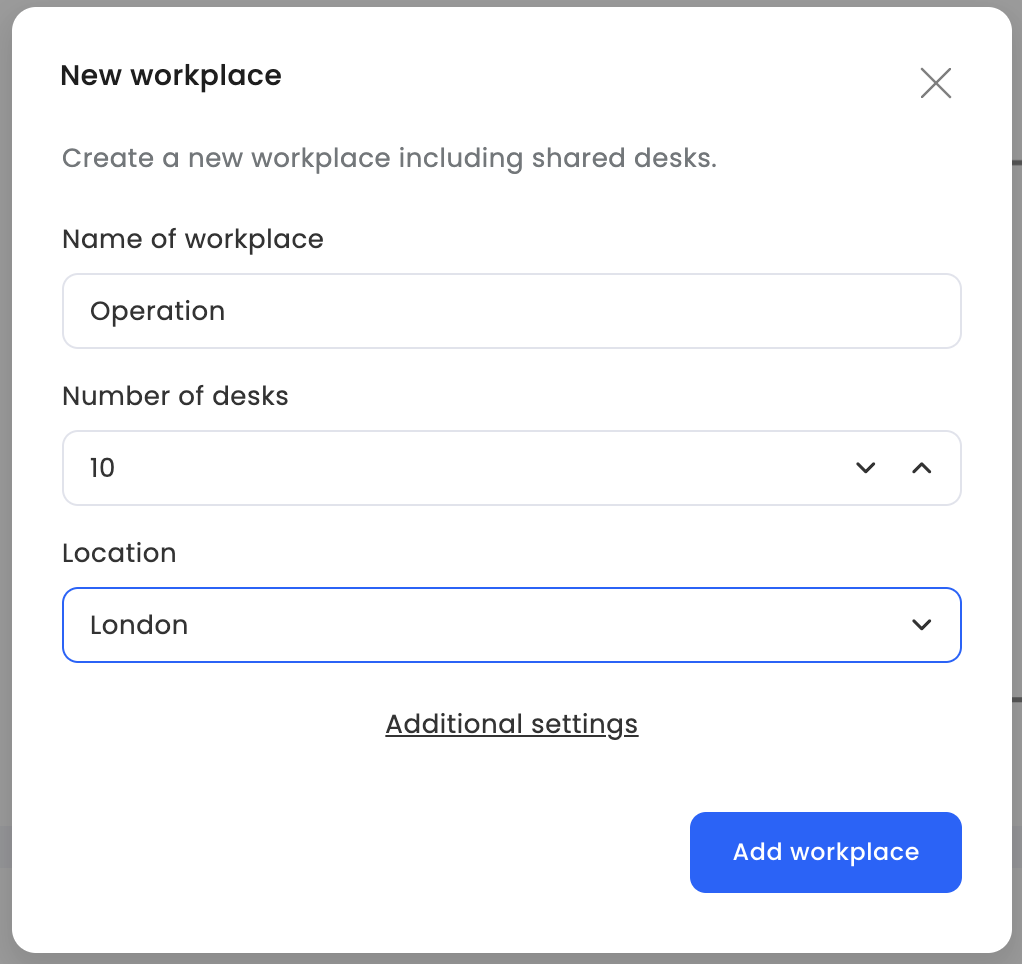
Additional settings: In this section, you can also:
Change desk names: Customize the names of the desks (e.g., Desk 1, Desk 2, etc.).
Starting number: Specify the starting number for desk labels.
Add attributes: Add any additional attributes to desks as needed.

Using these methods, you can easily set up and manage your office workspaces, ensuring a smooth and efficient booking experience for all users.
