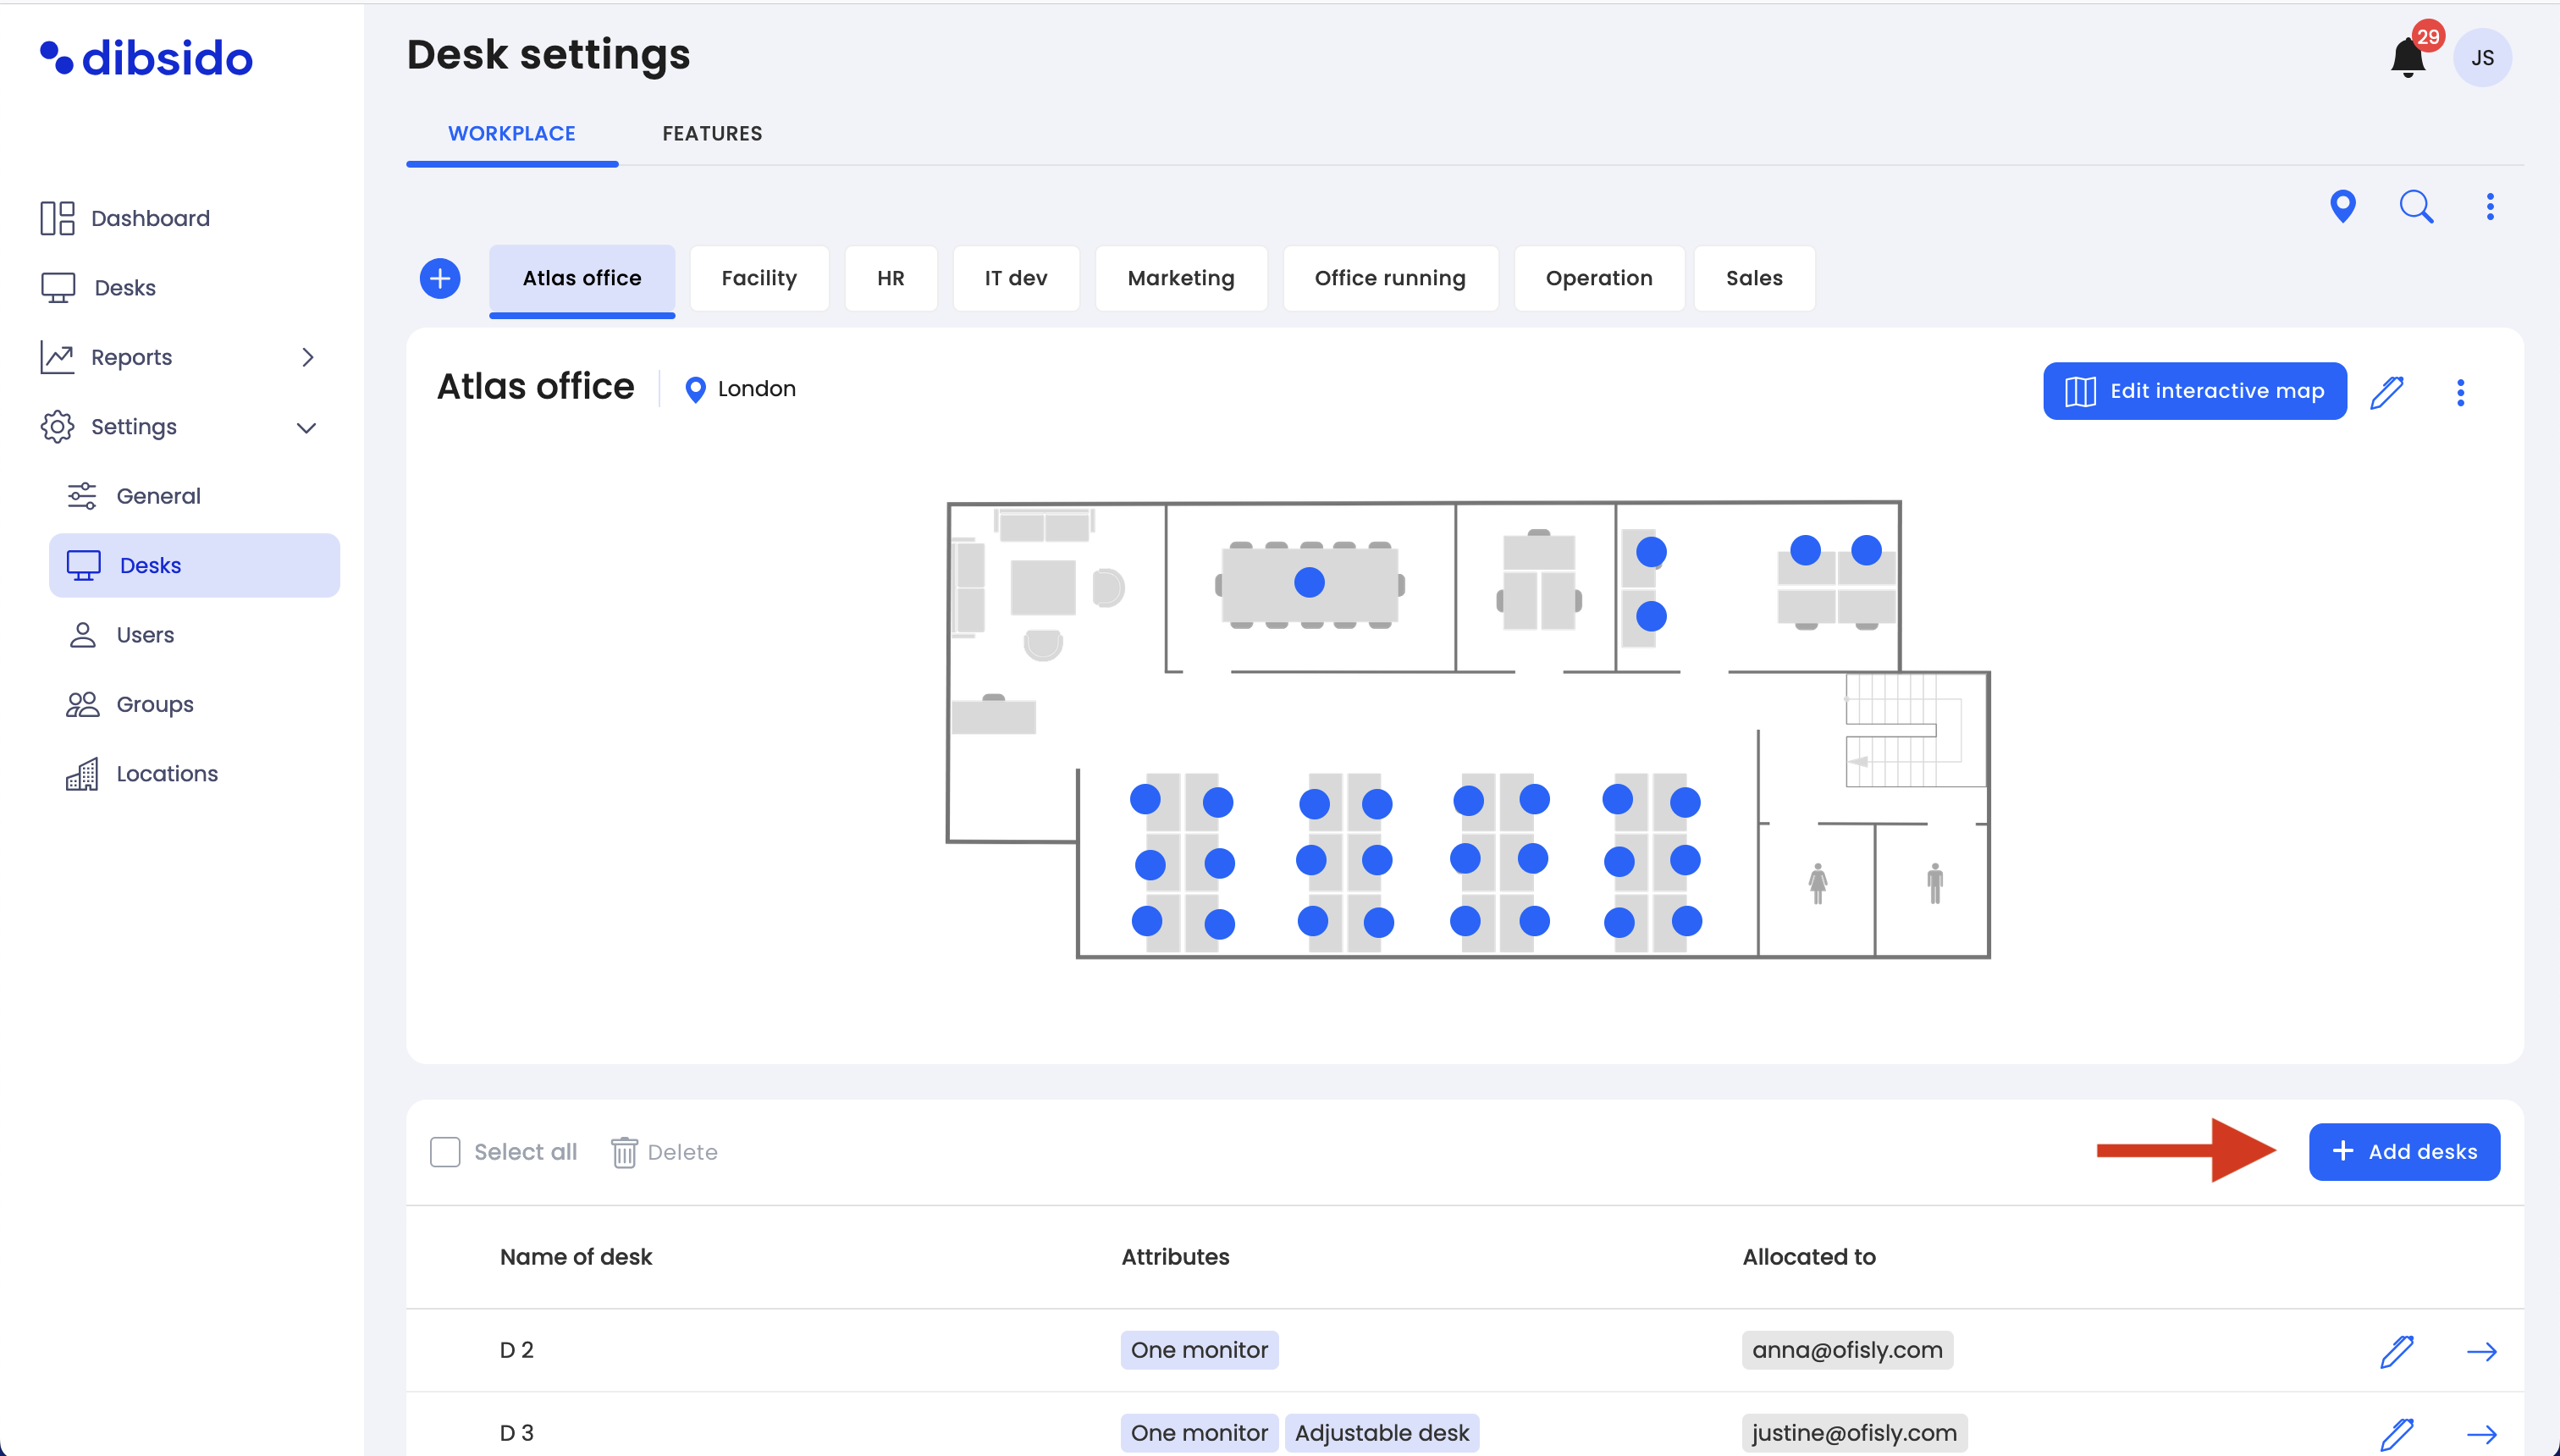
Navigate to desks settings:
Start by going to the "Settings" menu within the Dibsido app.
Select the "Desks" option to view your existing workplaces.
Choose the workplace:
In the desks settings, select the workplace where you want to add new desks.
On the right side of the screen, click the "Add Desks" button.
Choose your desk creation method:
One desk: Add a single desk with customizable attributes.
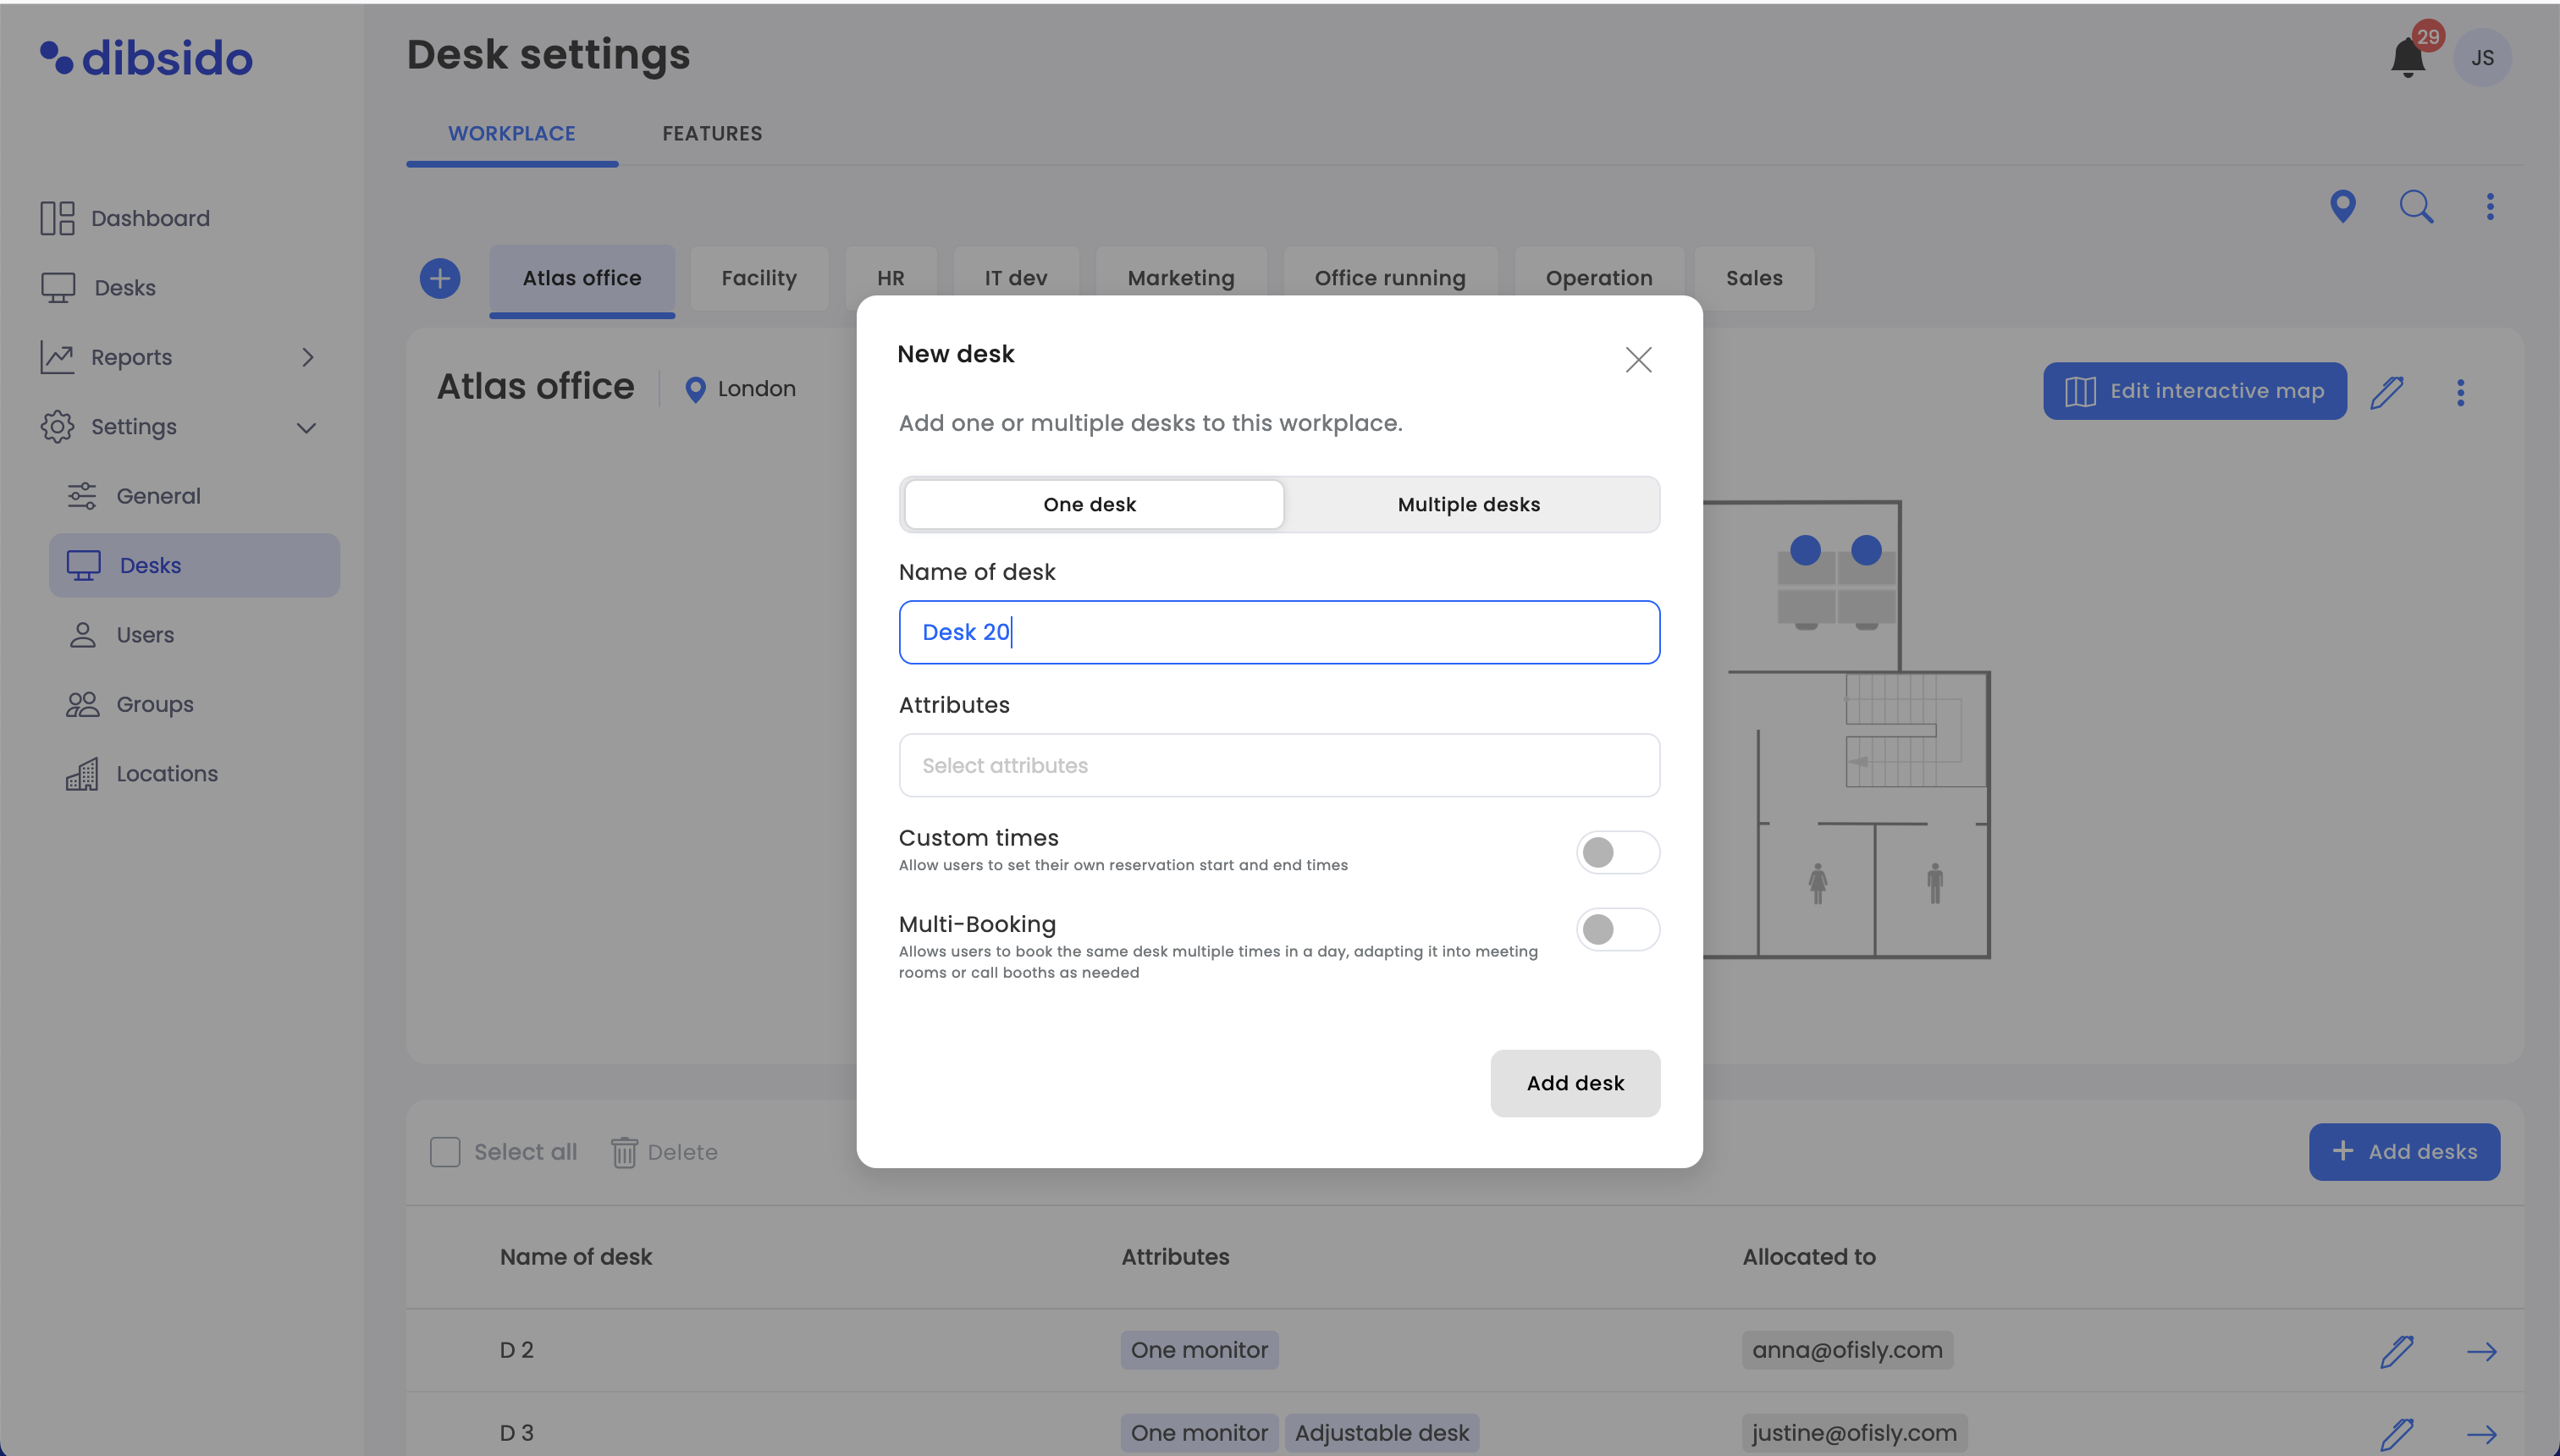
Multiple desks: Add several desks at once, with options to customize their names and starting numbers.

For both one desk and multiple desks, you can set the following attributes:
Name of desk:
Enter the name for the desk. If adding multiple desks, you can define the naming pattern and starting number (e.g., Desk 12, Desk 13, etc.).
Attributes:
Assign specific attributes to the desk, such as "Ergonomic Chair," "Quiet Place," or other features that help employees choose the best workspace for their needs.

Custom times (toggle on/off):
Enable this option to allow users to set their own reservation start and end times for the desk.
Multi-Booking (toggle on/off):
Enable this option to allow the same desk to be booked multiple times in a single day, making it ideal for meeting rooms, call booths, or other shared spaces.
Number of desks:
When adding multiple desks, specify how many desks you need.
Customize the naming convention by setting the starting number for the desks (e.g., Desk 12, Desk 13).
Review the settings:
After customizing the attributes, review your settings to ensure everything is correct.
Save the desks:
Click "Add desks" to finalize the creation of the new desks within the selected workplace.
By following these steps, you can efficiently add and customize desks within any workplace in Dibsido, ensuring they meet the specific needs of your organization. Whether you’re managing standard workspaces, meeting rooms, or specialized desks, Dibsido provides the flexibility to tailor workspace resources to your requirements.
