Navigate to settings:
Start by going to the "Settings" menu in Dibsido.
Select desks settings:
Under "Settings," choose the "Desks" option to manage your workplaces.
View desk layout:
Within the desks settings, navigate to the layout that displays all desks in your workplace.
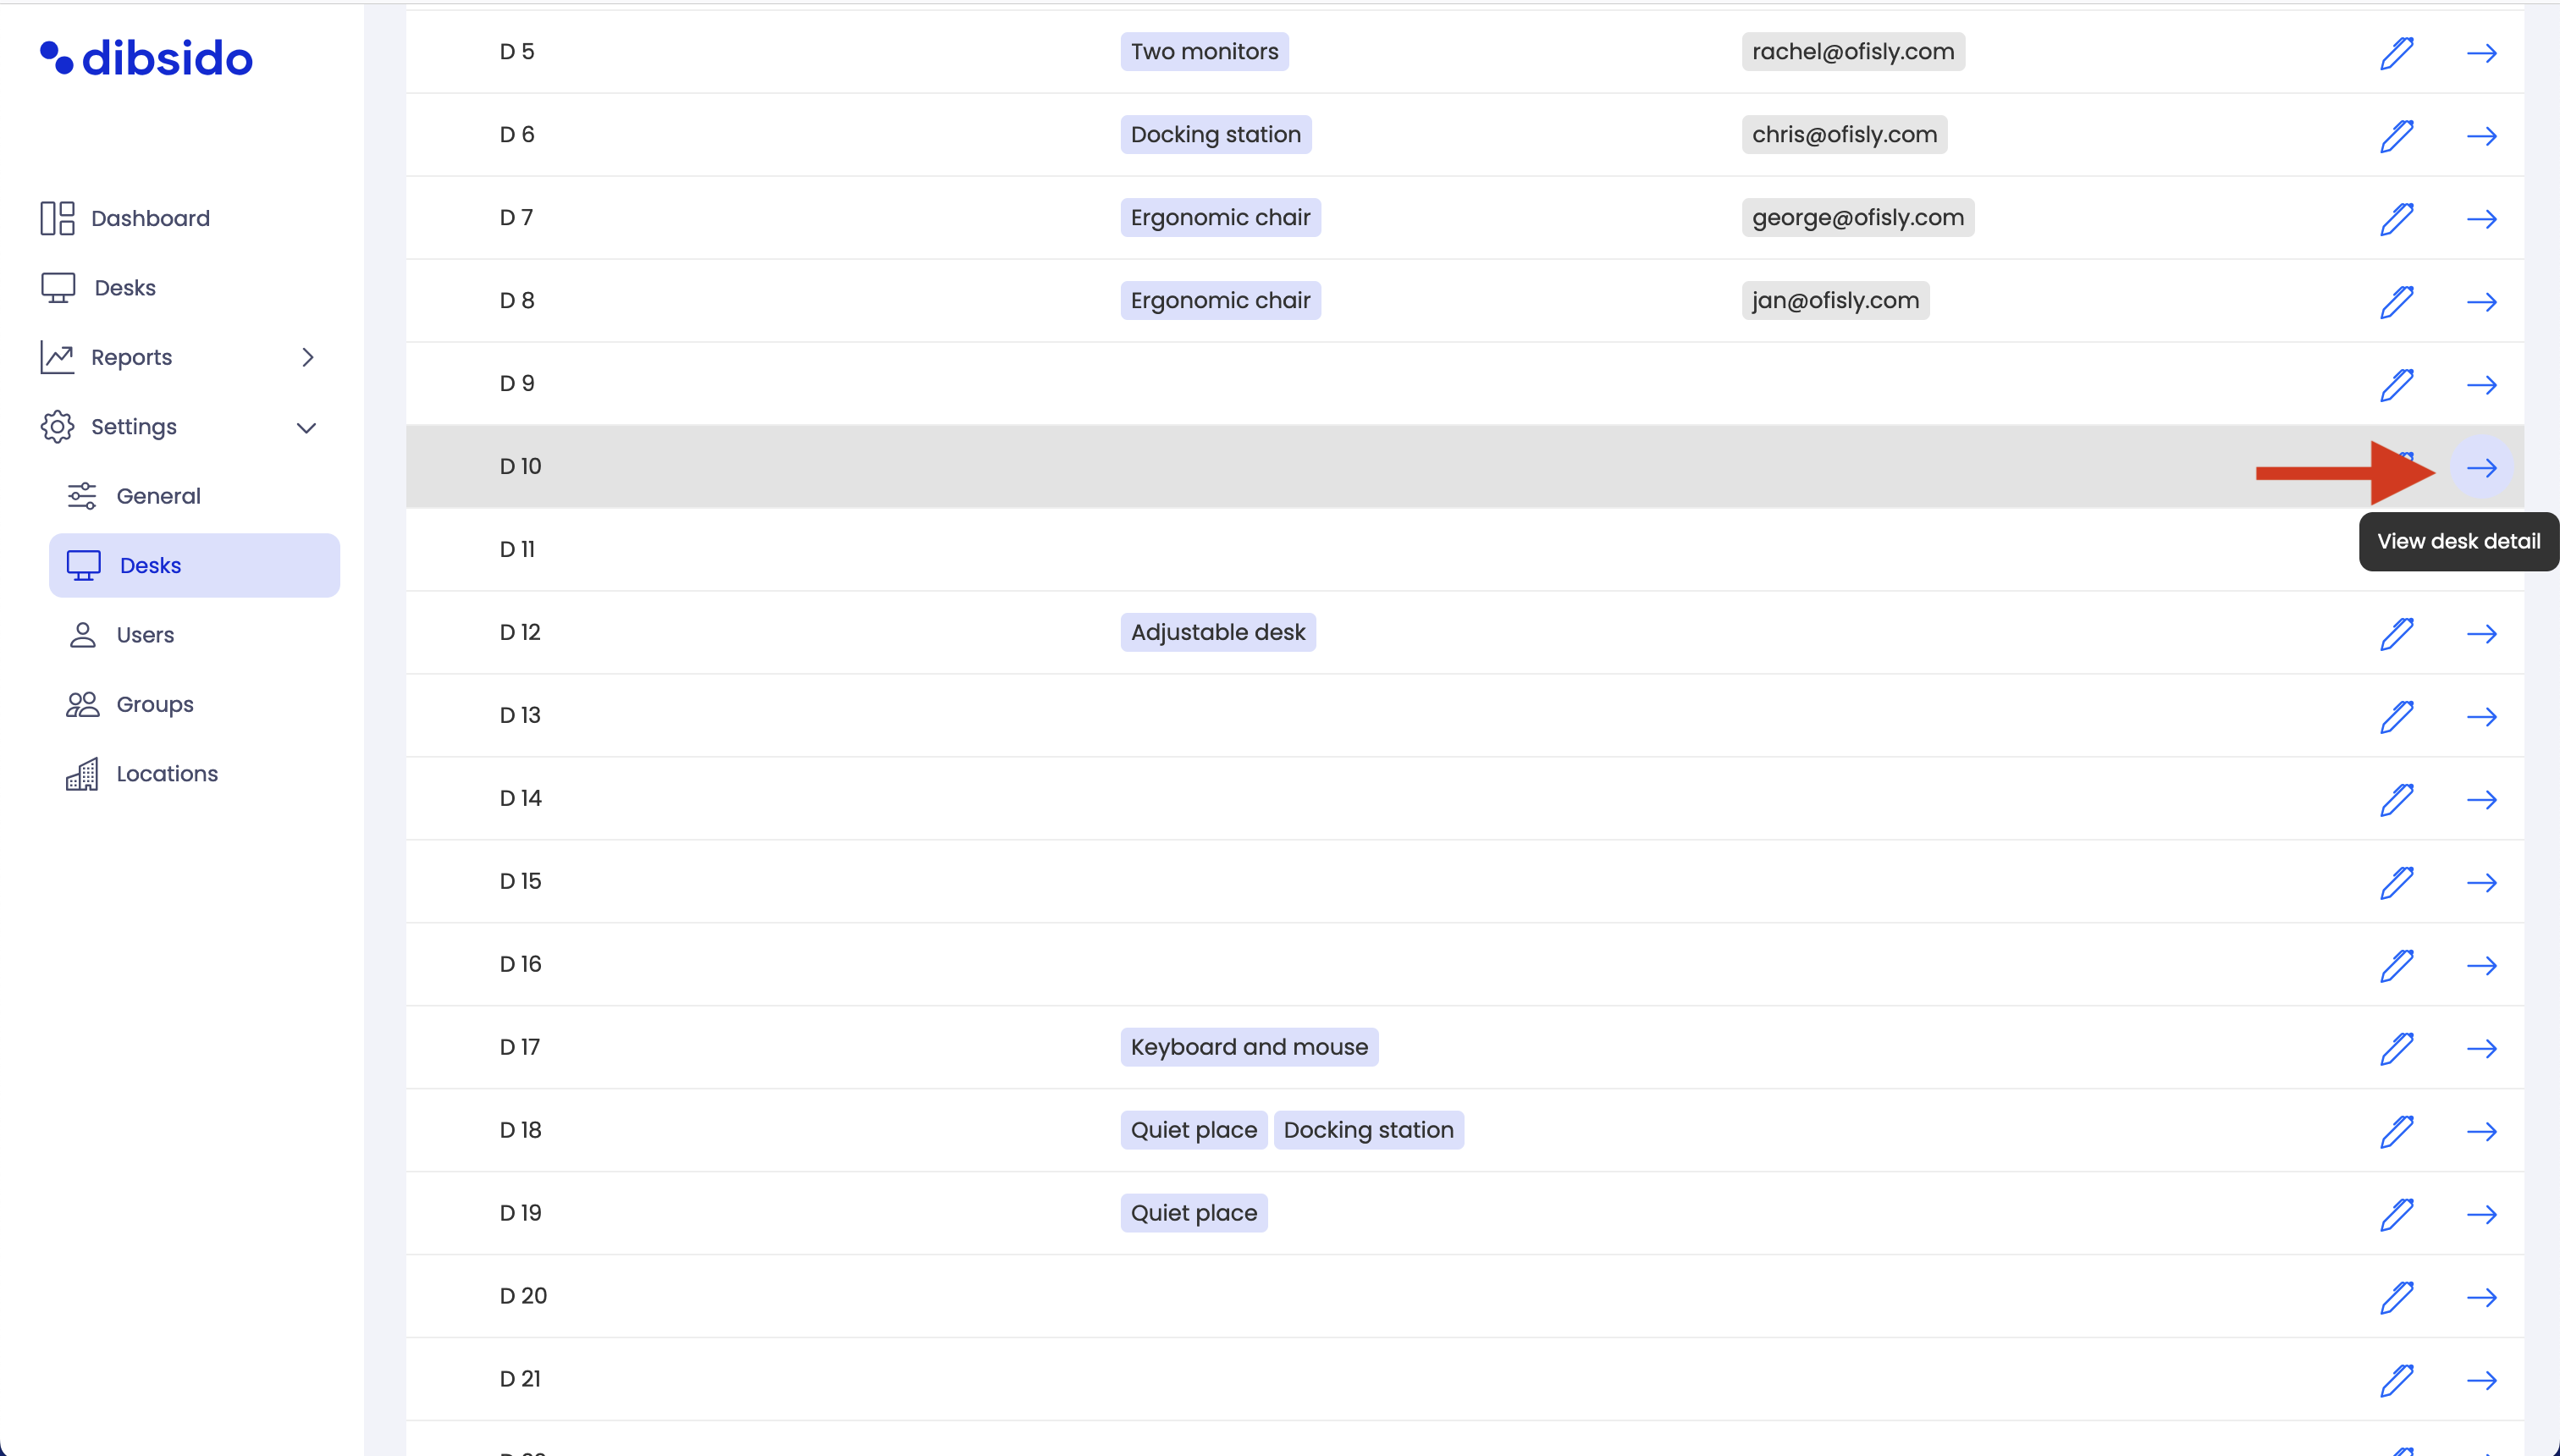
Access desk details:
Click on the arrow next to the desk you want to allocate to see its detail page.
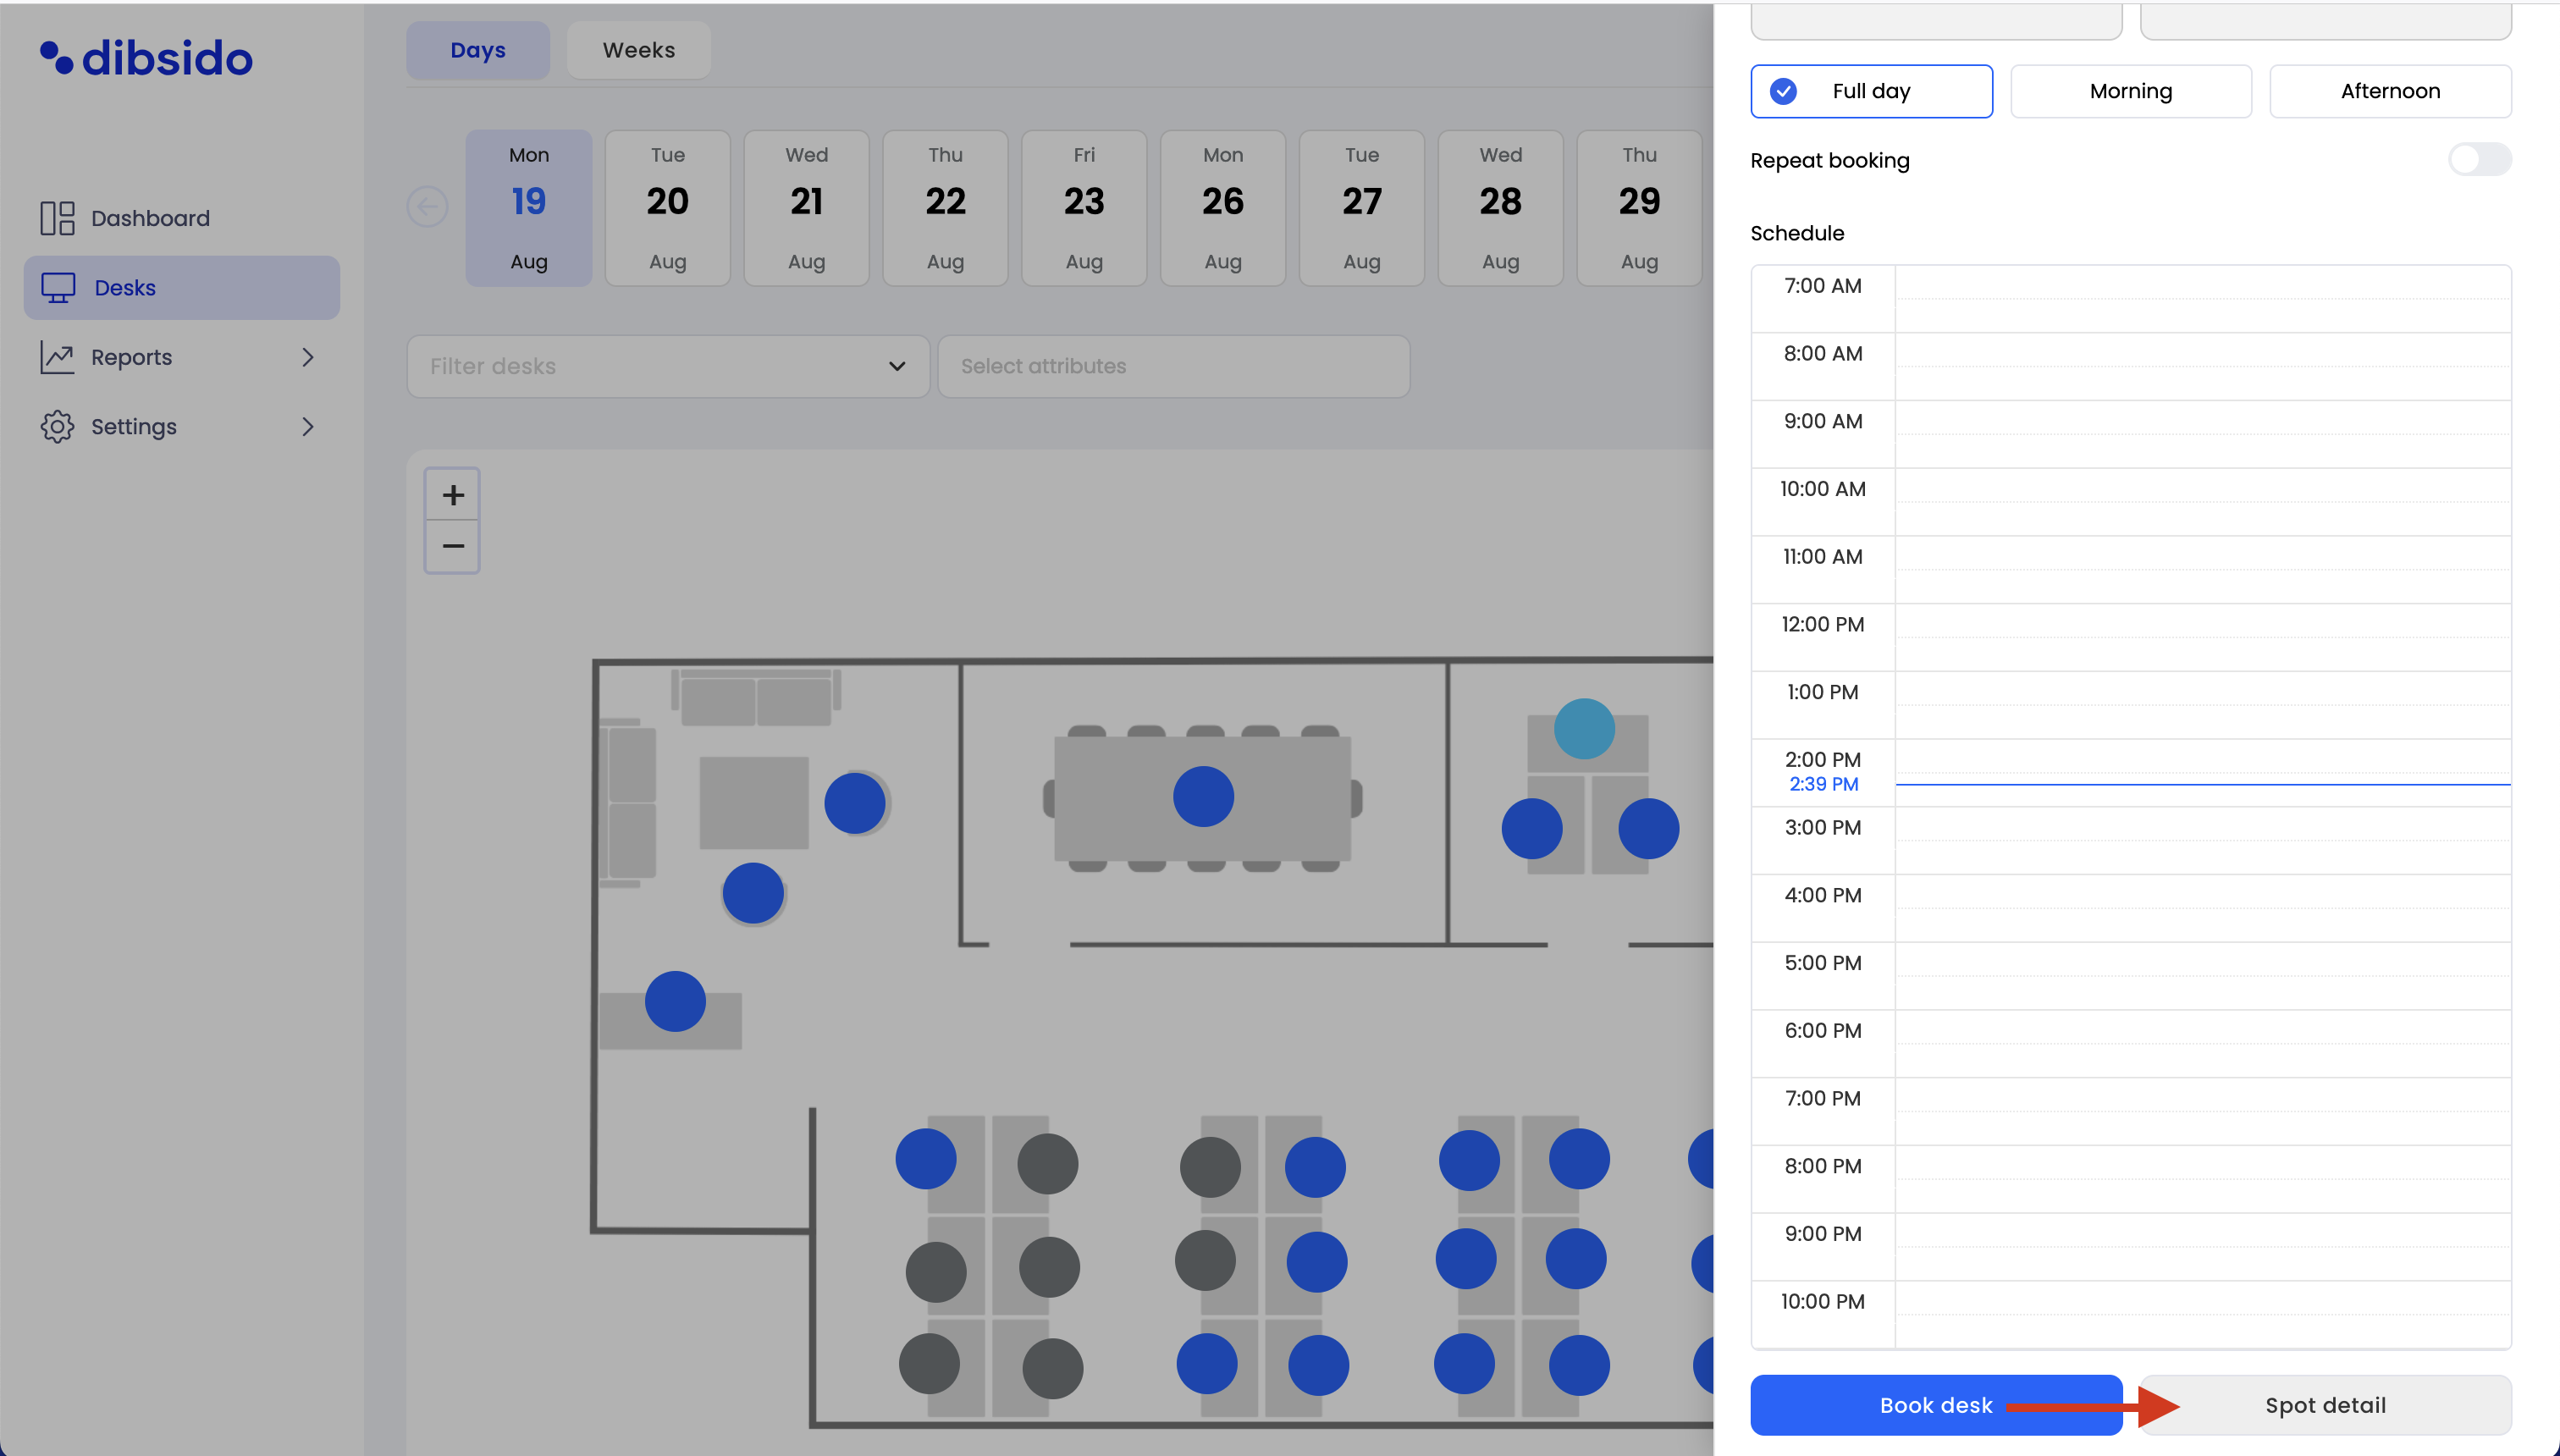
Choose the desk:
Select any desk from the layout or list.
Click on the desk name to open its detail page. Alternatively, you can open the sidebar and click on the "Desk Detail" button at the bottom.
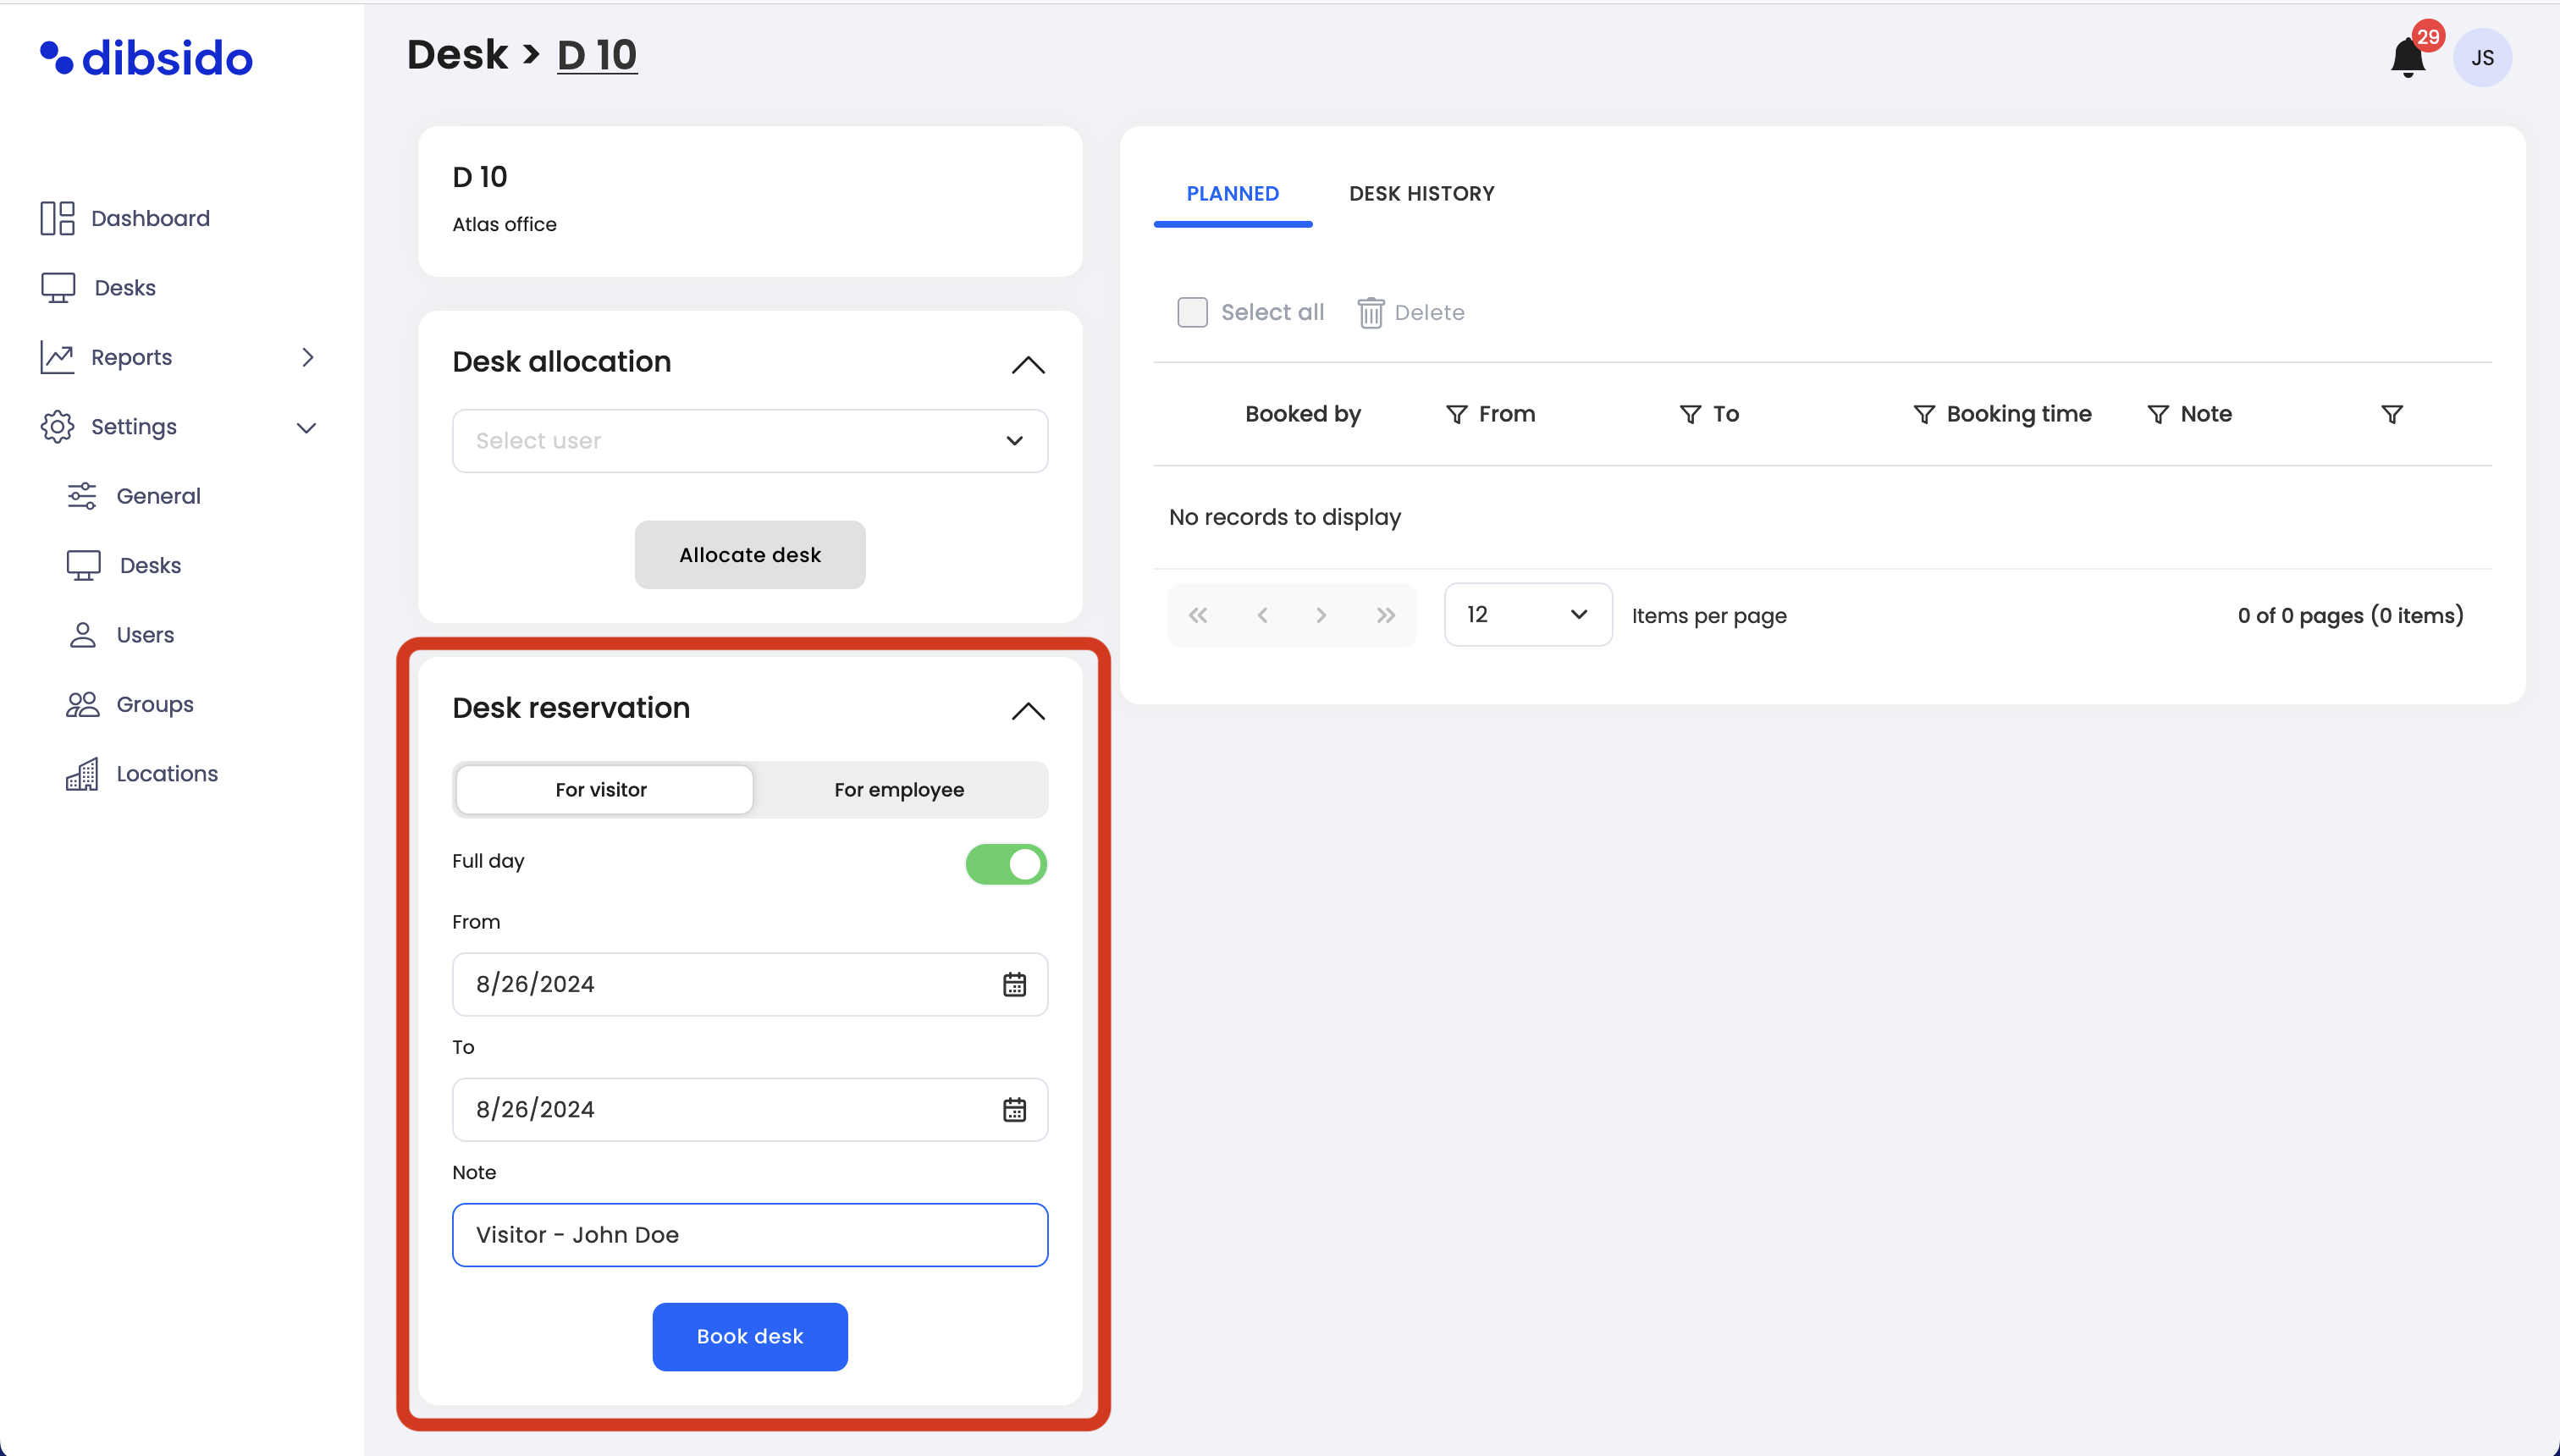
Input time period (dates):
On the desk detail page, input the desired time period for the reservation. You can choose a full-day reservation by toggling the "Full Day" option. If you turn off the full-day toggle, you can set a specific time period by selecting both the date and the hours.
Add a note:
You can add a note to the reservation, such as the name of the visitor or any other relevant information.
Book the desk:
After entering the time and note, click "Book Desk" to finalize the reservation.
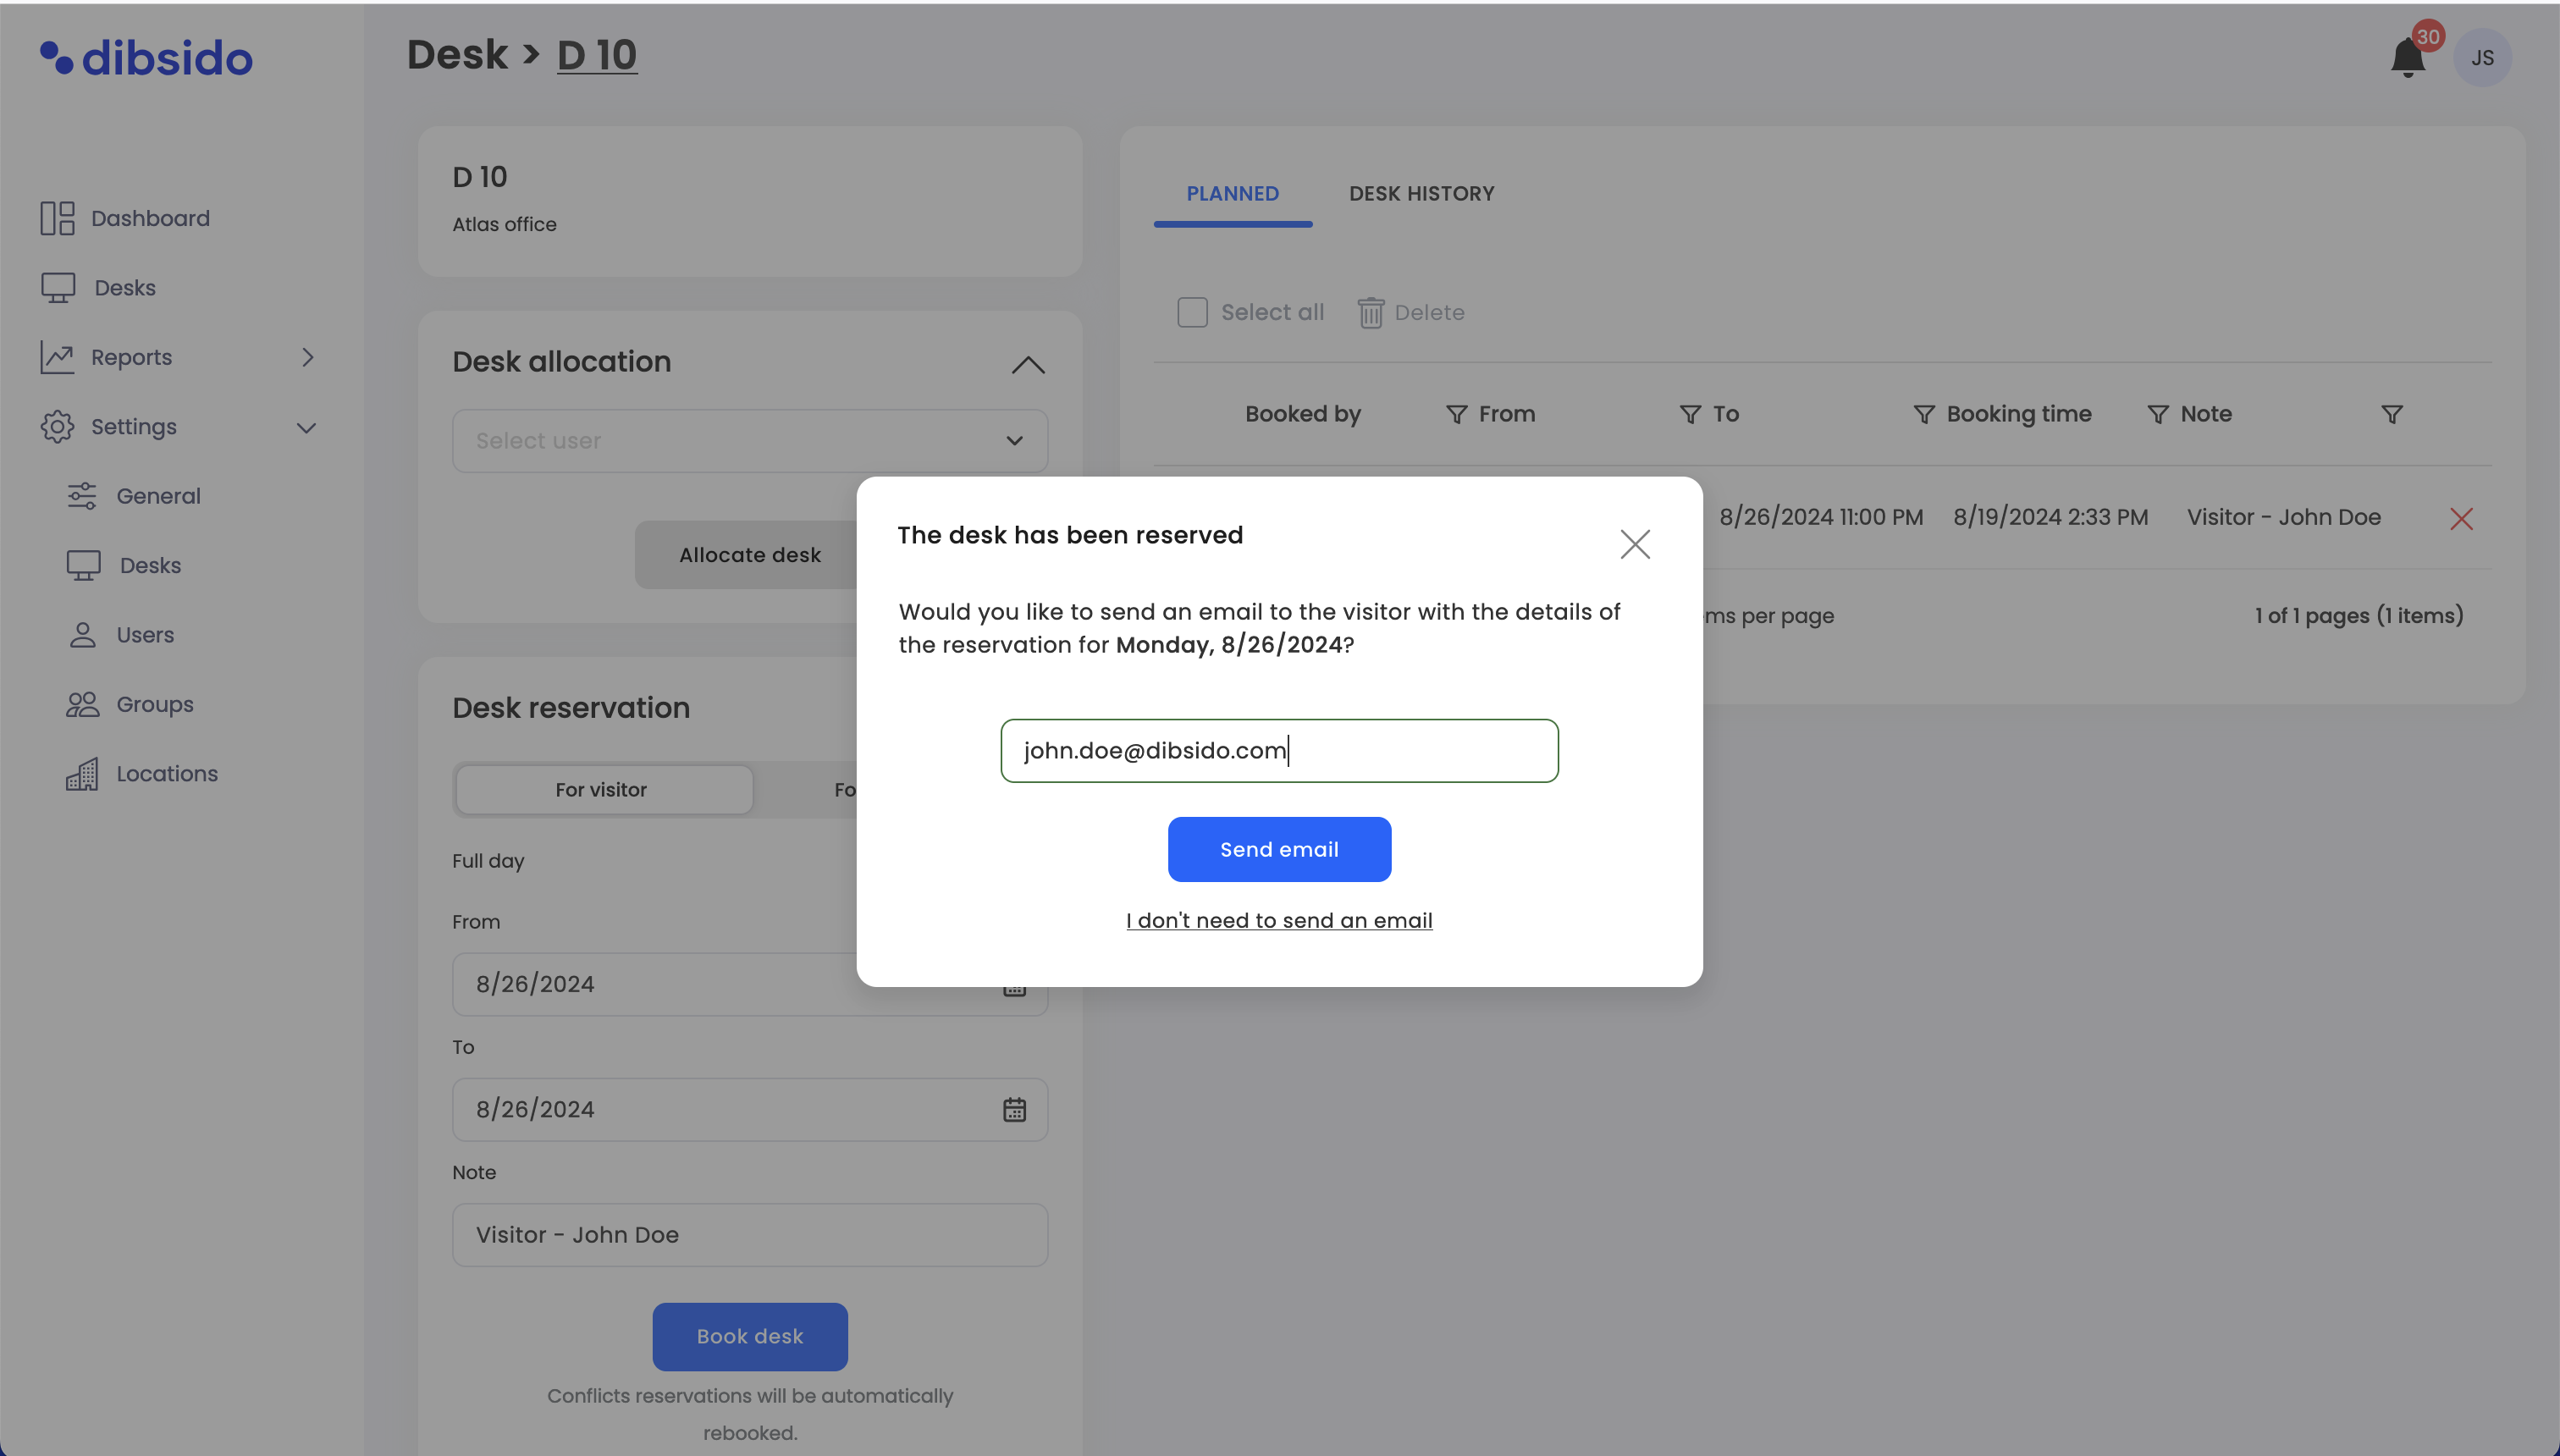
Send confirmation email:
After creating the reservation, a window (popup) will appear, giving you the option to send a confirmation email to the visitor. This email will include the details of the booking and any other information you wish to share.
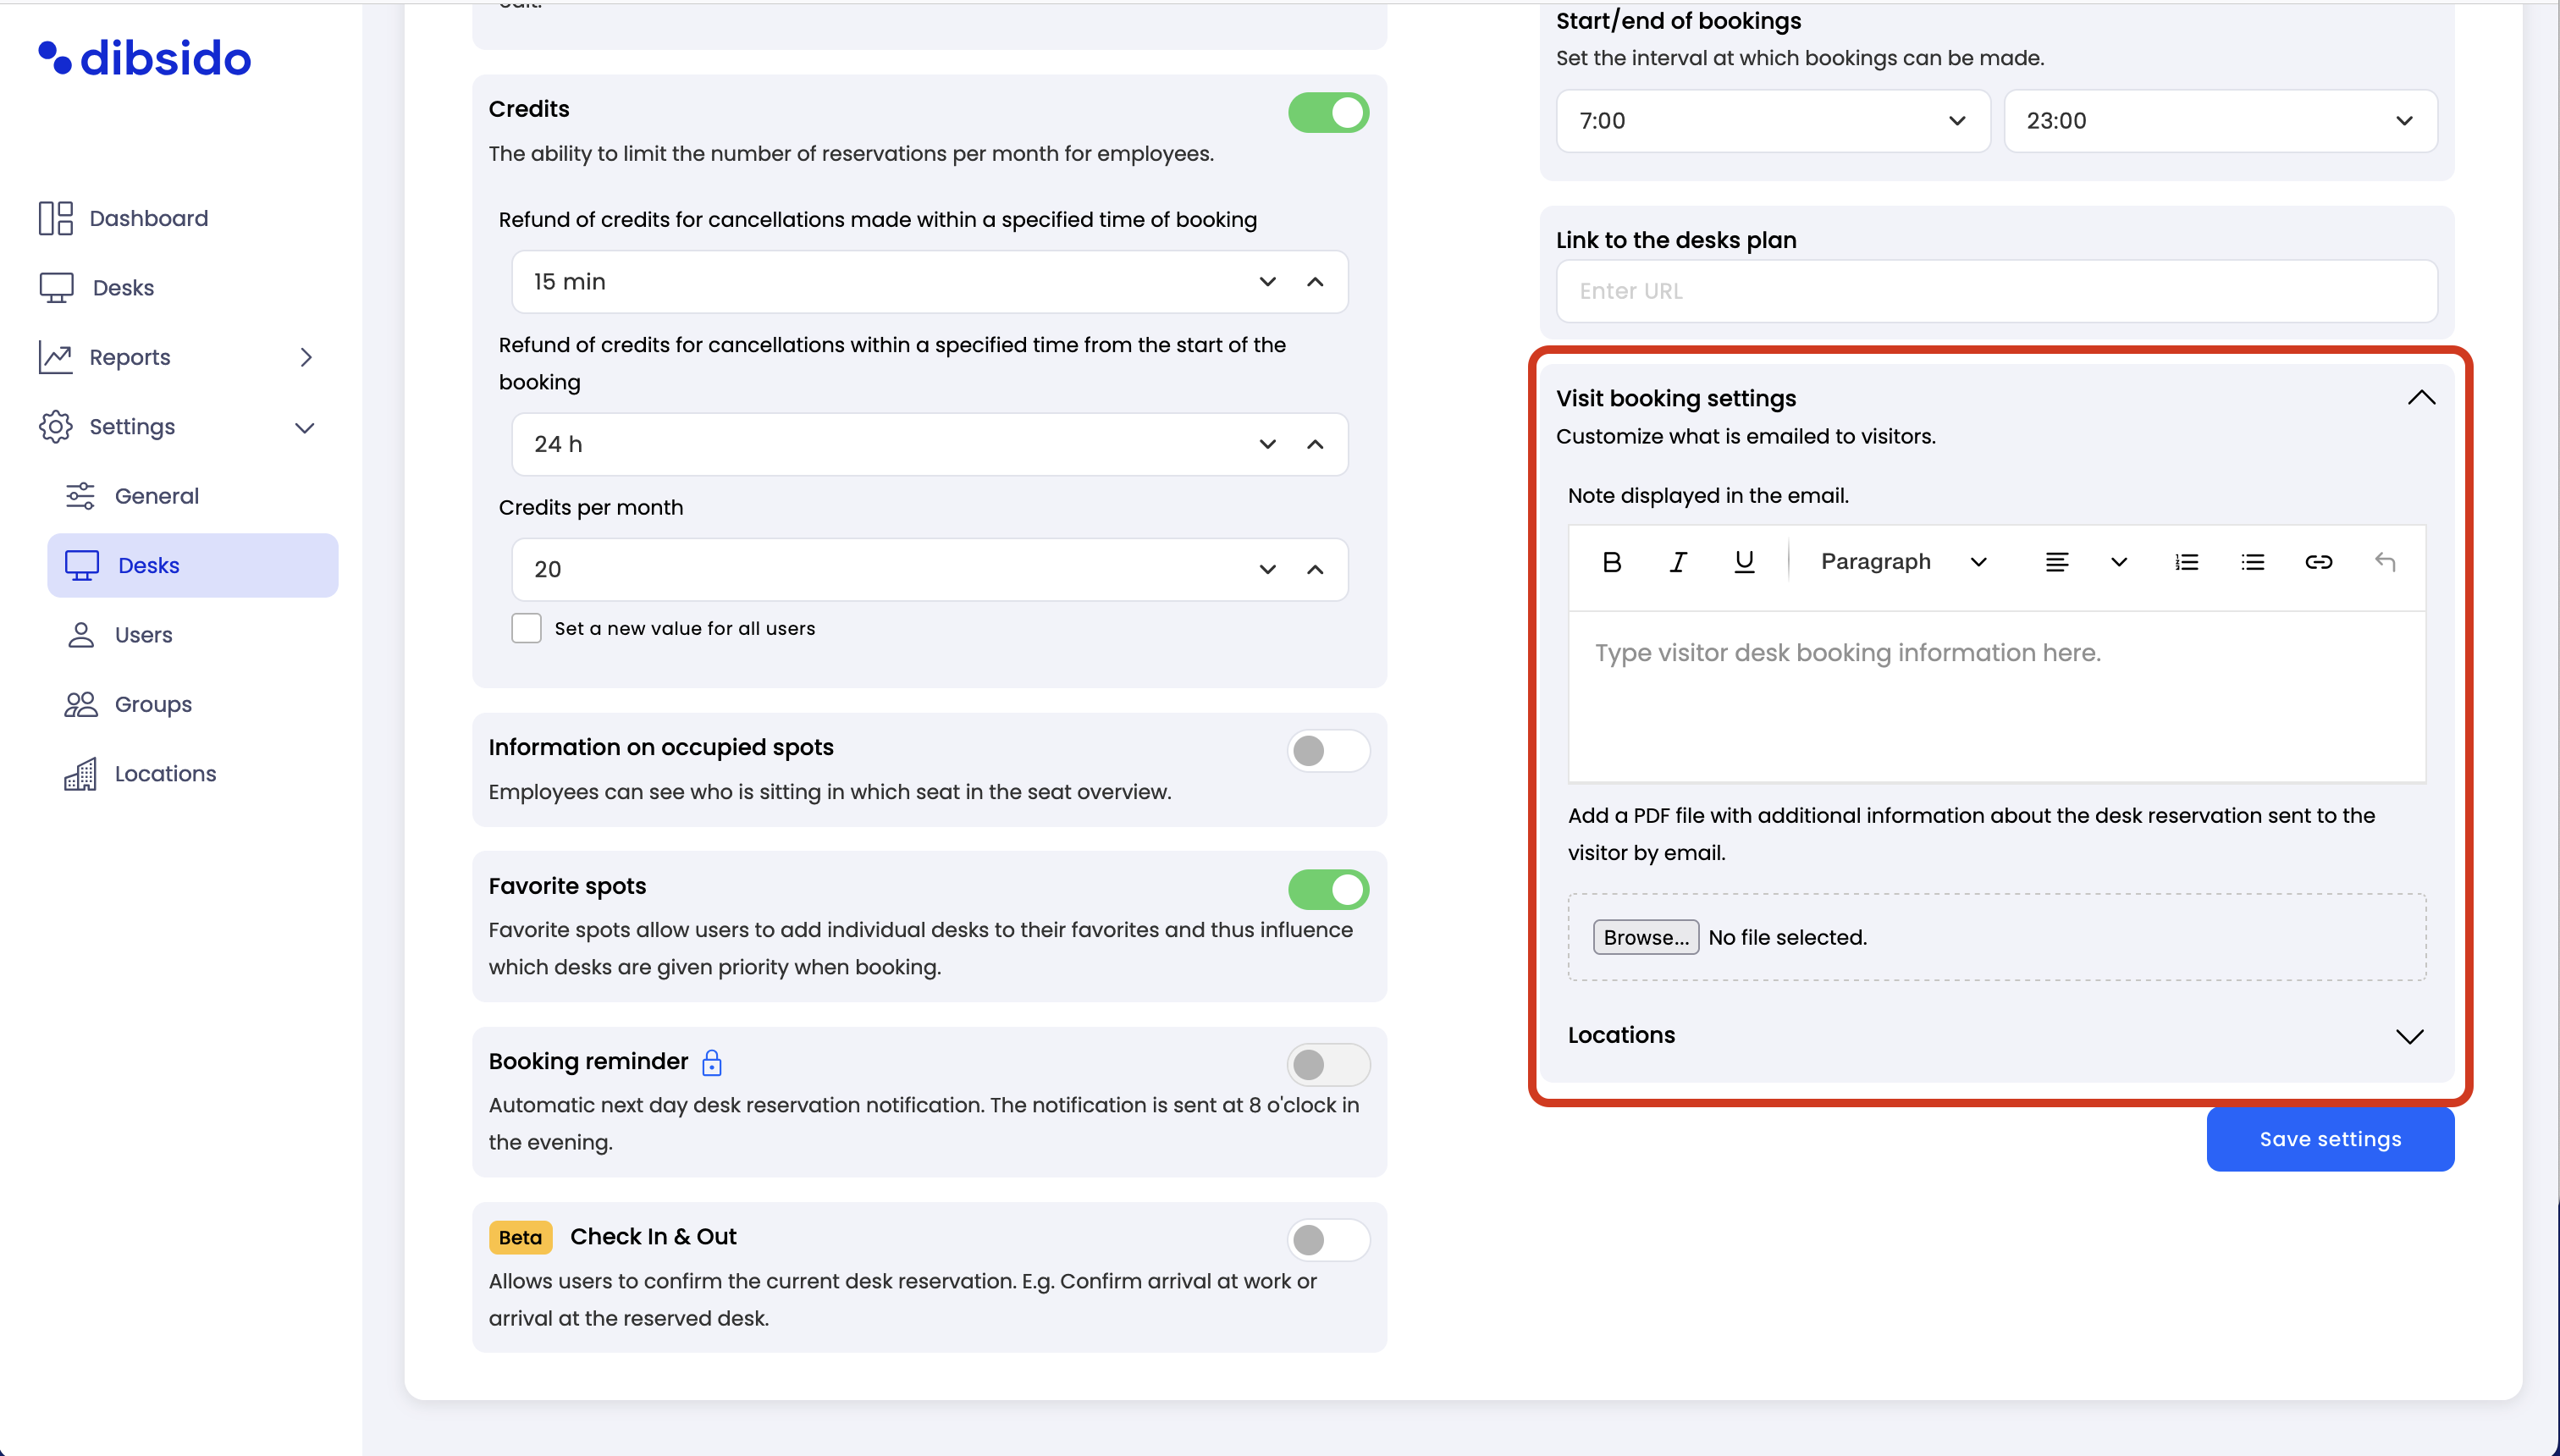
Visit booking settings: You can customize the email that is sent to visitors by navigating to "Settings" > "Desks" > "Features" and selecting "Visit Booking Settings."
Email customization: This allows you to personalize the message sent to visitors, ensuring they receive all the necessary details for their visit.
Adding attachments: You can also attach any files to the email, such as maps, parking instructions, or company policies, to provide visitors with all the information they need.
By following these steps, you can easily create and manage desk reservations for visitors in Dibsido, ensuring a seamless experience for both your team and your guests.
