Navigate to settings:
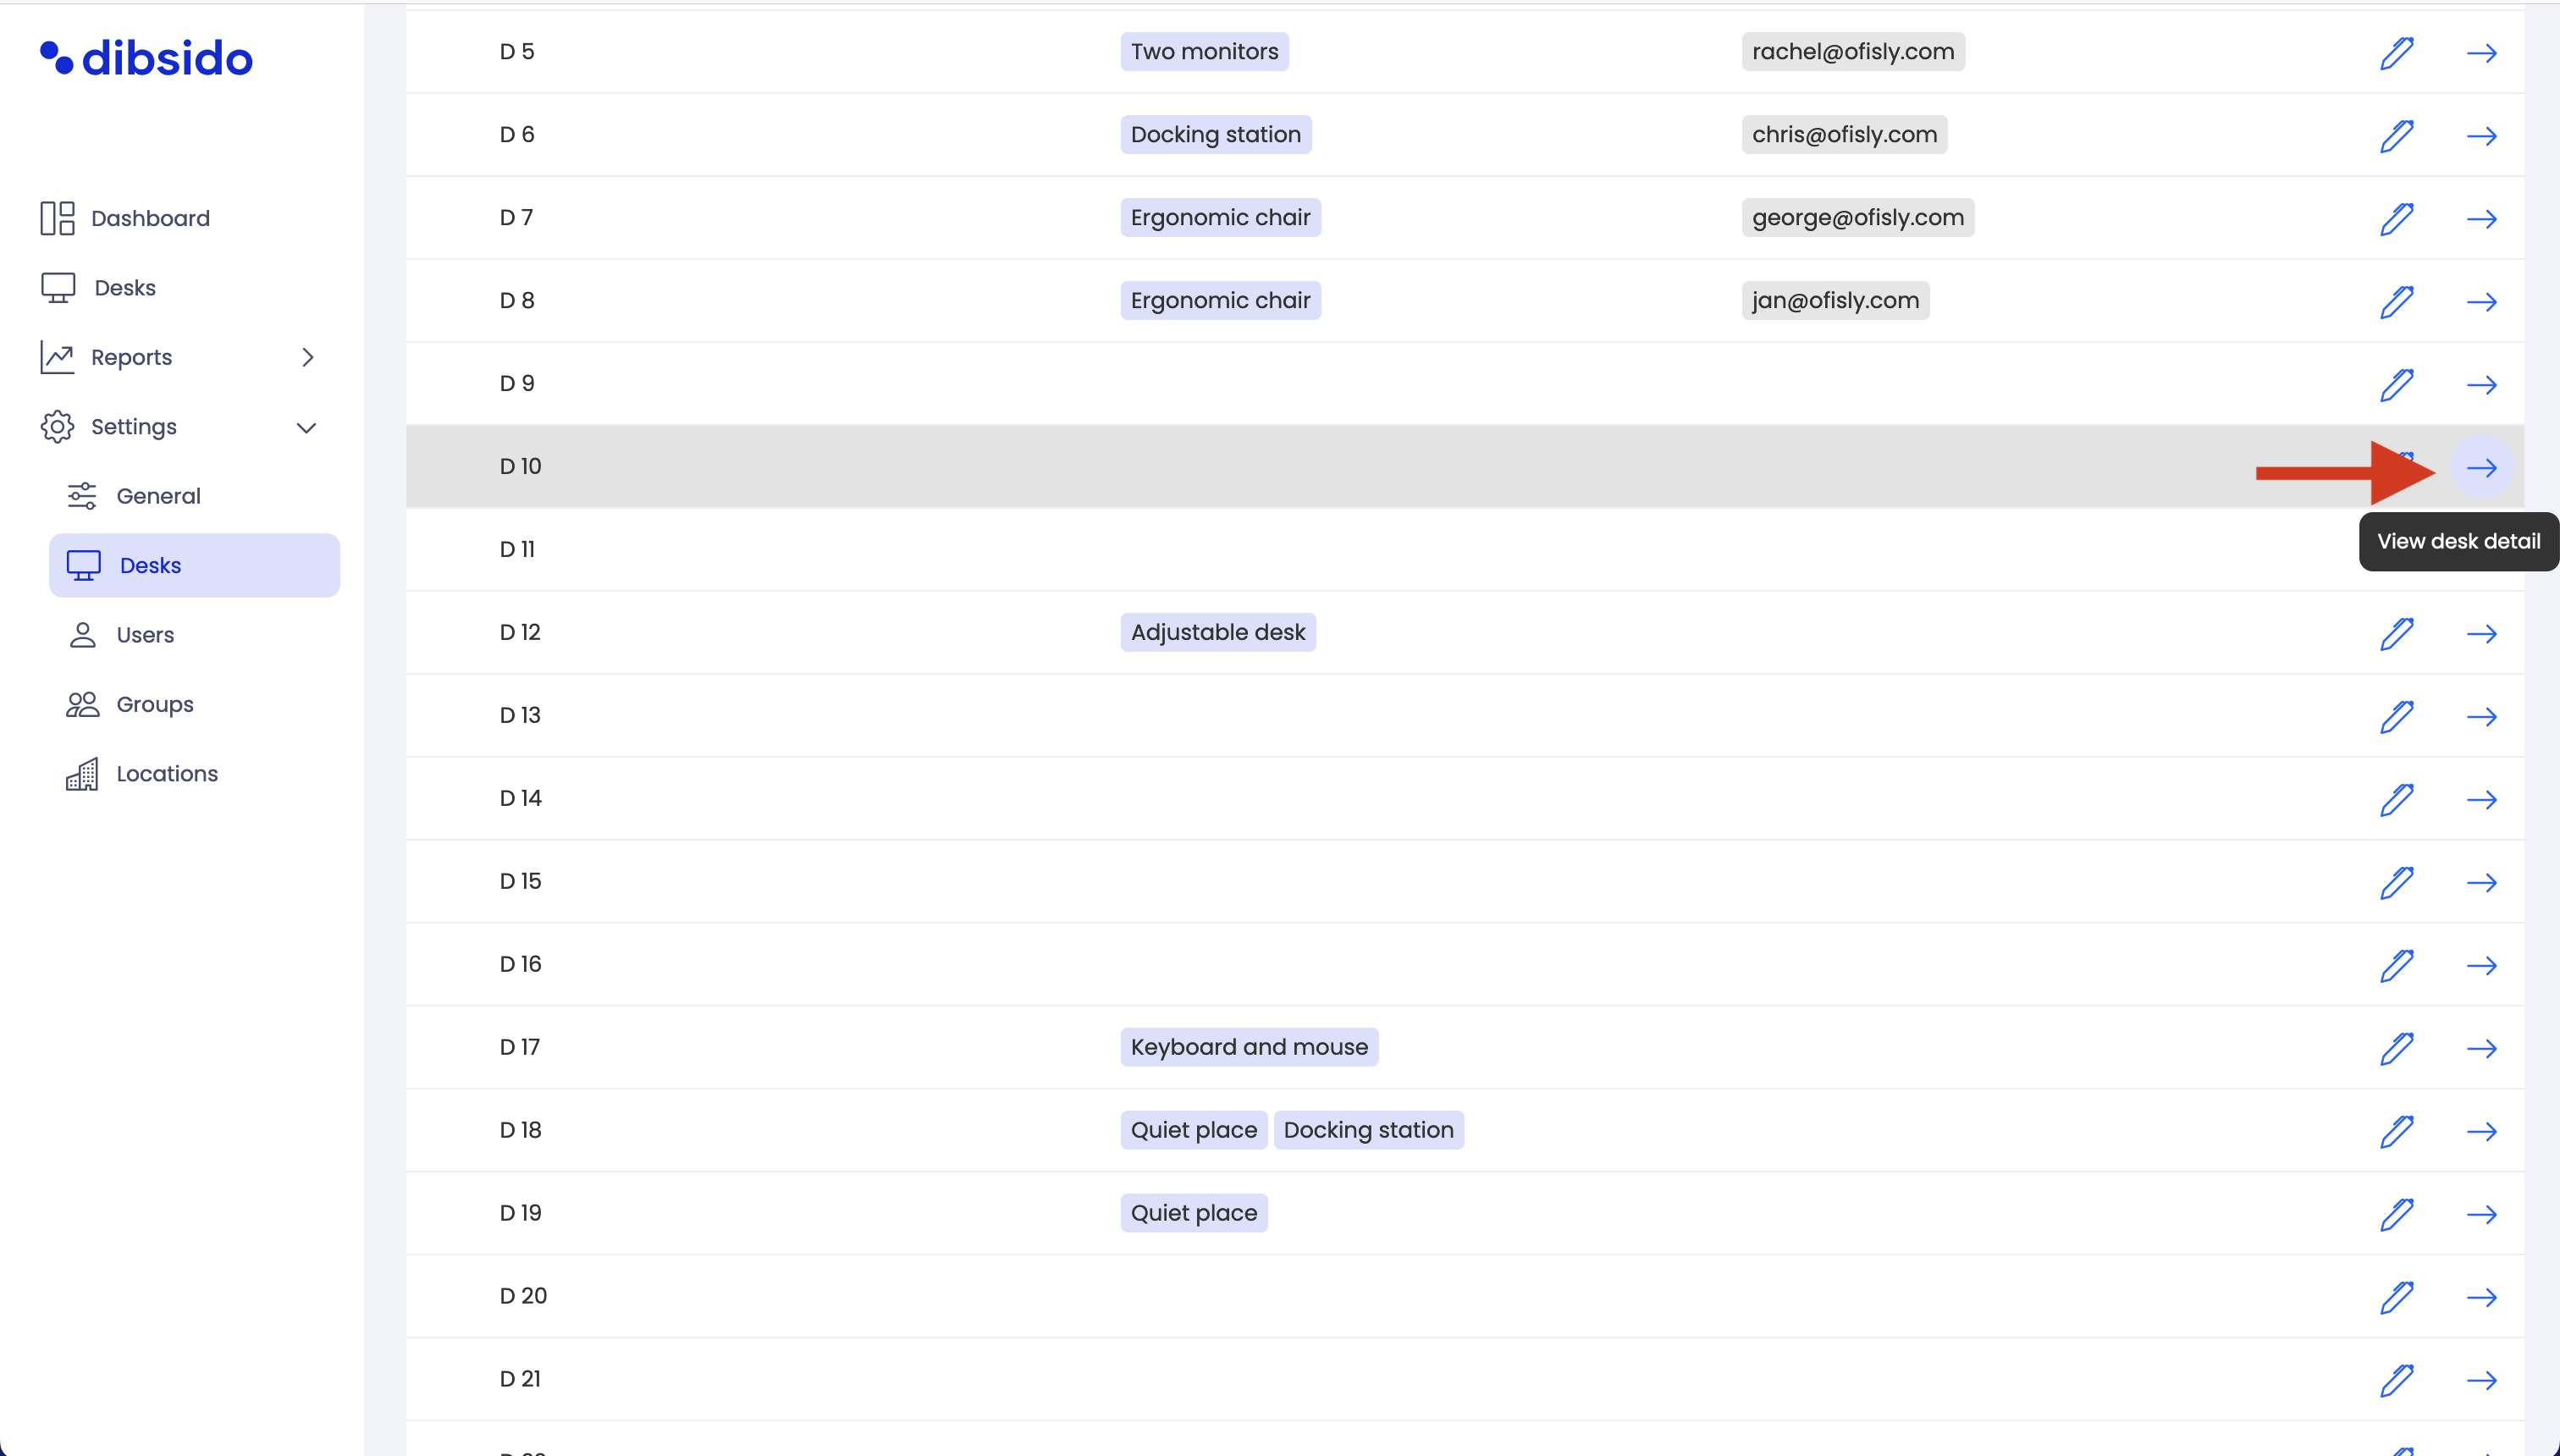
Start by going to the "Settings" menu in Dibsido.
Select desks settings:
Under "Settings," choose the "Desks" option to manage your workplaces.
View desk layout:
Within the desks settings, navigate to the layout that displays all desks in your workplaces.
Access desk details:
Click on the arrow next to the desk you want to allocate to see its detail page.

Choose the desk:
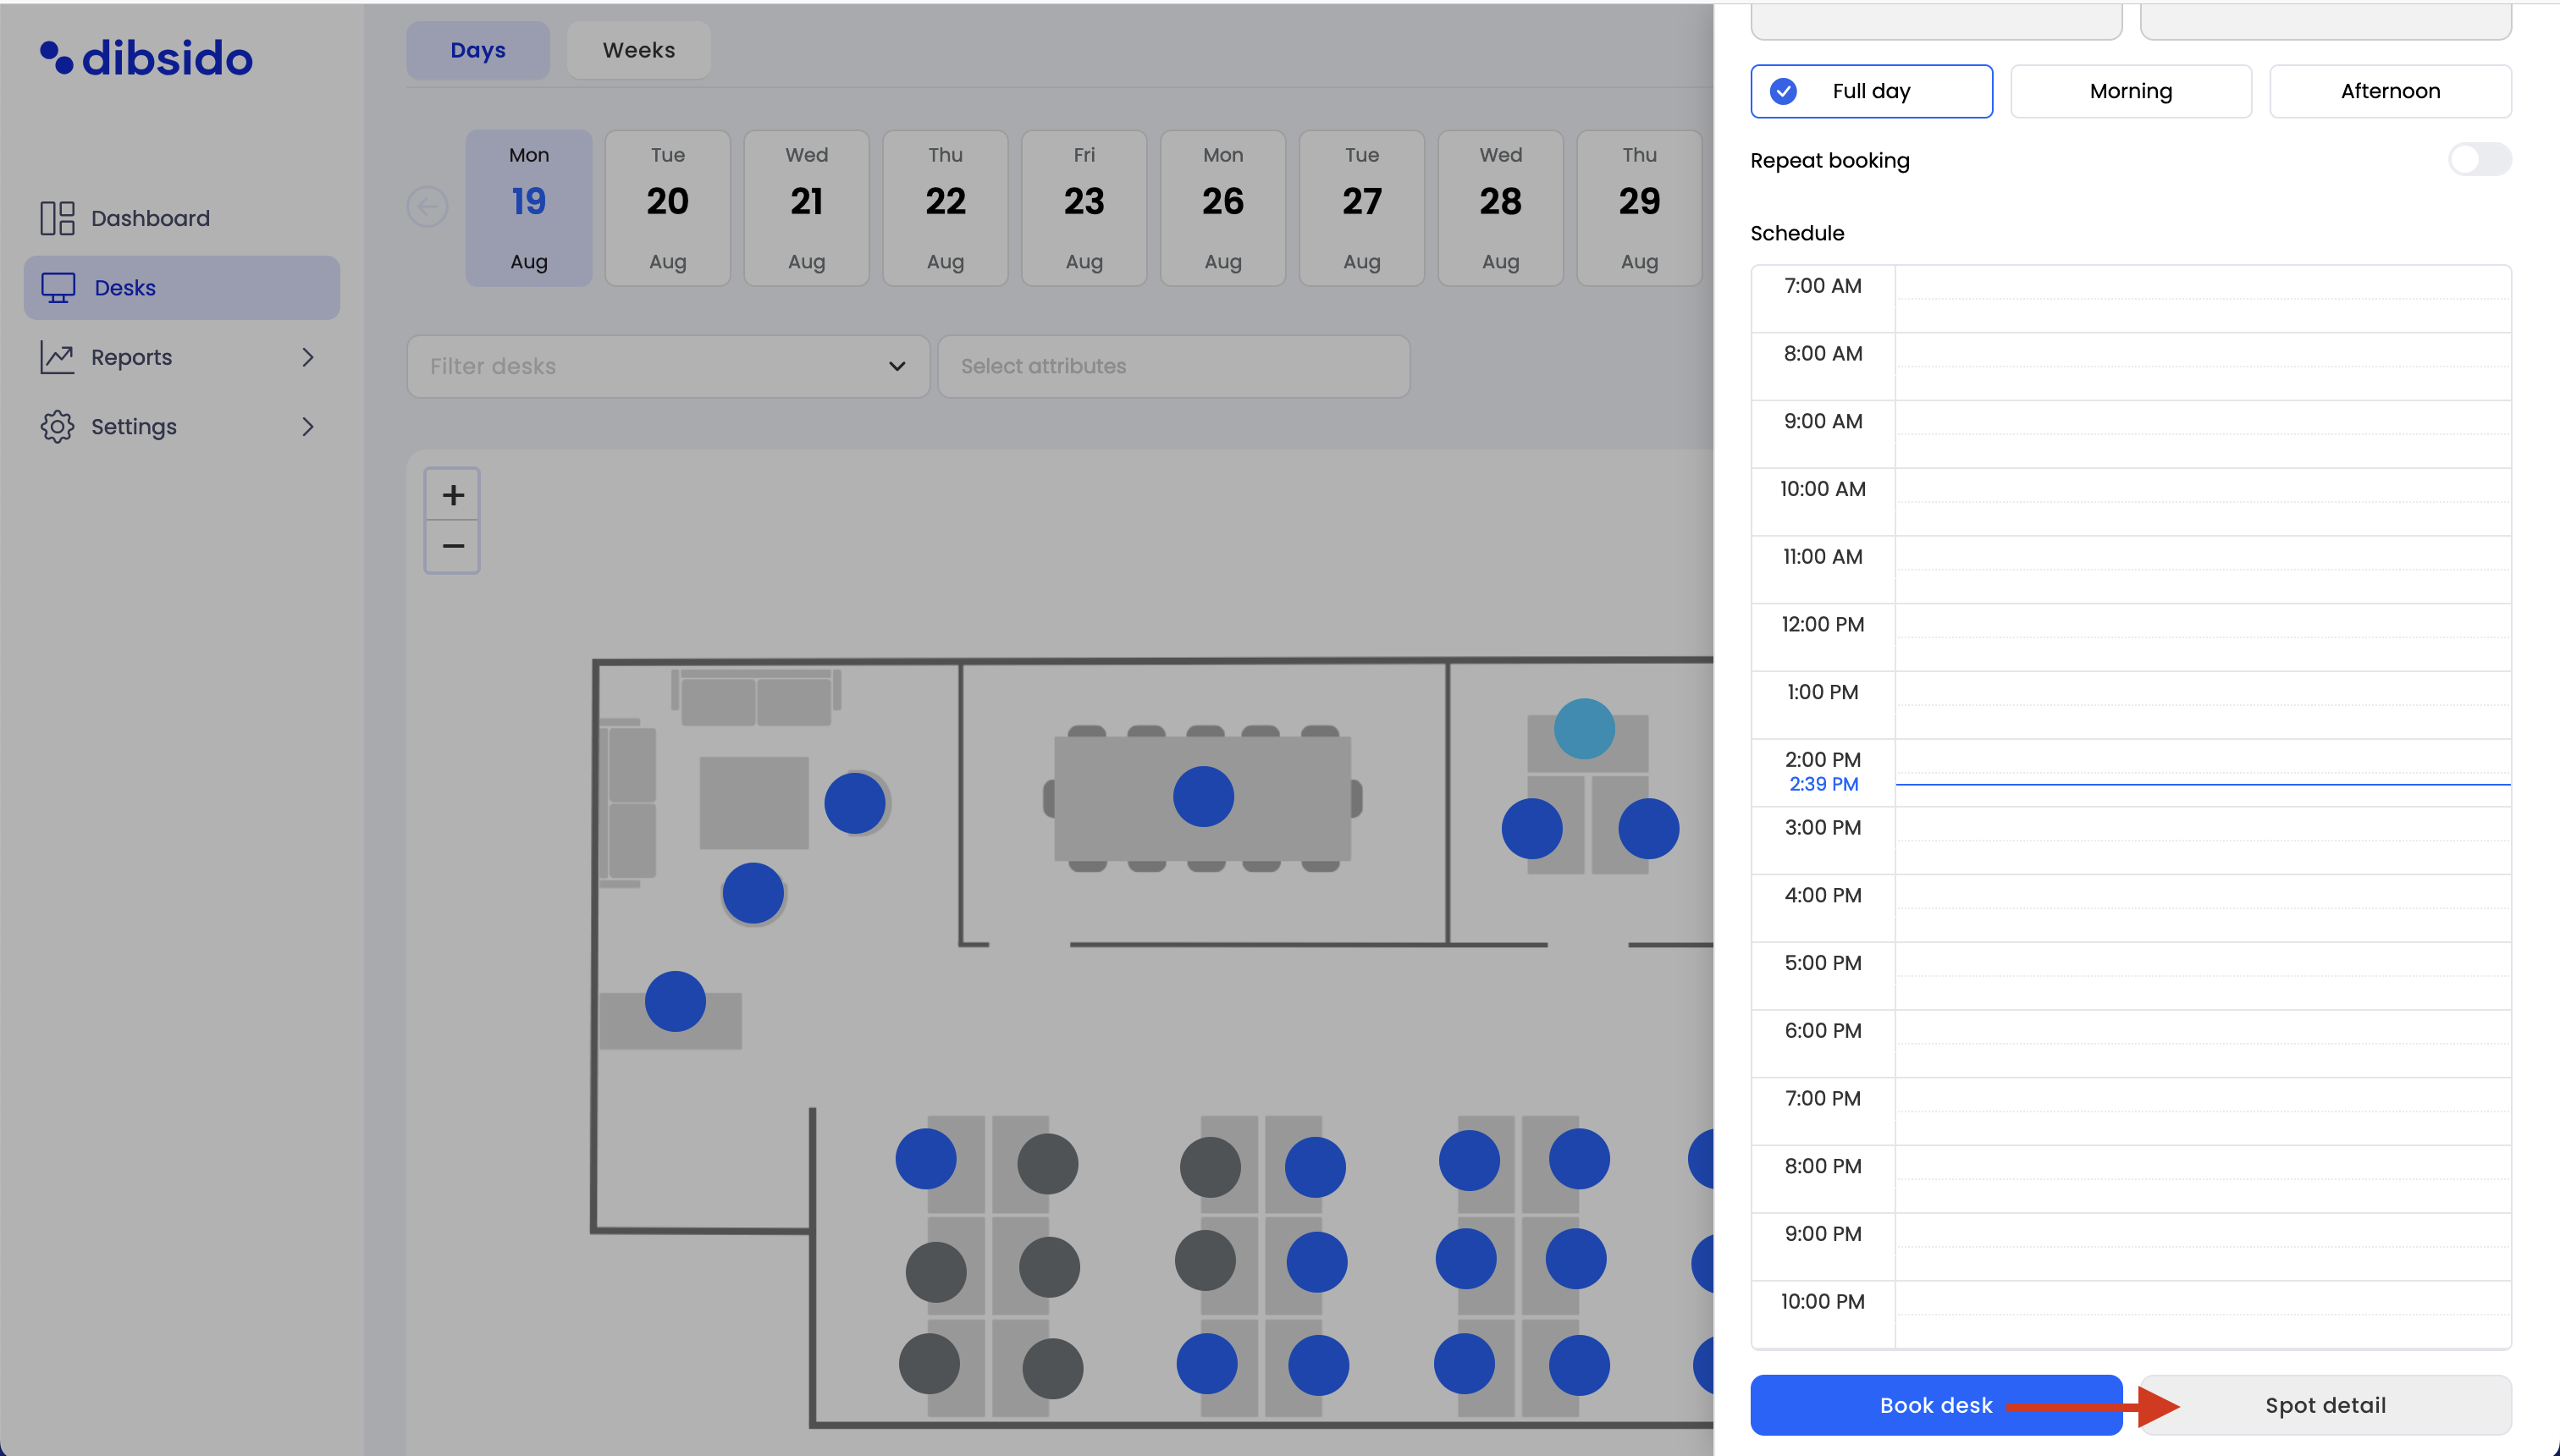
Select any desk from the layout or list.
Click on the desk name to open its detail page. Alternatively, you can open the sidebar and click on the "Desk Detail" button at the bottom.

Switch from visitor to employee reservation:
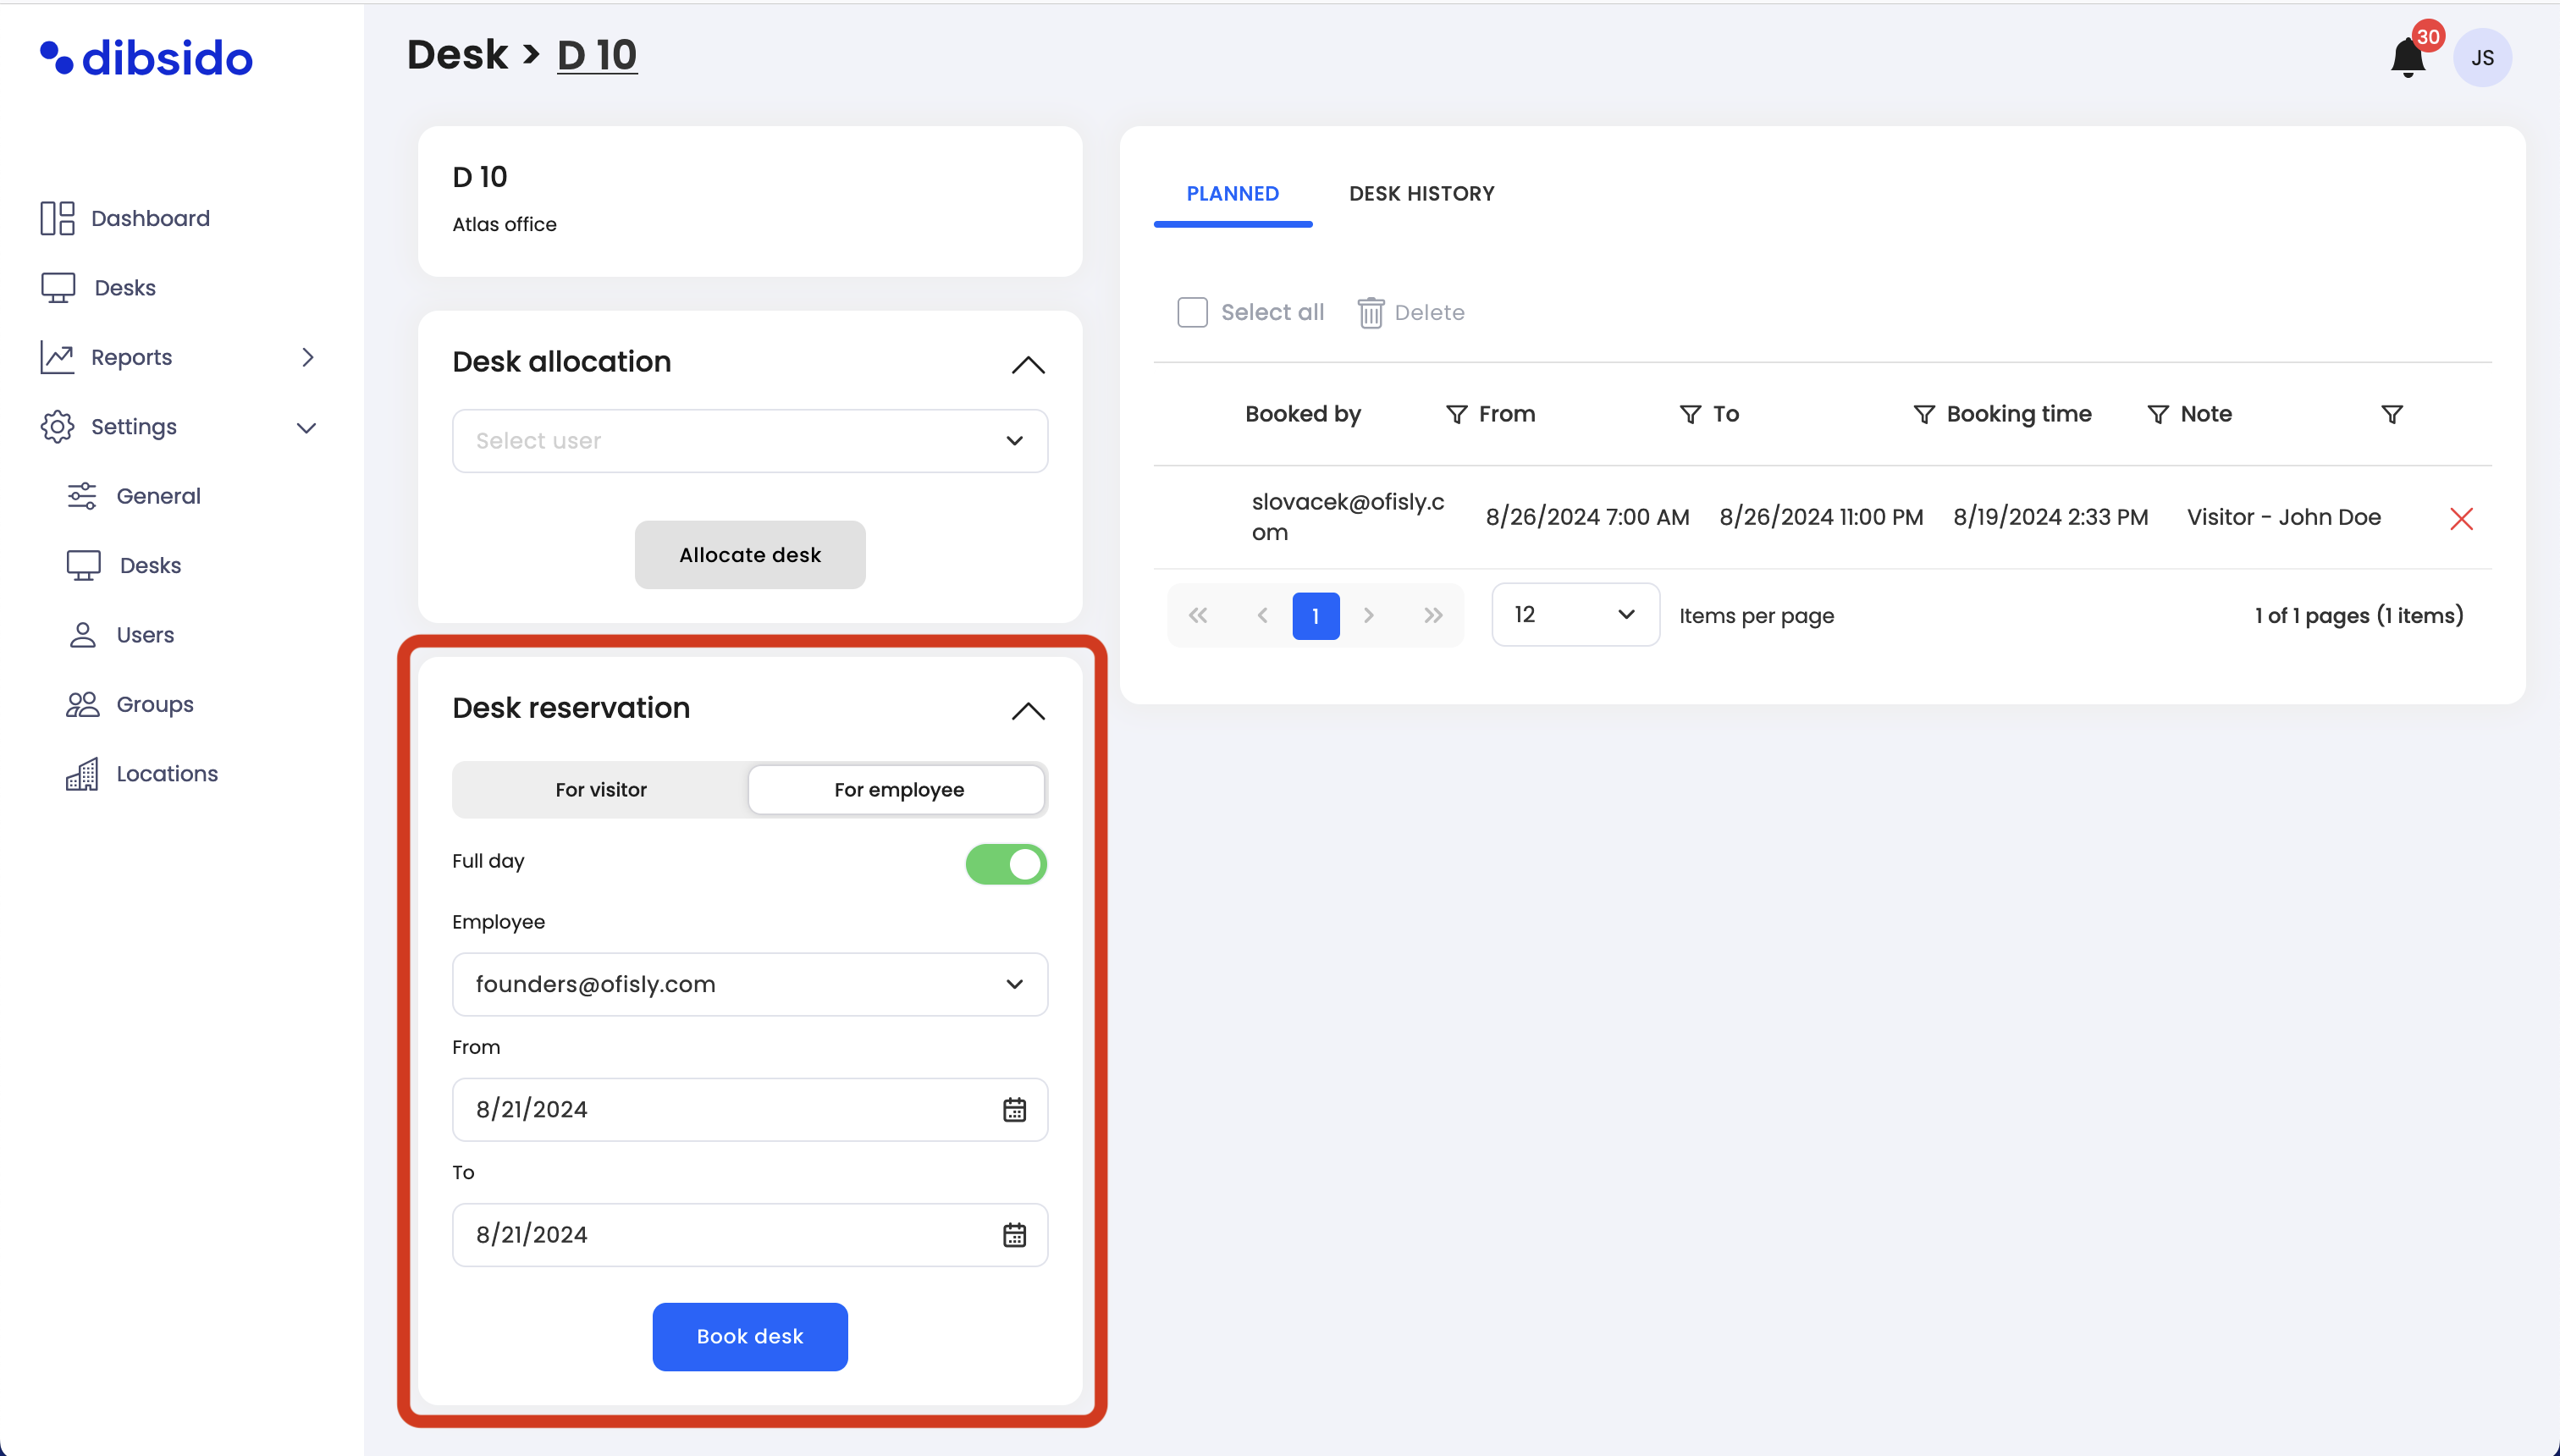
On the desk detail page, switch the option from "Visitor" to "Employee" to indicate that the reservation is for an employee.
Select the employee:
Choose the employee for whom you want to create the reservation from the dropdown list of users.
Input time period (dates):
Enter the desired time period for the reservation. You can choose a full-day reservation by toggling the "Full Day" option. If you turn off the full-day toggle, you can set a specific time period by selecting both the date and the hours.
Book the desk:
After selecting the employee and entering the time period, click "Book Desk" to finalize the reservation.

By following these steps, you can efficiently create desk reservations for employees in Dibsido, ensuring that they have a designated workspace during their work hours. This feature simplifies the process, focusing on quick and easy reservation management for your team.