Access the desk detail page:
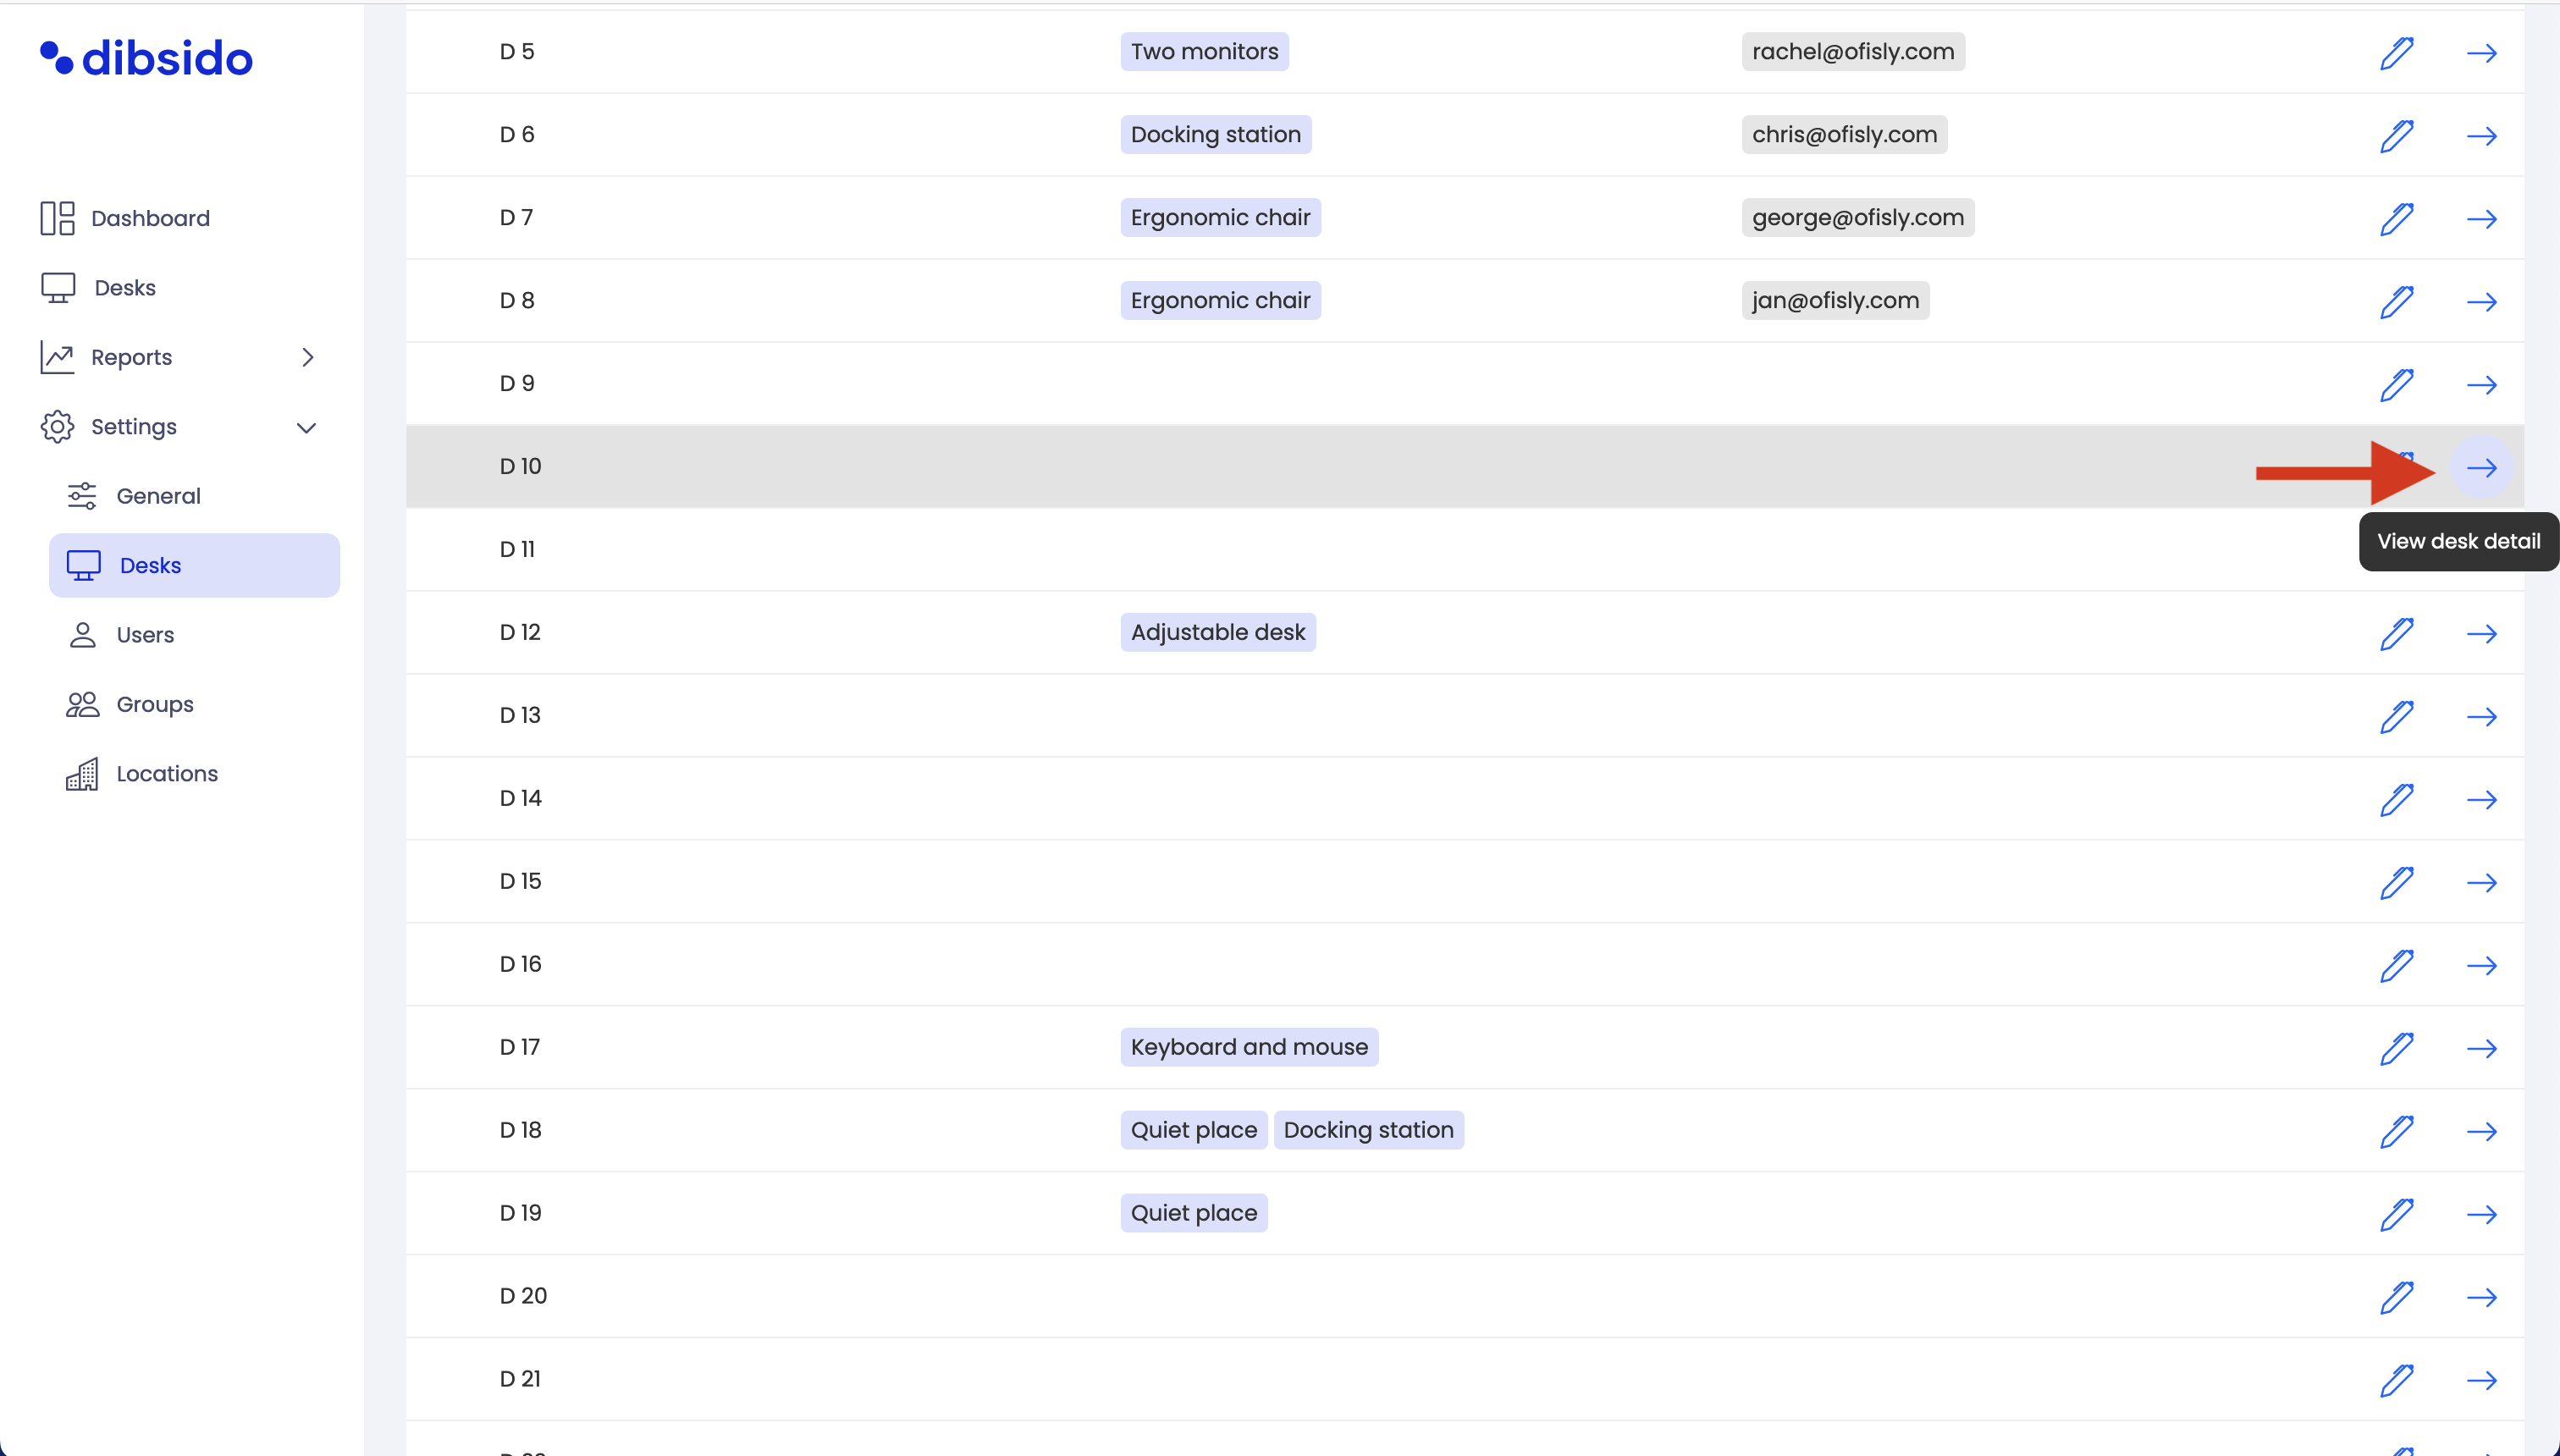
As an Administrator: Navigate to the "Settings" menu within the Dibsido app, select the "Desks" option, and find the workplace and desk where the reservation was made. Click on the desk name or arrow to access its detail page.
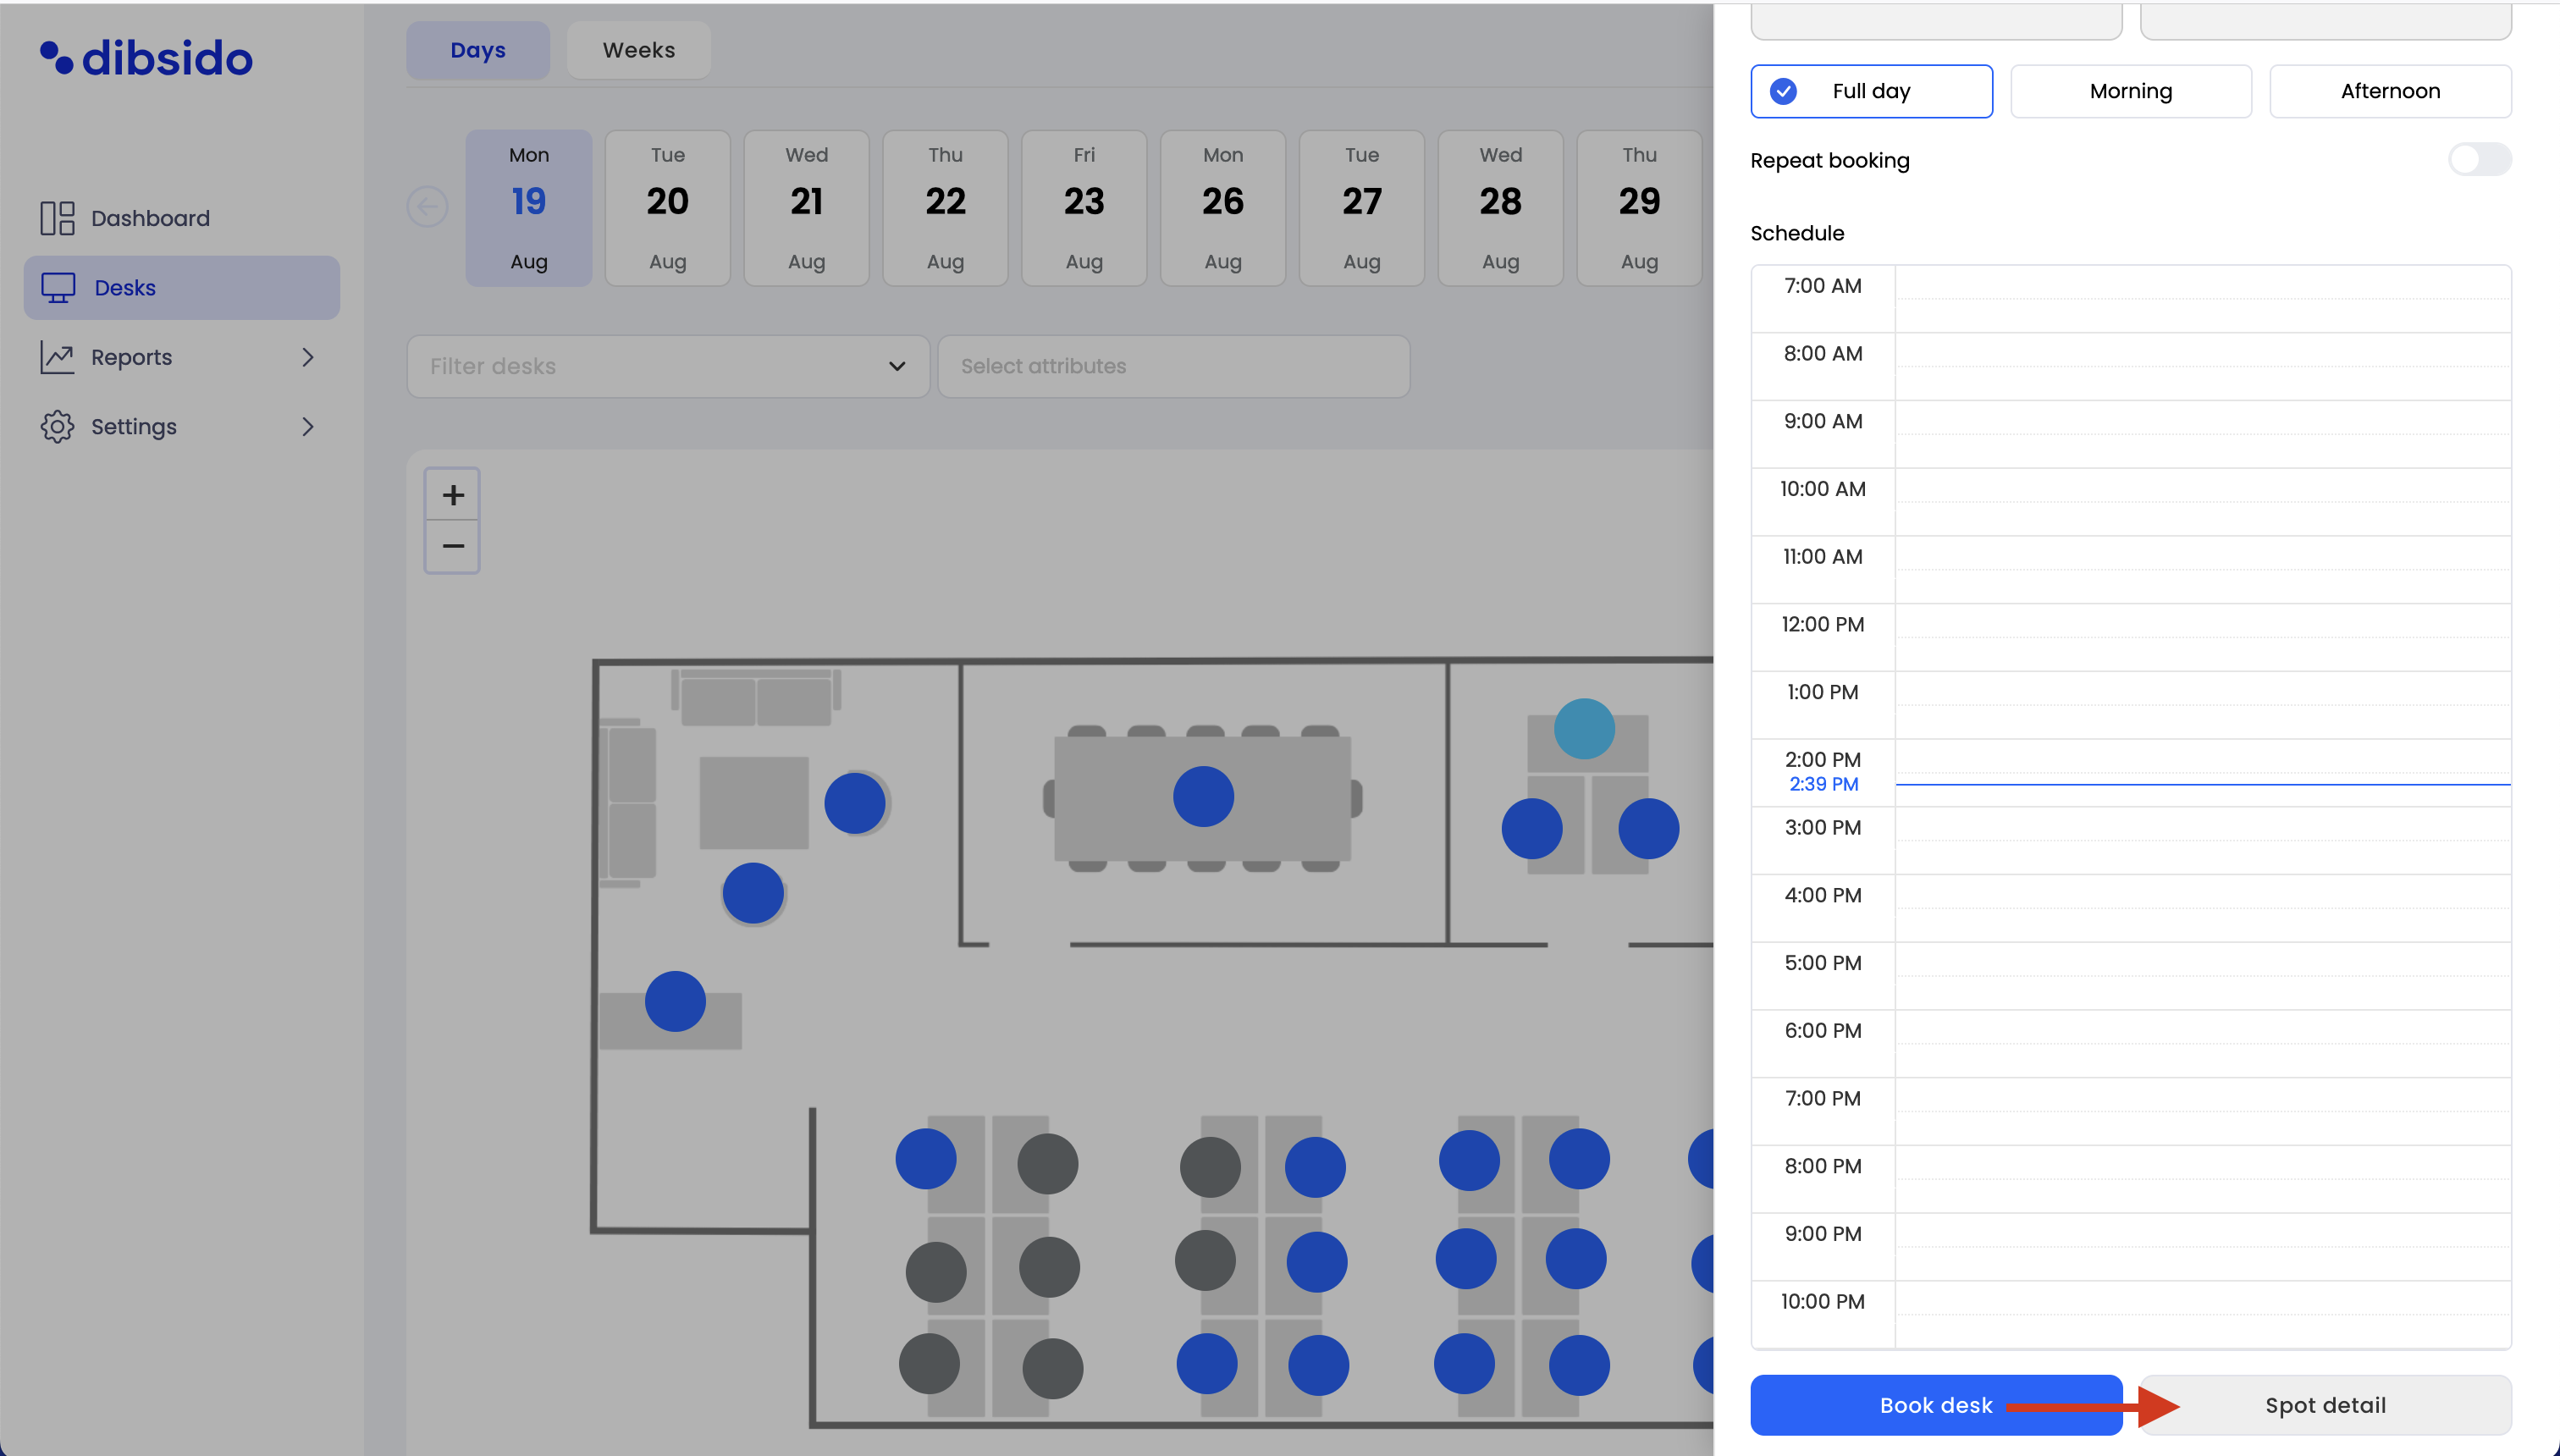
As an Operator or Administrator: You can also access the desk detail directly through the desk view by selecting the desk and clicking on the "Desk Detail" button at the bottom of the sidebar.
Find the reservation:
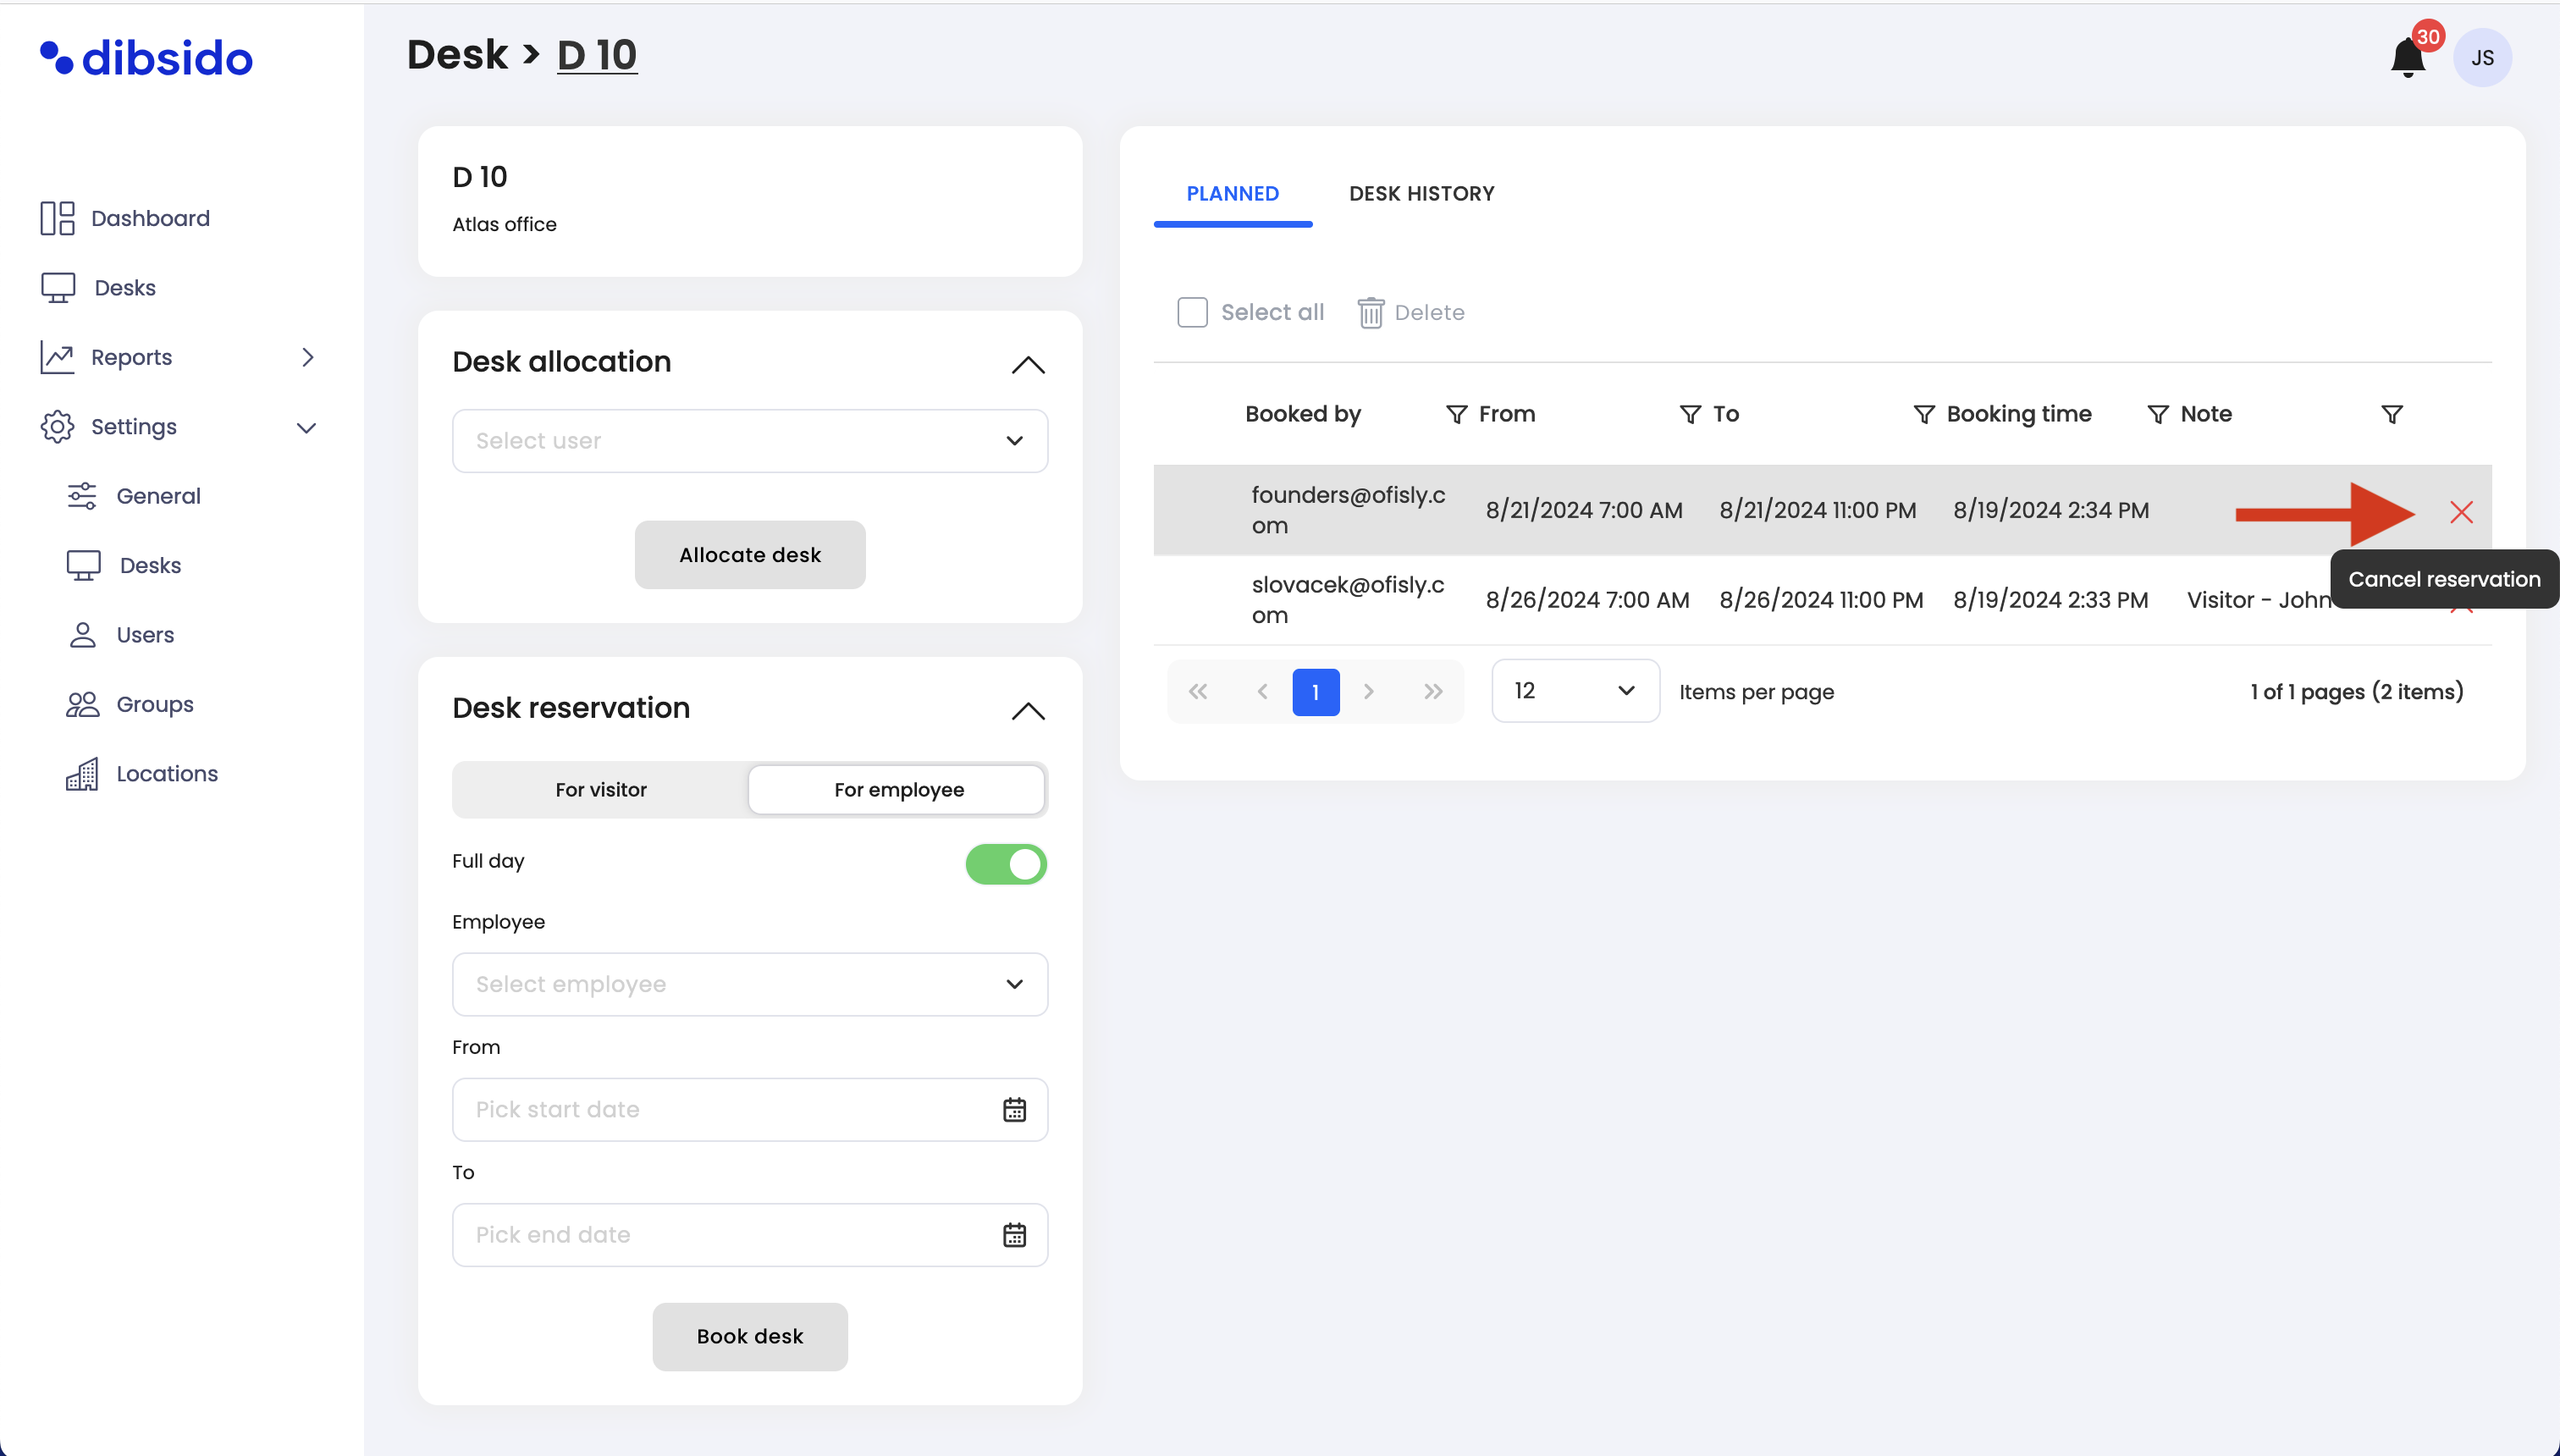
On the desk detail page, you will see a table listing all current reservations for that desk. Locate the specific reservation you wish to cancel.
Cancel the reservation:
Click on the red cross (X) icon next to the reservation you wish to cancel. A confirmation window will appear.
Add a reason for cancellation (optional):
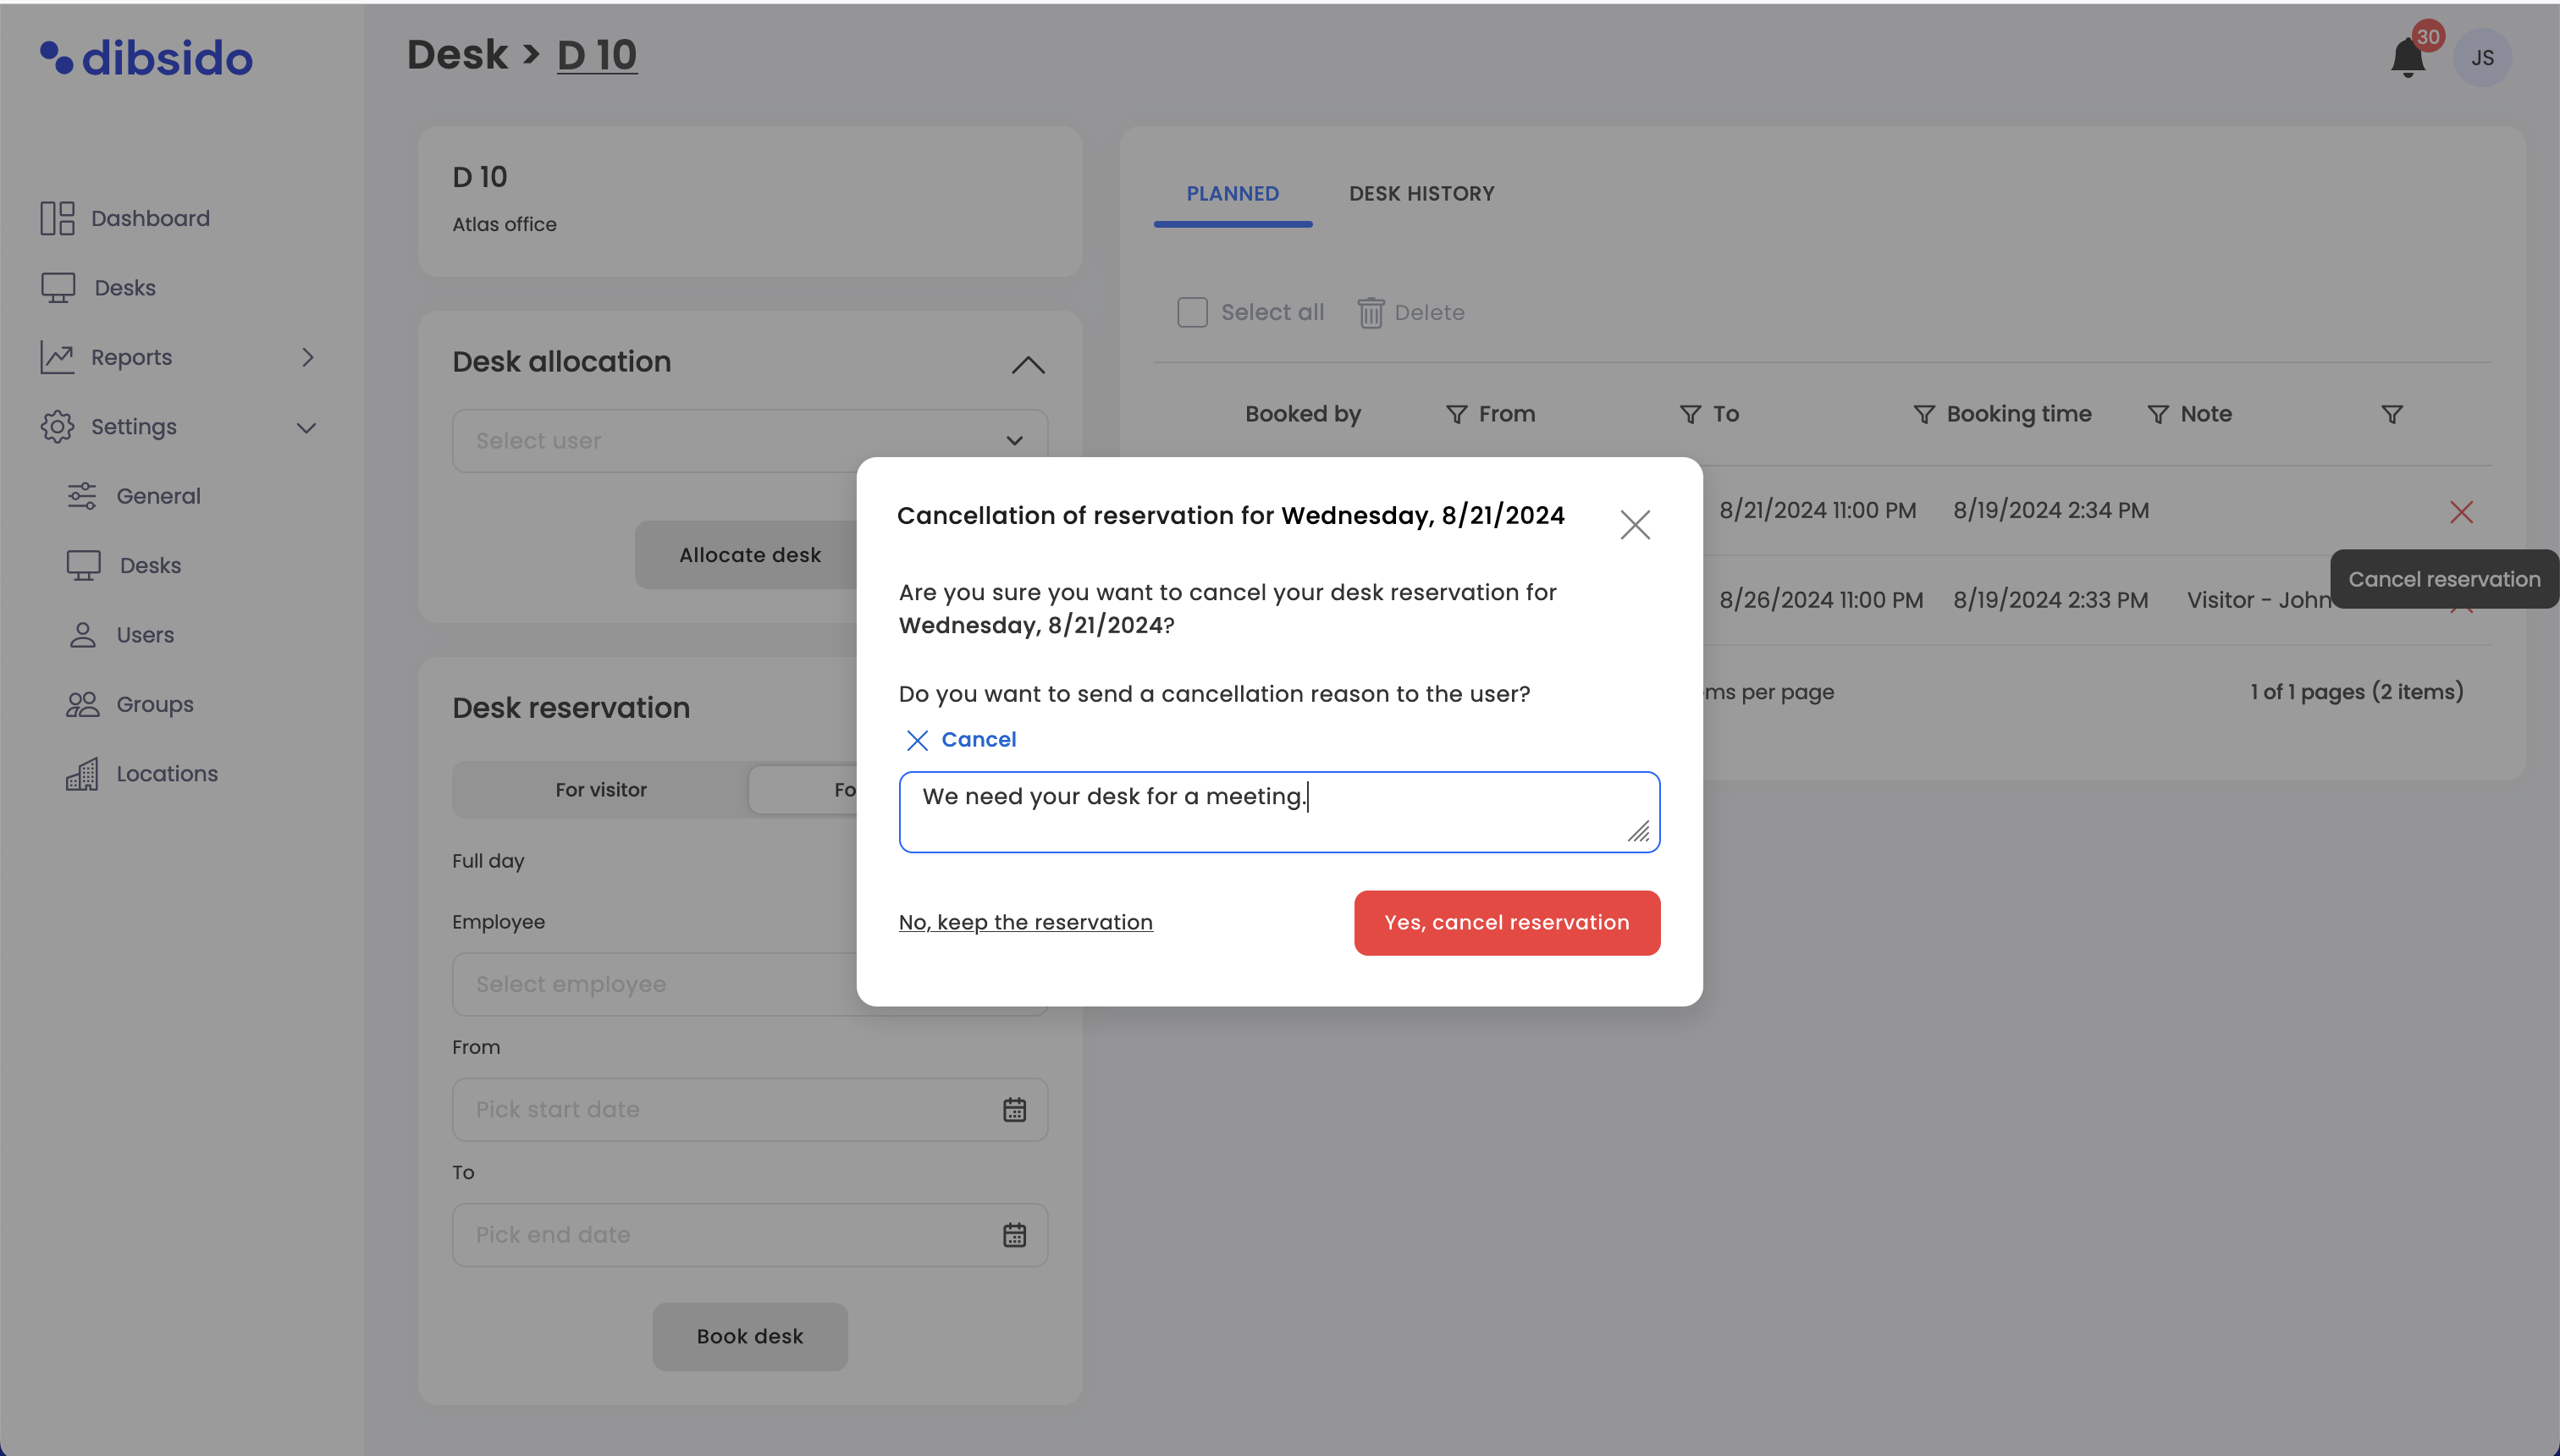
In the confirmation window, you can add a reason for the cancellation. This note will be included in the email sent to the employee whose booking is being canceled.
Confirm cancellation:
Click "Confirm" to finalize the cancellation. An email confirmation, including any reason provided, will be sent to the employee.
Navigate to the reports menu:
Go to the "Reports" menu within the Dibsido app.
Select the "Desks" option to view all desk reservations.
Find the reservation:
Use the reports interface to locate the specific reservation you want to cancel. You can filter by date, employee, or desk.
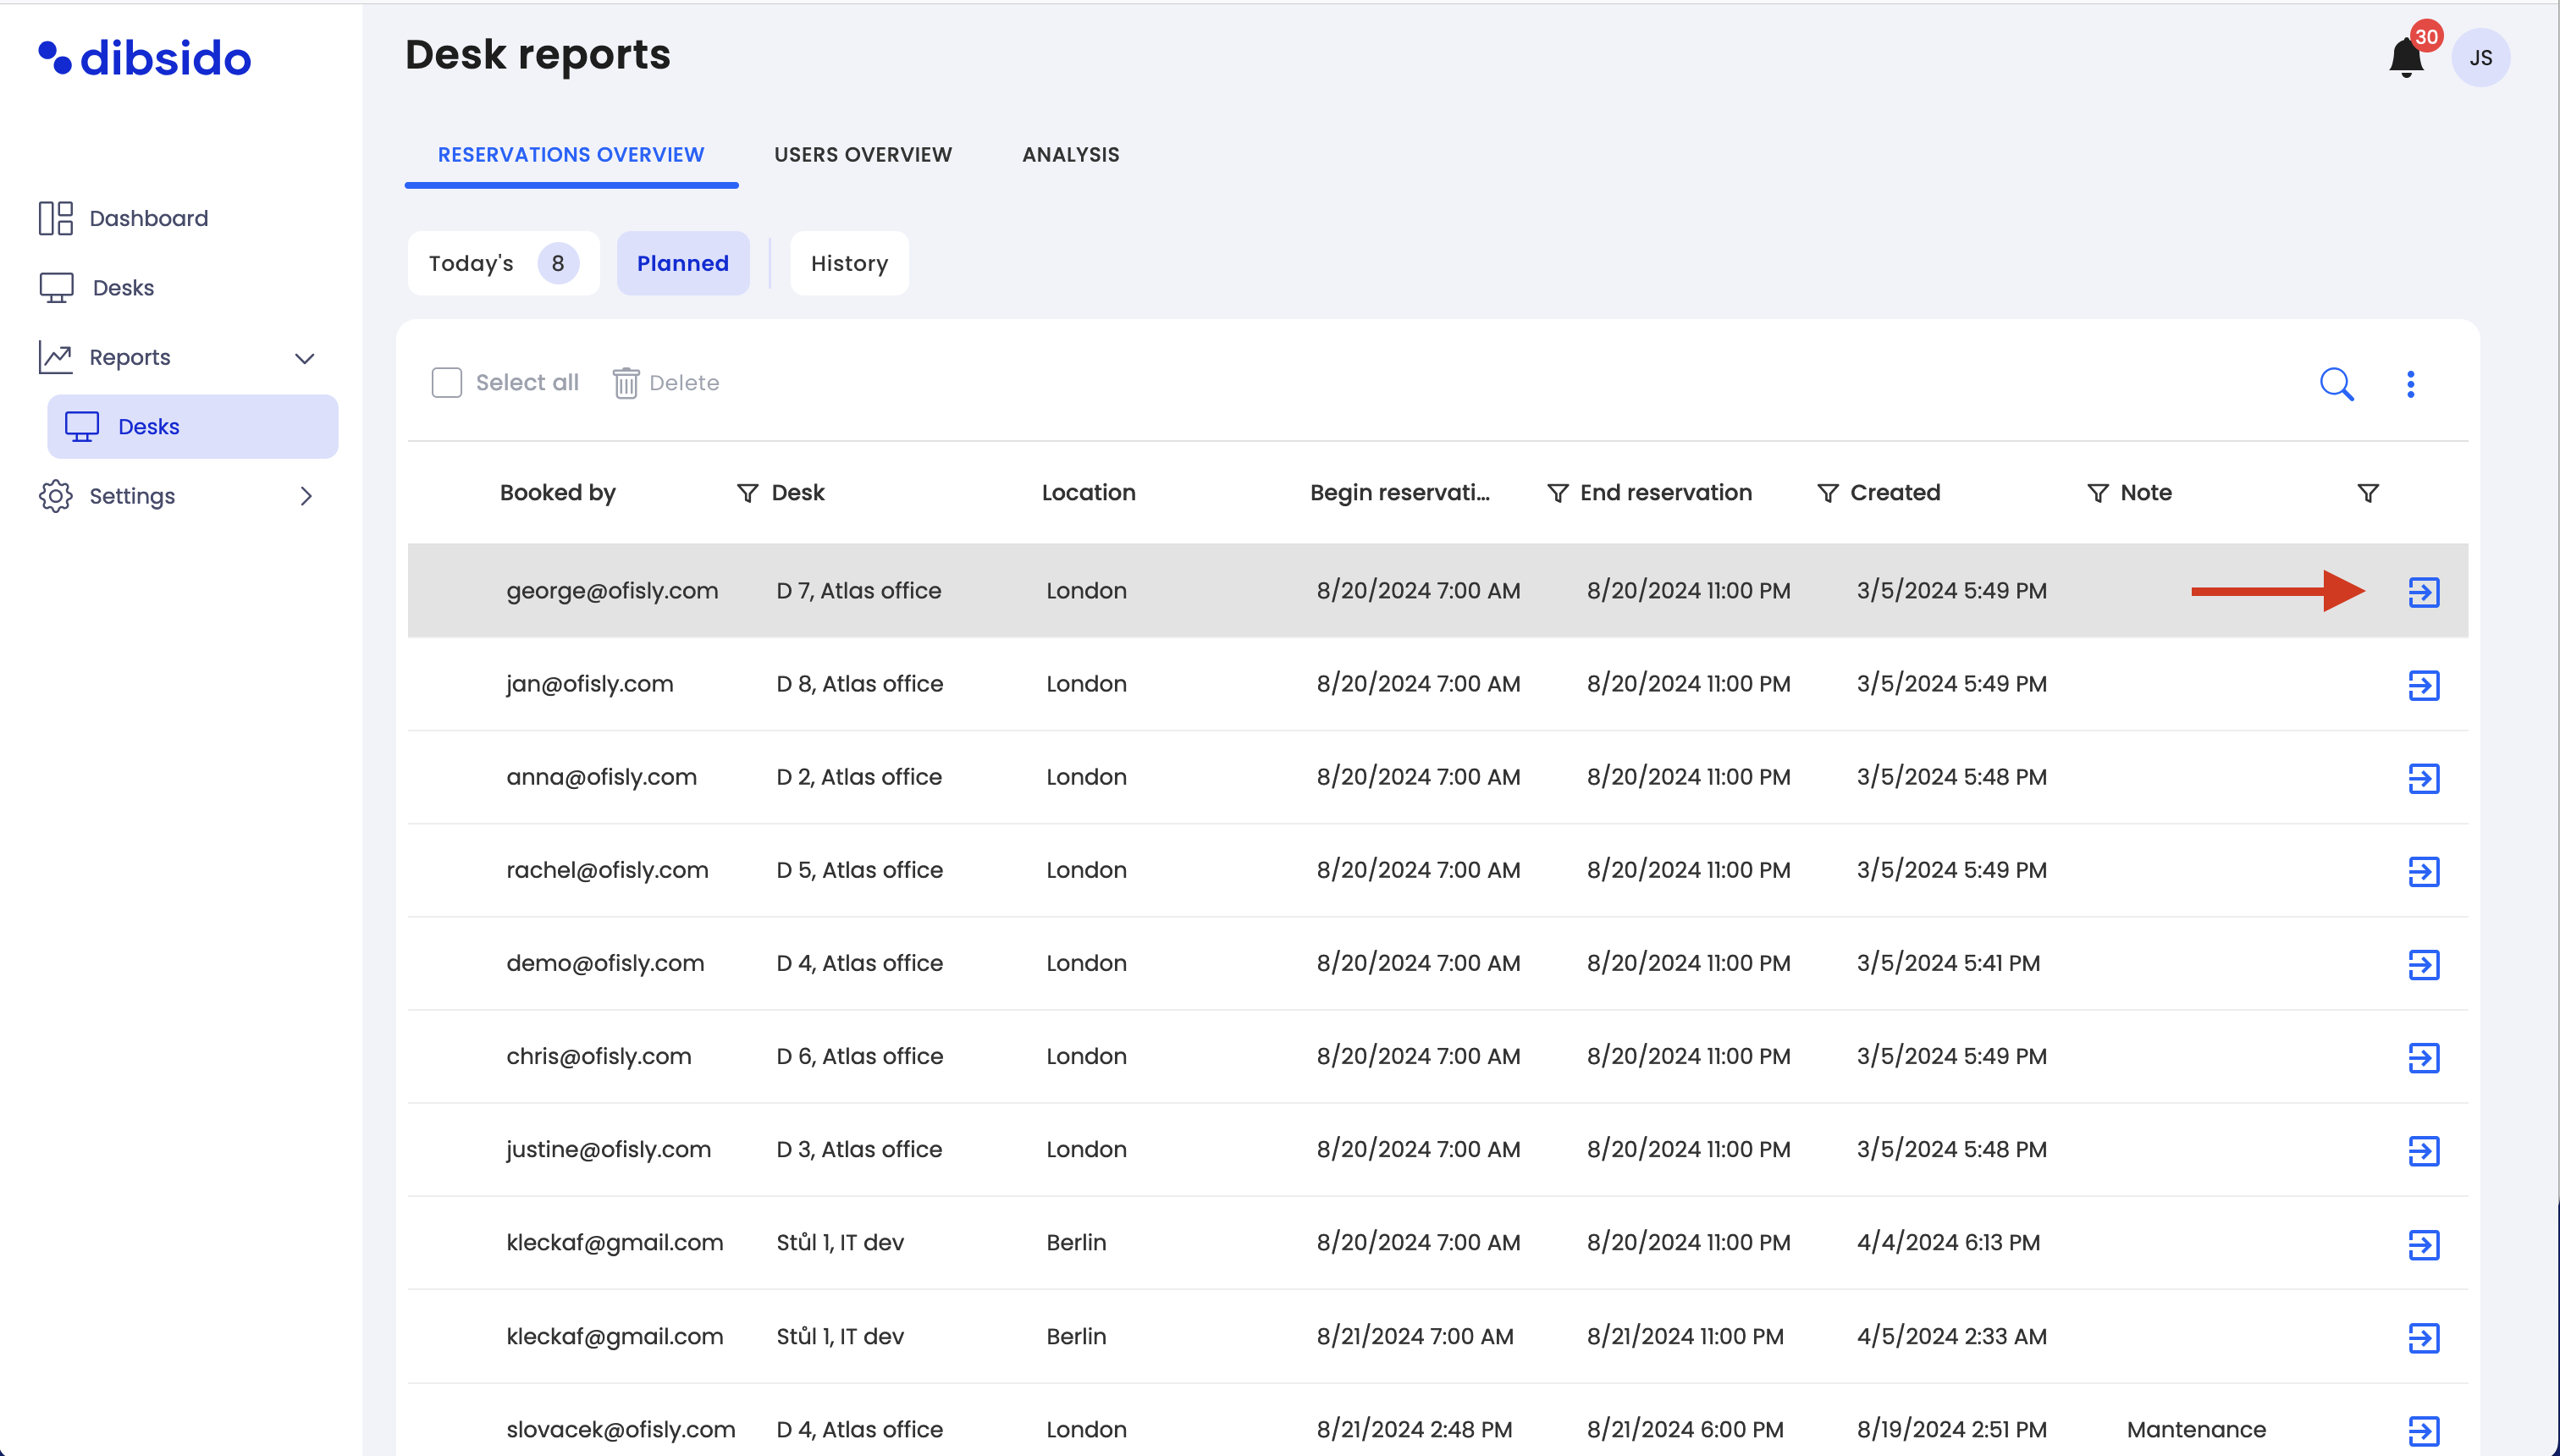
Cancel the reservation:
Once you find the reservation, click on the cancellation option. A confirmation window will appear.
Add a reason for cancellation (optional):
You can add a reason for canceling the booking in the provided field.
Confirm cancellation:
Click "Confirm" to finalize the cancellation. An email will be sent to the employee, including any reason you provided.