Admins control which floorplans are visible, which rooms are active, how far ahead people can book, and which groups can book which workplaces. Open Settings → Meeting rooms. Related guides: Introduction to Meeting Room Booking, How to add meeting rooms, How to book a meeting room.
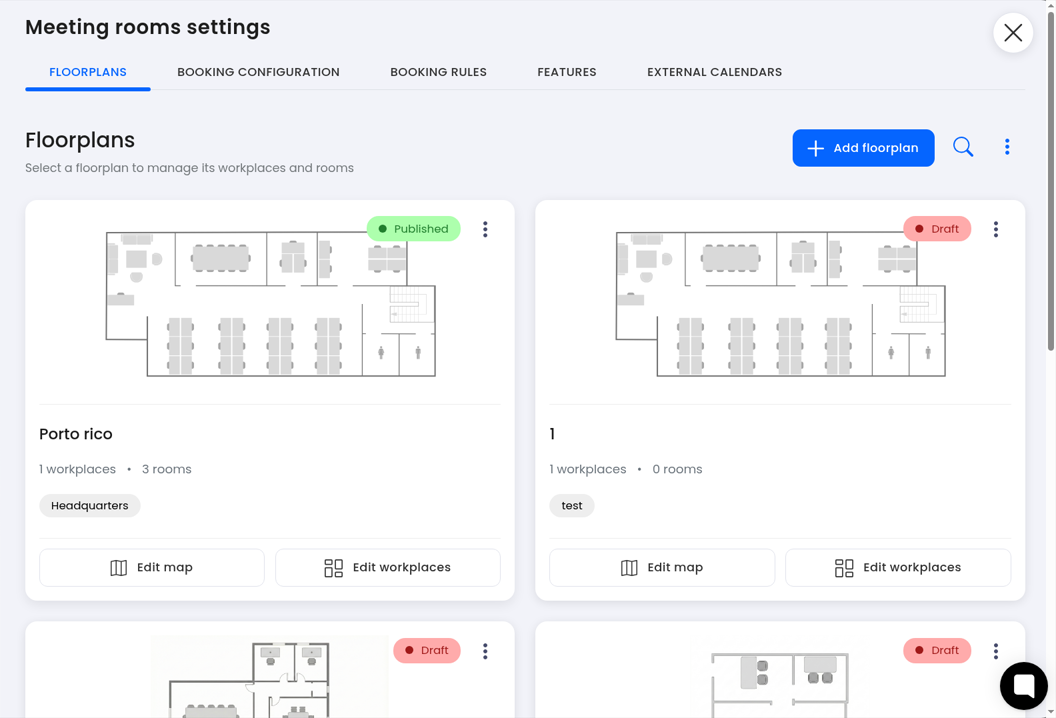
Publishing is at the floorplan level, not per room. On the FLOORPLANS tab, each card shows a green "Published" badge or a red "Draft" badge.
Open floorplans: Go to Settings → Meeting rooms → FLOORPLANS.
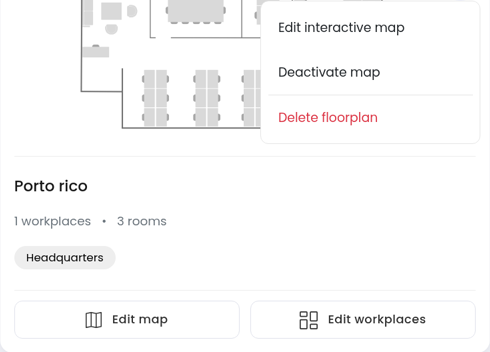
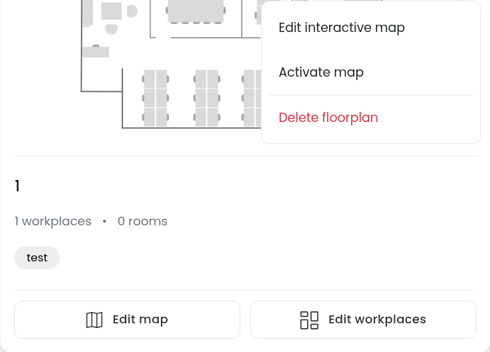
Open the menu: On a floorplan card, click the ⋮ menu.
Publish or unpublish: Choose "Activate map" for a Draft floorplan, or "Deactivate map" for a Published one. The same menu also has "Edit interactive map" and "Delete floorplan".
Edit content: Use "Edit map" or "Edit workplaces" on the card. You can also add a floorplan with "+ Add floorplan".

Open workplaces: On a floorplan card, click "Edit workplaces".
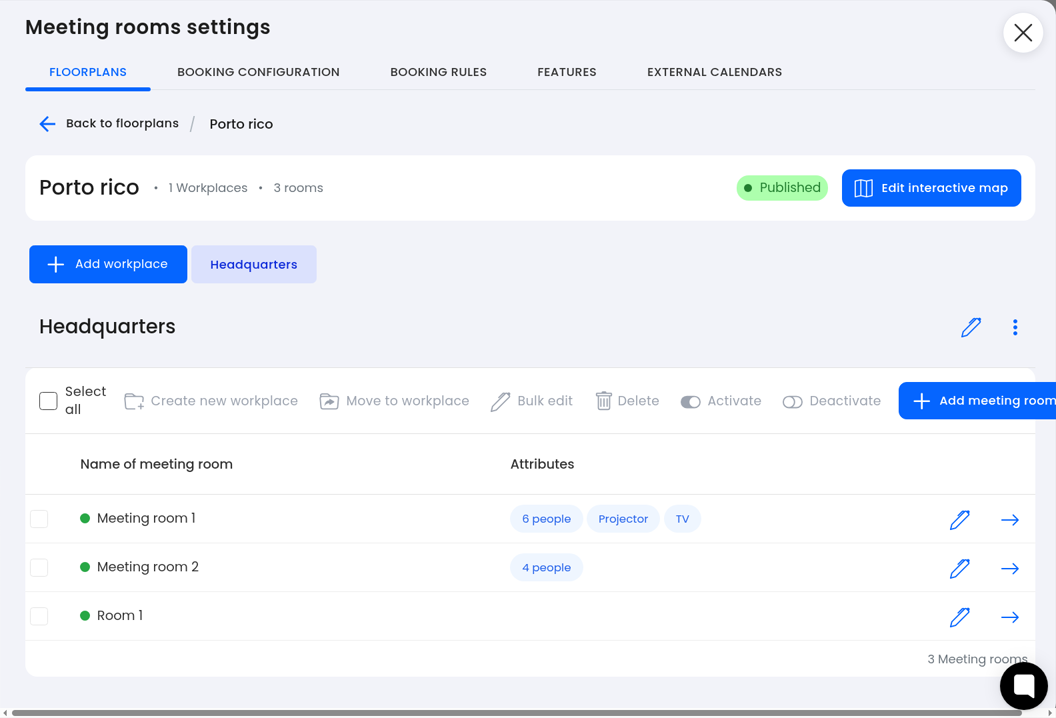
Pick a workplace: Use the workplace pills (for example "Headquarters") or "+ Add workplace".
Review rooms: The list shows Name of meeting room, Attributes, and a green status dot when the room is active.
Use the toolbar: Select rooms, then Create new workplace, Move to workplace, Bulk edit, Delete, Activate or Deactivate. Or click "+ Add meeting room".
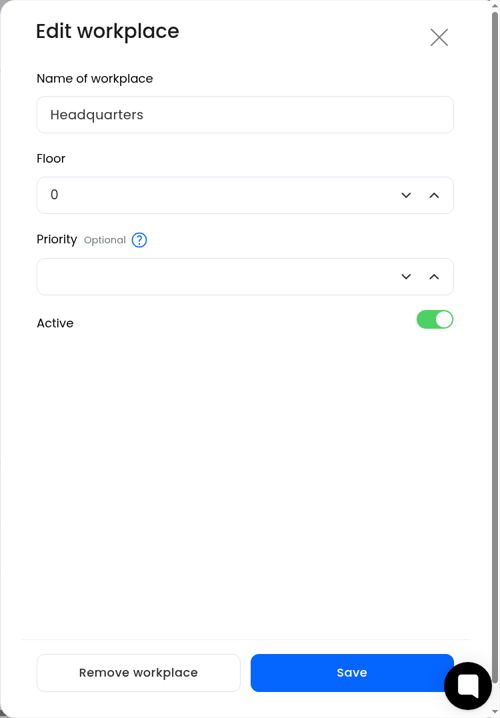
Open the workplace: Click the edit (pencil) icon next to the workplace name.
Set details: Name of workplace, Floor, and optional Priority. Priority sets the order in which meeting rooms are assigned relative to meeting room categories: 5 is highest, 1 is lowest. You can leave Priority blank. It applies to the workplace, not to a group.
Active: Turn the workplace on or off with the Active toggle, then Save. Remove workplace deletes it.
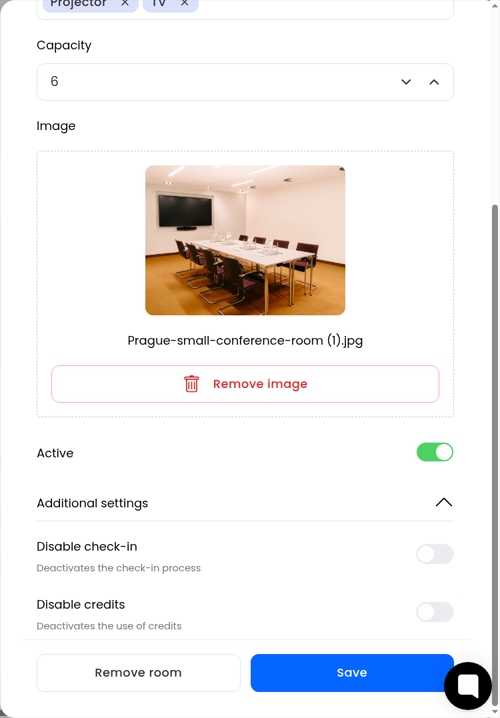
Open the room: Click the edit (pencil) icon on a room row.
Set basics: Name, Select workplace, Select attributes (or Add attributes), Capacity, Image, and Active.
Additional settings: Expand Additional settings if you need them.
- Disable check-in: Deactivates the check-in process for this room. See How to use check-ins for meeting rooms.
- Disable credits: Deactivates the use of credits for this room. See Managing monthly booking limits (credits) for meeting rooms.
Save: Click Save, or Remove room to delete it.
Operating hours and how far ahead people can book are set company-wide under BOOKING CONFIGURATION and BOOKING RULES, not on the room drawer.
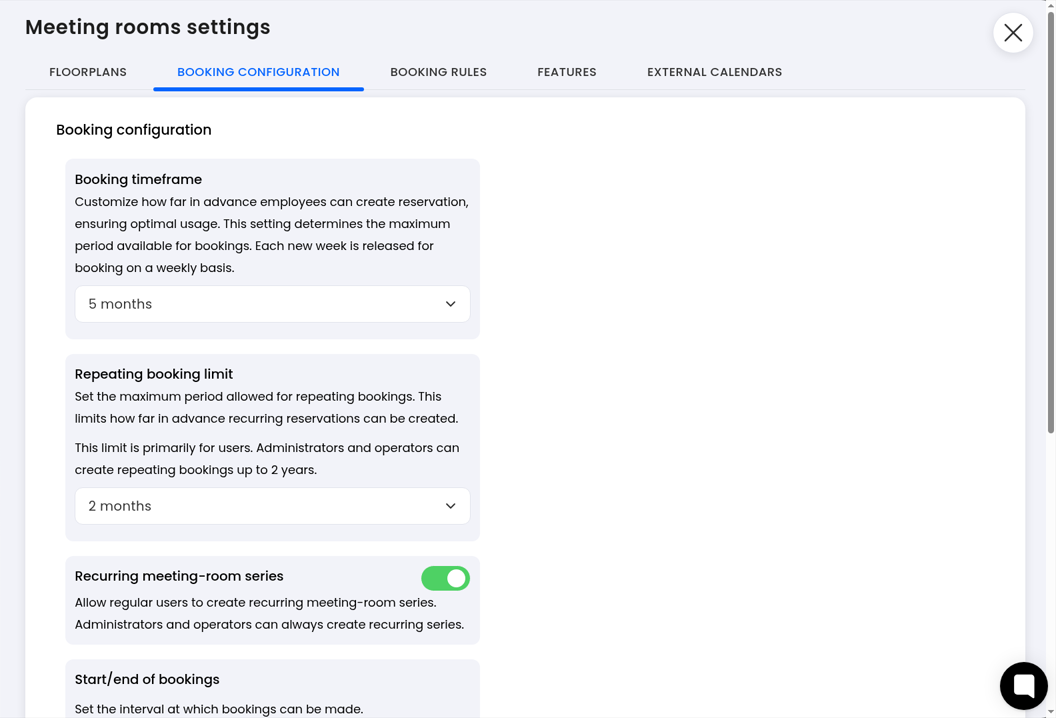
On BOOKING CONFIGURATION you set the same rules for all meeting rooms.
Open the tab: Settings → Meeting rooms → BOOKING CONFIGURATION.
Booking timeframe: How far ahead employees can create a reservation (for example 5 months). Each new week is released on a weekly basis.
Repeating booking limit: How far ahead users can create repeating bookings (for example 2 months). Admins and operators can create repeating bookings up to 2 years.
Recurring meeting-room series: Allow regular users to create series. Admins and operators can always create them. See How to create and manage a recurring meeting-room series.
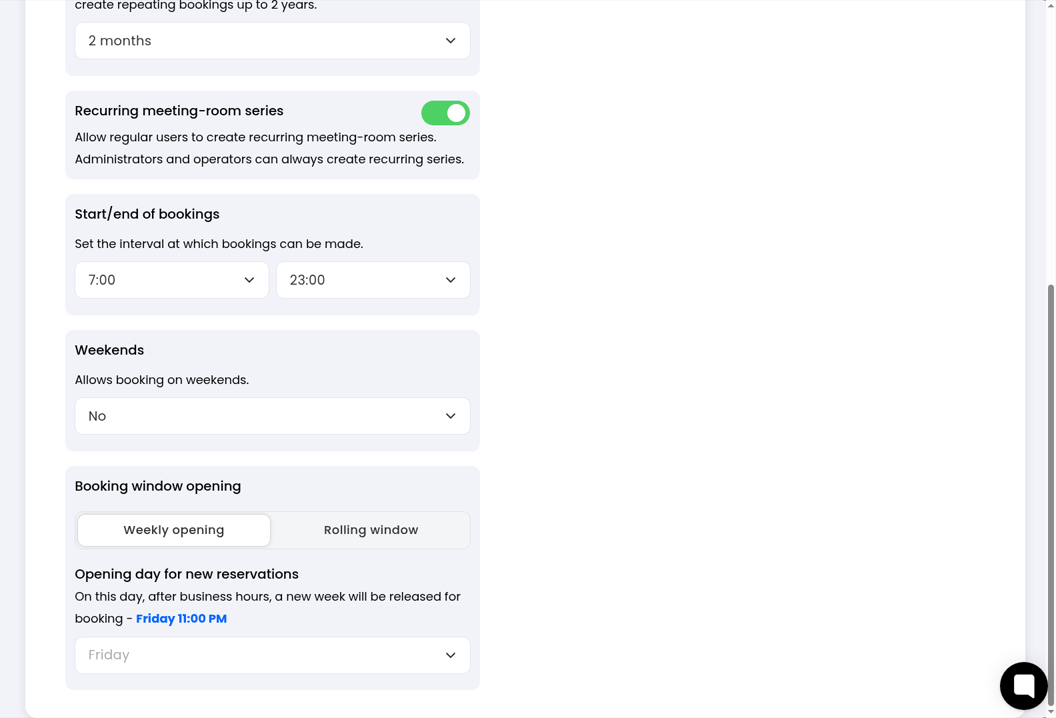
Start/end of bookings: The daily interval when bookings can be made (for example 7:00 to 23:00). This is the operating-hours control for all rooms.
Weekends: Yes or No for weekend booking.
Booking window opening: Weekly opening or Rolling window. With Weekly opening, set the Opening day for new reservations (for example Friday 11:00 PM), when a new week is released after business hours.
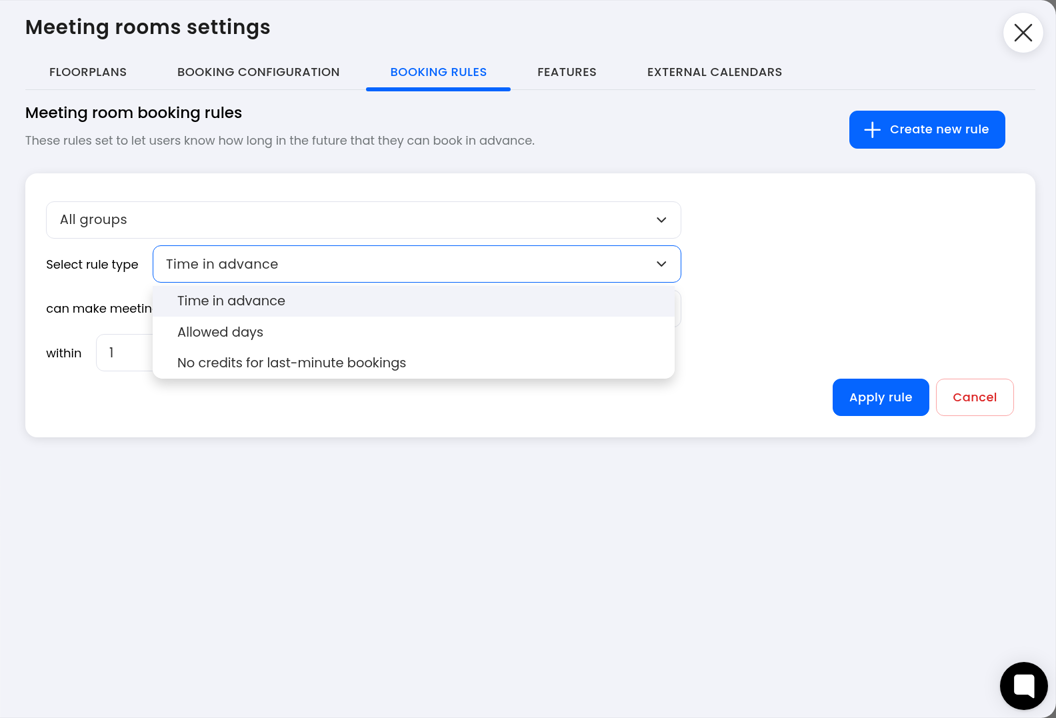
Booking rules refine who can book where, how far in advance, and on which days.
Open the tab: Settings → Meeting rooms → BOOKING RULES.
Create a rule: Click "+ Create new rule".
Choose a group: Pick a group, or "All groups".
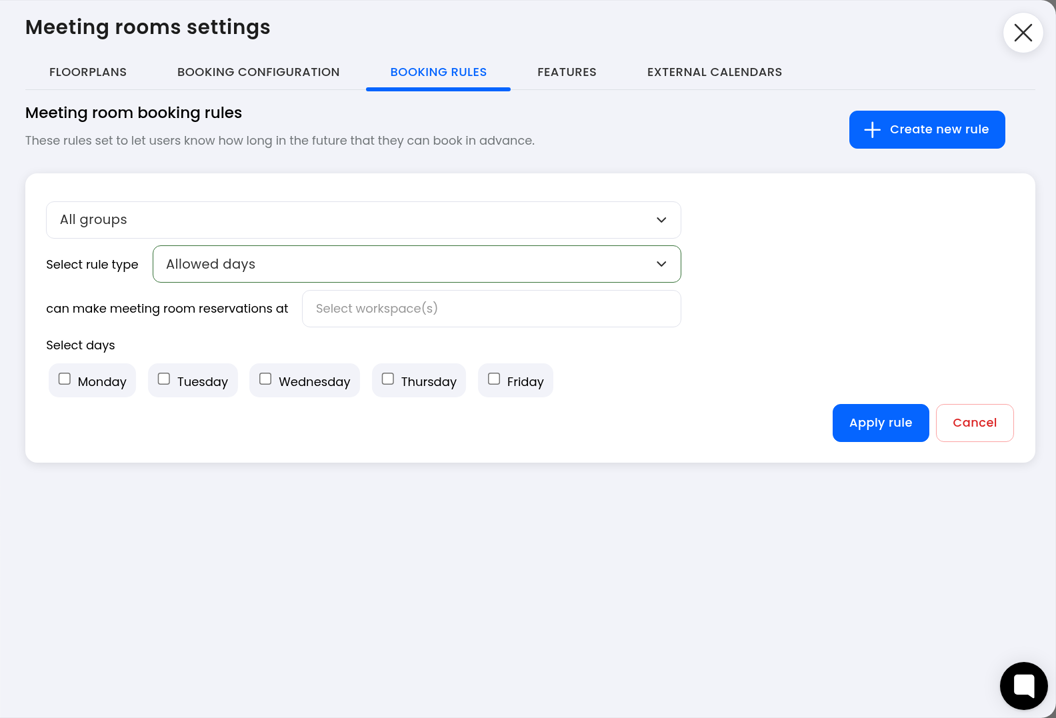
Select rule type: Choose one of:
- Time in advance: Limit how far ahead the group can book (within N days or similar).
- Allowed days: Limit booking to selected weekdays (Monday to Friday checkboxes). Use this to control which days are bookable; there is no separate block-days control.
- No credits for last-minute bookings: Adjust credits behaviour for last-minute bookings.
Set workplaces: Under "can make meeting room reservations at", choose Select workspace(s).
Apply: Click Apply rule, or Cancel.
Groups grant or restrict access to workplaces (and other resources). For meeting rooms:
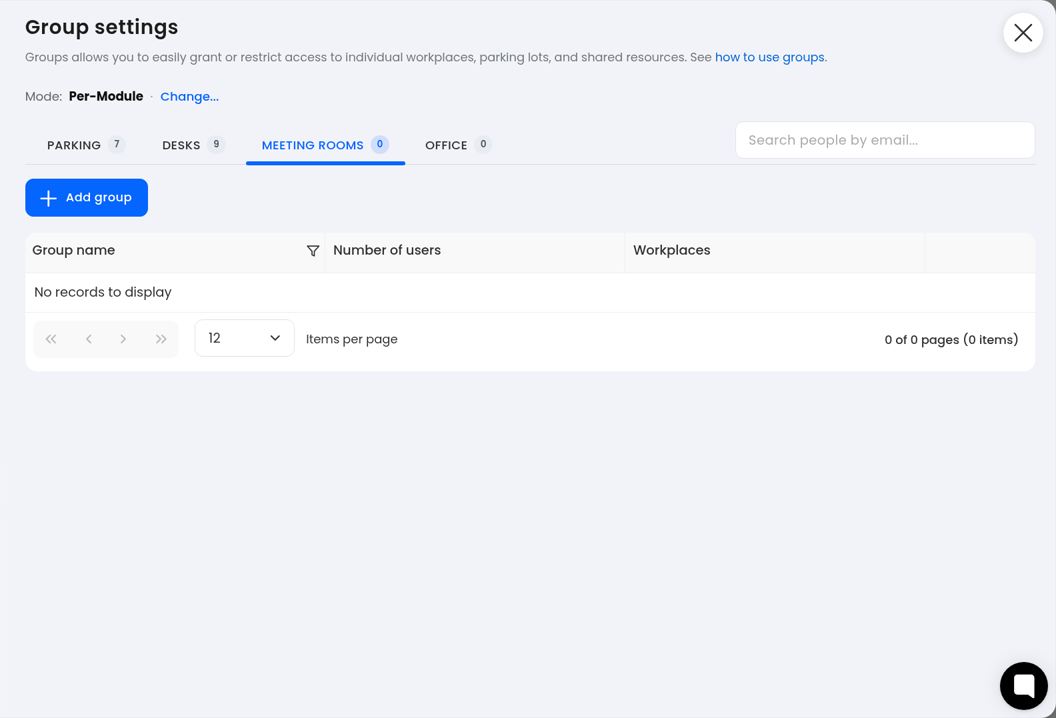
Open groups: Go to Settings → Groups. Mode can be Per-Module.
Open Meeting rooms: Click the MEETING ROOMS tab. Columns: Group name, Number of users, Workplaces.
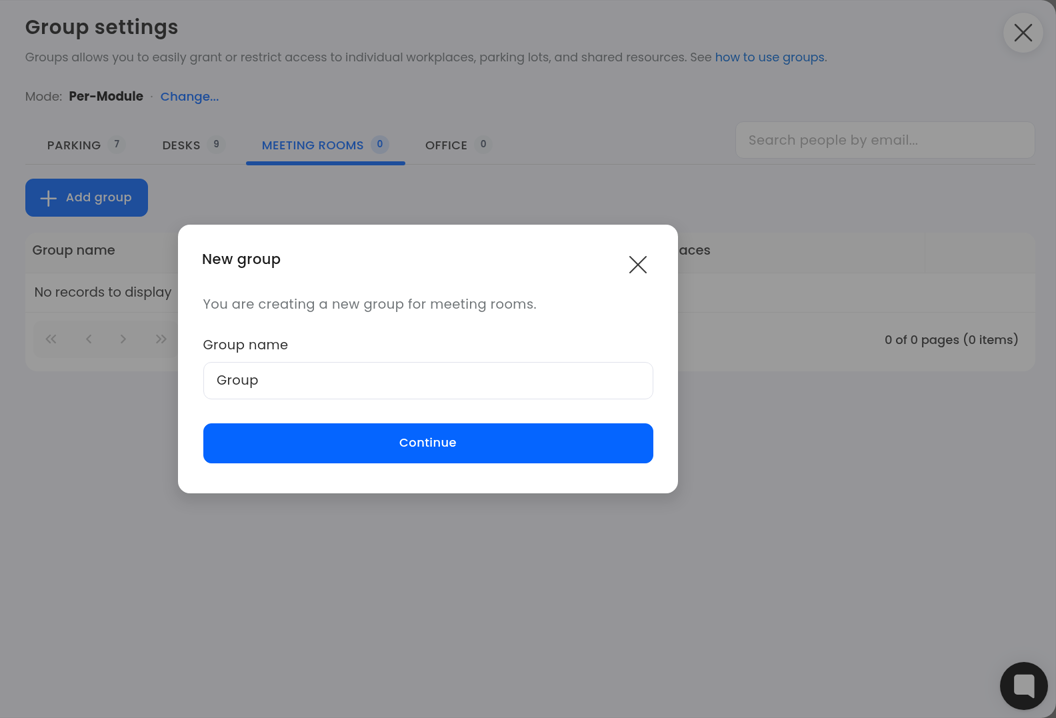
Add a group: Click "+ Add group". The dialog says "You are creating a new group for meeting rooms." Enter a Group name and Continue.
Assign workplaces to the group so members can book those workplaces. Then combine groups with BOOKING RULES when you need time-in-advance or allowed-days limits for a group.
